background image

9

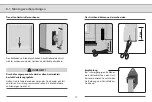
Kontrollleuchte

Frontblende

Befestigungslöcher

Abdeckblende

Ab-Taste

Endpunkttaste

Umlenkrolle 

Wickelrad

Befestigungs- 

haken

Zugentlastung

Kabelkanal

Befestigungslöcher

Anschlussklemmen

DECT-Taste

5.  Gesamtansicht

Wickelradfach- 

abdeckung

Gurteinlass 

Auf-Taste

Typenschild

Entriegelungs-
klammer

Lieblings- 
position

Summary of Contents for RolloTron DECT

Page 1: ...VBD 709 1 1 02 21 Montage und Bedienungsanleitung Originalanleitung RolloTron DECT Typ 1213 Artikelnr 1823 45 13 DE EN...

Page 2: ...2 Elektrischer Anschluss 18 8 3 Das Gurtband einf hren und befestigen 20 8 4 Den RolloTron DECT einbauen 22 9 Einstellungen und Bedienung 23 9 1 Endpunkte einstellen 23 9 2 DECT Anmeldung Abmeldung 26...

Page 3: ...ie alle Sicherheitshinweise bevor Sie mit den Arbeiten beginnen Diese Anleitung ist Teil des Produkts Bewahren Sie sie gut erreichbar auf F gen Sie diese Anleitung bei Weitergabe des RolloTron DECT an...

Page 4: ...kann zu schweren Verletzungen oder zum Tod f hren sofern sie nicht vermieden wird VORSICHT Diese Gef hrdung kann zu geringf gigen bis mittelschweren Verletzungen f hren sofern sie nicht vermieden wird...

Page 5: ...w hrend der Einstellungen Personen fern damit diese nicht die durch pl tzliches Nachrutschen des Rollladens zu Schaden kom men F hren Sie alle Reinigungsarbeiten am Rollladen im spannungslosen Zustan...

Page 6: ...r vom auto risierten Kundendienst durchgef hrt werden Einsatzbedingungen F r den elektrischen Anschluss muss am Einbauort ein 230 V 50 Hz Stromanschluss mit bauseitiger Freischalt vorrichtung Sicherun...

Page 7: ...zwerks m ssen angemeldet sein Hinderniserkennung Trifft der Rollladen bei der AB t t Bewegung auf ein Hindernis wird der RolloTron DECT ausgeschaltet siehe Seite 12 berlastsicherung BlockiertderAntrie...

Page 8: ...elnr 1823 45 13 DE EN 4 Lieferumfang RolloTron DECT Anschlusskabel mit Eurostecker Zugentlastung Abdeckblende Montageschrauben 4 x 55 mm Entriegelungsklammer im Geh use Montage und Bedienungsanleitung...

Page 9: ...lende Ab Taste Endpunkttaste Umlenkrolle Wickelrad Befestigungs haken Zugentlastung Kabelkanal Befestigungsl cher Anschlussklemmen DECT Taste 5 Gesamtansicht Wickelradfach abdeckung Gurteinlass Auf Ta...

Page 10: ...lladen f hrt Auf Ab oder stoppt 3 Kontrollleuchte Statusanzeige rot gr n 4 Endpunkttaste Einstellen der beiden Endpunkte 5 Lieblingsposition Einstellen einer beliebigen Position an der der Rollladen b...

Page 11: ...rsorgung erfolgt ber das beiliegende Anschlusskabel mit Netzstecker FRITZ Box FRITZ Box Bequeme Steuerung via DECT Funkstandard ber das Internet z B mit einem Smartphone Neben der manuellen Bedienung...

Page 12: ...Blockiert der Antrieb beim nen des Rollladens z B durch Vereisung wird der Gurtwickler ausgeschaltet Beseitigen Sie zuerst die berlastungsursache Danach ist der Betrieb in beide Fahrtrichtungen wiede...

Page 13: ...hzahl 30 U min DECT Funkstandard Sendefrequenz 1880 1900 MHz Sendeleistung max 250 mW Reichweite im Geb ude bis zu 40 m im Freien bis zu 100 m Betriebsbedingungen Kurzzeitbetrieb KB 4 Minuten maximale...

Page 14: ...14 R A D E M A C H E R DECT 165 132 185 211 35 139 27 61 7 1 Abmessungen Alle Ma angaben in mm...

Page 15: ...Zul ssige Rollladen Gurtb nder RolloTron DECT Gurtbandbreite Gurtst rke Maximale Gurtl nge 23 mm 1 0 mm 7 6 m 1 3 mm 6 2 m 1 5 mm 5 2 m Zul ssige Rollladenfl che m2 Rollladentyp Gewicht m2 zul ssige R...

Page 16: ...rfordern Montieren Sie den Gurtwickler so dass das Gurtband m glichst senkrecht in das Ger t ein l uft Sie vermeiden dadurch unn tige Reibung und Verschlei i Um einen optimalen Betrieb zu gew hrleiste...

Page 17: ...am Gurtband Den Rollladen vollst ndig schlie en Anschlie end den Gurt wickler ausbauen und das Gurtband vollst ndig abwickeln VORSICHT Durch die vorgespannte Feder des alten Gurtwicklers besteht Verl...

Page 18: ...verlegte Zuleitung erfolgen GEFAHR Bei Ber hrung von elektrischen Komponenten besteht Lebensgefahr durch Stromschlag F hren Sie alle Montage und Anschlussarbeiten im span nungslosen Zustand durch Tre...

Page 19: ...en Schrauben festschrau ben und das Kabel im Kabelkanal verlegen Das Netzkabel mit der Zugentlastung sichern Zugentlastung 8 2 Elektrischer Anschluss WARNUNG WARNUNG Ein besch digtes Anschlusskabel ka...

Page 20: ...nge dr cken bis der Befestigungshaken im Wickelradfach gut erreichbar ist 3 Den Netzstecker wieder aus der Steckdose ziehen VORSICHT Fassen Sie nicht bei laufendem Motor in das Wickelradfach Das Gurtb...

Page 21: ...erneut in die Steckdose stecken 2 Die Auf Taste solange dr cken bis sich das Gurtband ein mal ganz um das Wickelrad gedreht hat 3 Den Netzstecker wieder aus der Steckdose ziehen 8 3 Das Gurtband einf...

Page 22: ...loTron DECT in den Gurtkasten schieben und mit den beiliegenden Schrauben festschrauben Anschlie end den Netzstecker in die Steckdose stecken 8 4 Den RolloTron DECT einbauen i Der RolloTron DECT muss...

Page 23: ...die Endpunkte eingestellt werden i Es m ssen unbedingt beide Endpunkte eingestellt werden sonst kann es zu Funktionsst rungen kommen Ohne Endpunkteinstellung l uft der RolloTron DECT nur solange wie...

Page 24: ...hg ngig zur Best tigung Den unteren Endpunkt einstellen ACHTUNG Die falsche Einstellung des oberen Endpunktes kann zur berlastung bzw Zerst rung des RolloTron DECT bzw des Antriebs f hren Stellen Sie...

Page 25: ...25 Einen Endpunkt korrigieren Den Rollladen in die Mittelstellung fahren Anschlie end den Endpunkt neu einstellen Beispiel f r den oberen Endpunkt 9 1 Endpunkte einstellen...

Page 26: ...ar erfolgreich rot leuchtend 5 Sekunden Die Anmeldung ist fehlgeschlagen Kontrollleuchten am RolloTron DECT rot blinkend Der Abmeldemodus ist aktiv gr n leuchtend 5 Sekunden Die Abmeldung war erfolgre...

Page 27: ...und stoppt am eingestellten Endpunkt Bei aktivierter Lieblingsposition In Abrichtung f hrt der Rollladen bis zur eingestellten Lieblingsposition siehe Seite 28 ffnen und Schlie en durch langes Dr cke...

Page 28: ...B als L ftungsposition festlegen Die Lieblingsposition aktivieren deaktivieren Die Lieblingsposition anfahren und speichern Taste l nger als zwei Sekunden dr cken Die gr ne Kontrollleuchte blinkt ca 5...

Page 29: ...r FRITZ App Smart Home oder mit dem FRITZ Fon steuern FRITZ App Smart Home Mit der FRITZ App Smart Home k nnen Sie den an einer FRITZ Box angemeldeten RolloTron DECT steuern Daf r muss diese App auf I...

Page 30: ...e LED 5 Sekunden lang Nach dem Loslassen sind folgende Einstellungen gel scht Endpunkte Lieblingsposition DECT Basisstation FRITZ Box i Danach befindet sich der RolloTron DECT wieder im Auslieferungsz...

Page 31: ...Sekunden 2 Den Rollladen vollst ndig schlie en und die Ab Taste weiter gedr ckt halten 3 Danach das Gurtband soweit wie m glich oben aus dem RolloTron DECT herausziehen 4 Den Netzstecker aus der Stec...

Page 32: ...ion fahren VORSICHT Es besteht Verletzungsgefahr Fassen Sie nicht bei laufendem Motor in das Wickelradfach Ziehen Sie immer den Netzstecker bevor Sie in das Wickelradfach fassen 10 Den RolloTron DECT...

Page 33: ...WARNUNG WARNUNG Es besteht Verletzungsgefahr der Rollladen kann unge bremst herunterfallen Sichern Sie den Rollladen gegen Herunterfallen Halten Sie das Gurtband gut fest damit der Rollladen nicht ung...

Page 34: ...rd Die Endpunkte sind noch nicht eingestellt stellen Sie die Endpunkte ein s Seite 23 der RolloTron DECT falsch herum l uft M glicherweise ist das Gurtband falsch herum auf das Wickelrad aufgelegt s S...

Page 35: ...adenkasten und beseitigen Sie den Fehler Schmieren Sie schwerg ngige Stellen wenn n tig mit Gleitwachs ein d Der Rollladen ist m glicherweise zu leicht Beschweren Sie den Rollladen indem Sie z B in di...

Page 36: ...lage f hren Kontrollieren Sie regelm ig den RolloTron DECT und alle Komponenten Ihrer Rollladenanlage auf Besch digung Pr fen Sie den RolloTron DECT auf korrekte Funktion Der Behang darf nicht besch d...

Page 37: ...dass der RolloTron DECT den Richtlinien 2006 42 EG Maschinenrichtlinie und 2014 53 EU Funkanlagenrichtlinie entspricht Der vollst ndige Text der EU Konformit tserkl rung liegt dem Produkt bei und ist...

Page 38: ...paraturen und Ab nderungen von dritten nicht autori sierten Stellen Verwendung ungeeigneter Zubeh rteile Sch den durch unzul ssige berspannungen z B Blitzeinschlag Funktionsst rungen durch Funkfrequen...

Page 39: ...39...

Page 40: ...e www rademacher de Service Hotline 01807 933 171 Telefax 49 2872 933 253 service rademacher de 30 Sekunden kostenlos danach 14 ct Minute aus dem dt Festnetz bzw max 42 ct Minute aus dem dt Mobilfunkn...

Page 41: ...VBD 709 1 1 02 21 Installation and operating manual Translation of the german original manual RolloTron DECT Type 1213 Item no 1823 45 13 DE EN...

Page 42: ...Electrical connection 58 8 3 Drawing in and fastening the belt 60 8 4 Mounting the RolloTron DECT 62 9 Settings and operation 63 9 1 Setting the end points 63 9 2 DECT log on log off 66 9 3 Manual mod...

Page 43: ...com pletely and follow all the safety instructions This manual is part of the product Please store it in an easily accessible place When passing the RolloTron DECT on to a third party this manual must...

Page 44: ...WARNING WARNING This hazard may result in serious injury or death if not avoided CAUTION This hazard may result in minor or moderate injury if not avoid ed ATTENTION This hazard may lead to property d...

Page 45: ...injury in the event that the shutter suddenly slips Carry out all cleaning work on the roller shutter whilst the device is disconnected from the mains power The mains socket and plug must be easily ac...

Page 46: ...pairs to the RolloTron DECT must be undertaken by authorised customer service personnel Operating conditions A 230 V 50 Hz power supply together with a site provided disconnecting device fuse MCB must...

Page 47: ...ntrol unit for DECT products All devices in a DECT network must be logged on Obstacle detection If the roller shutter hits an obstacle in the DOWN t t direction the RolloTron DECT is switched off see...

Page 48: ...45 13 DE EN 4 Included in delivery RolloTron DECT Connecting cable with Euro plug Traction relief Cover plate Assembly screws 4 x 55 mm Disengaging bracket in housing Installation and operating manua...

Page 49: ...ate Down button End point button Deflection roller Reel Fastening hook Traction relief Cable duct Fastening holes Connecting terminals DECT button 5 General view Reel compartment cover Belt inlet Up b...

Page 50: ...ton The roller shutter travels up down or stops 3 Indicator light status display red green 4 End point button Set both end points 5 Favourite position Set any position where the roller shutter stops w...

Page 51: ...ovided via the enclosed connecting cable with a mains plug FRITZ Box FRITZ Box Convenient control via the DECT radio standard over the Internet for example with a smartphone In addition to manual oper...

Page 52: ...when opening the roller shutter e g due to ice the belt winder is switched off First remove the cause of the overload Then it is possible to operate the drive in both directions again Manual operatio...

Page 53: ...tandard Transmission frequency 1880 1900 MHz Transmission power max 250 mW Range Indoors up to 40 m Outdoors up to 100 m Operating conditions Transient operation KB 4 minutes maximum running time Prot...

Page 54: ...54 R A D E M A C H E R DECT 165 132 185 211 35 139 27 61 7 1 Dimensions All dimensions in mm...

Page 55: ...T Belt width Belt thickness Maximum belt length 23 mm 1 0 mm 7 6 m 1 3 mm 6 2 m 1 5 mm 5 2 m Permissible shutter surface area m2 Roller shutter type Weight m2 Permissible shutter surface area m2 Plast...

Page 56: ...stallation on a firm base Install the belt winder so that the belt runs as straight as possible into the device in order to avoid unnecessary friction and wear i In order to ensure optimal operation t...

Page 57: ...avoid the risk of friction and wear on the belt Fully close the roller shutter Then remove the belt winder and completely unwind the belt CAUTION The pre tensioned springs on the old belt winder may l...

Page 58: ...hard wired cable on site DANGER There is a risk of fatal electric shock when touching electri cal components Carry out all installation and connection work in an isolated and de energised state Discon...

Page 59: ...ith the screws supplied and lay the cable in the cable duct Securing the power cable with the traction relief Traction relief 8 2 Electrical connection WARNING WARNING A damaged connecting cable may c...

Page 60: ...tton until the fastening hook is easily acces sible in the reel compartment 3 Remove the mains plug again from the socket CAUTION Never reach into the reel compartment when the motor is running Insert...

Page 61: ...the mains plug into the socket again 2 Press the Up button until the belt has fully wound once around the reel 3 Remove the mains plug again from the socket 8 3 Drawing in and fastening the belt 4 Pla...

Page 62: ...ly Slide the RolloTron DECT into the belt box and screw it tight using the screws provided Then insert the mains plug into the socket 8 4 Mounting the RolloTron DECT i The RolloTron DECT must sit free...

Page 63: ...point i It is imperative that both end points are set other wise malfunctions may occur If the RolloTron DECT is operated without an end point setting the drive will continue to run for as long as one...

Page 64: ...p for approx 5 seconds to confirm this Setting the lower end point ATTENTION Setting the wrong upper end point may lead to overload or damage the RolloTron DECT or the drive Do not set the upper end p...

Page 65: ...65 Correcting an end point Move the roller shutter to the centre position Then reset the end point example showing the upper end point 9 1 Setting the end points...

Page 66: ...n was successful Flashing red 5 seconds The log on has failed Indicator lights on the RolloTron DECT Flashing red The log off mode is active Flashing green 5 seconds The log off was successful Flashin...

Page 67: ...the set end point When the favourite position function is activated The roller shutter lowers to the favourite position that has been Opening and closing by pressing and holding the button The roller...

Page 68: ...ntilation position Activating deactivating the favourite position Moving to and saving the favourite position Press the button for more than two sec onds The green indica tor light flashes for approx...

Page 69: ...olling the RolloTron DECT with the FRITZ App Smart Home or with the FRITZ Fon FRITZ App Smart Home You can control a RolloTron DECT logged on to a FRITZ Box with the FRITZ App Smart Home This app must...

Page 70: ...hts up for 5 seconds The following settings are erased after you release the buttons End points Favourite position DECT base station FRITZ Box i Then the RolloTron DECT is reset to the default factory...

Page 71: ...nds 2 Completely close the roller shutter and continue to press and hold the Down button 3 Then pull out the belt as far as possible from the top of the RolloTron DECT 4 Remove the mains plug from the...

Page 72: ...sition CAUTION There is a risk of injury Never reach into the reel compartment when the motor is running Always remove the mains plug before touching the reel compartment 10 Removing the RolloTron DEC...

Page 73: ...rtment WARNING WARNING There is a risk of injury as the roller shutter may slam shut in an uncontrolled manner Secure the roller shutter from falling Hold on to the belt tightly to stop the roller shu...

Page 74: ...end points are not yet set configure the end points see page 63 the RolloTron DECT rotates in the wrong direction The belt may be wrapped around the reel incorrectly see page 60 the roller shutter st...

Page 75: ...tter Open the roller shutter box and rectify the fault Lubricate any stiff areas with gliding wax if necessary d The roller shutter may be too light Increase the weight of the roller shutter by for ex...

Page 76: ...eck the RolloTron DECT and all of the roller shutter com ponents regularly for damage Check that the RolloTron DECT is functioning correctly The shutter must not be damaged The belt may not be frayed...

Page 77: ...e RolloTron DECT complies with the Directives 2006 42 EC Machinery Directive and 2014 53 EU Radio Equipment Directive The full text of the EU declaration of conformity is included with the product and...

Page 78: ...and modifications by third parties unauthorised persons Use of unsuitable accessories Damage caused by unacceptable excess voltages e g lightning Operational malfunctions caused by radio frequency ove...

Page 79: ...79...

Page 80: ...de Service Hotline 01807 933 171 Fax 49 2872 933 253 service rademacher de 30 seconds free of charge subsequently 14 cents minute from German fixed line networks and max 42 cents minute from German c...

Reviews: