background image

When tapping a list item, a selection screen pops up. The user can modify the setting by tapping

‘–’ or ‘+’ and can confirm by tapping ‘V’ or decline by tapping ‘X’.

Change a selection

When tapping a list item, a selection screen pops up. The user can change the selection by

swiping up or down and confirm by tapping ‘V’ or decline by tapping ‘X’.

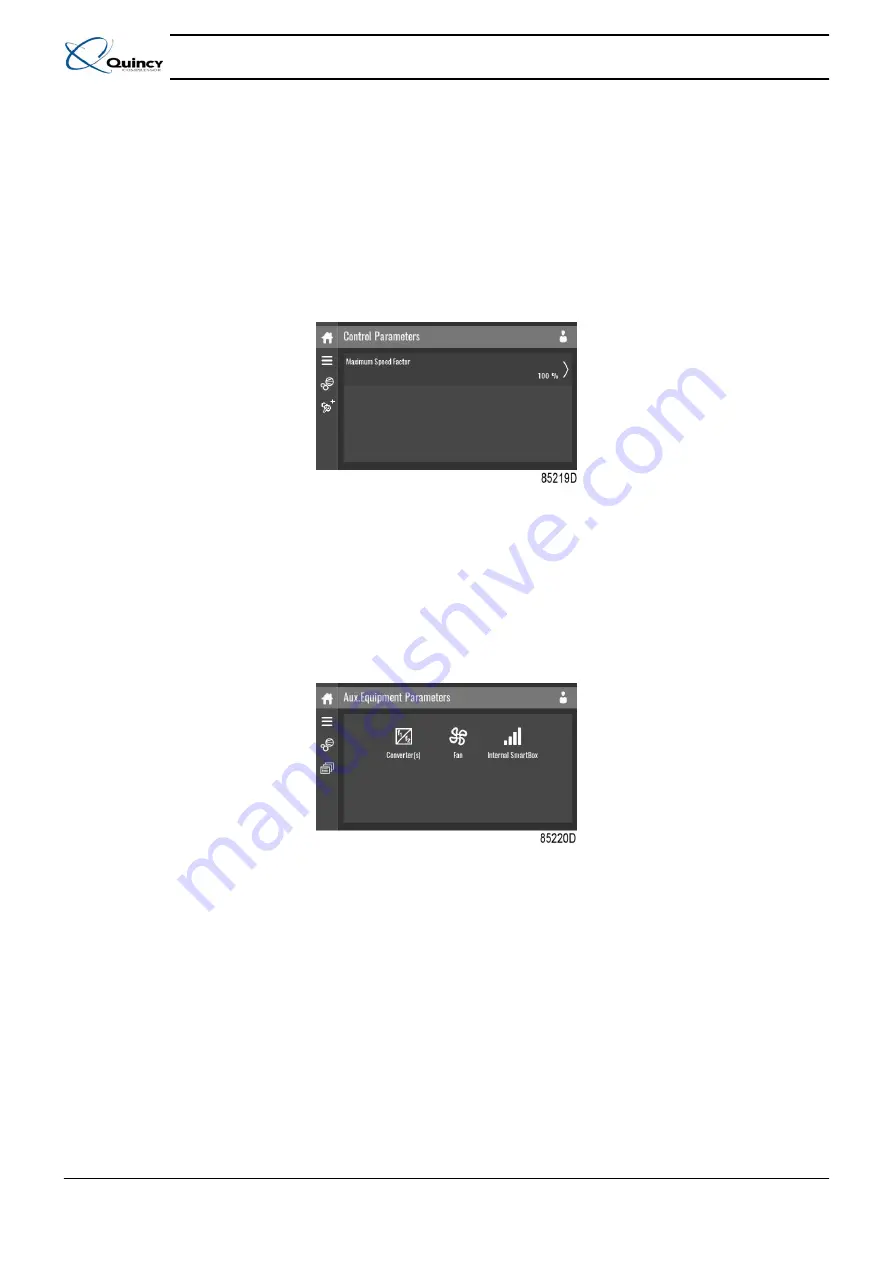
Control parameters menu

Tap the Control Parameters icon to enter the Control Parameters menu.

This menu shows information about the Control Parameters.

Modify a setting

When tapping a list item, a selection screen pops up. The user can modify the setting by tapping

‘–’ or ‘+’ and can confirm by tapping ‘V’ or decline by tapping ‘X’.

Auxiliary equipment parameters menu

Tap the Aux. Equipment Parameters icon to enter the auxiliary equipment parameters menu.

This menu shows an overview of all the auxiliary equipment fitted.
Through this menu, the parameters of the auxiliary equipment can be changed.

Modify a setting

When tapping a list item, a selection screen pops up. The user can modify the setting by tapping

‘–’ or ‘+’ and can confirm by tapping ‘V’ or decline by tapping ‘X’.

Auto restart menu

Tap the Auto restart icon to enter the Auto Restart menu.

Instruction book

38

9829 3199 7

4

Summary of Contents for QOFT 20

Page 1: ...QOFT 20 QOFT 25 QOFT 30 QOFT 40 QOFT 50 QOFT 60 Instruction book...

Page 2: ......

Page 3: ...on book Original instructions COPYRIGHT NOTICE Any unauthorized use or copying of the contents or any part thereof is prohibited This applies in particular to trademarks model denominations part numbe...

Page 4: ...ion 11 2 1 INTRODUCTION 11 2 2 AIR FLOW 13 2 3 CONDENSATE DRAIN SYSTEM 14 2 4 OIL SYSTEM 16 2 5 COOLING SYSTEM 16 2 6 ELECTRICAL SYSTEM 16 3 Q Control Touch 19 3 1 CONTROLLER 19 3 2 CONTROL PANEL 21 3...

Page 5: ...5 STOPPING 58 5 6 TAKING OUT OF OPERATION 58 6 Maintenance 59 6 1 MAINTENANCE WARNINGS 59 6 2 PREVENTIVE MAINTENANCE SCHEDULE OF THE COMPRESSOR 59 6 3 SERVICE KITS 60 6 4 SERVICE AGREEMENTS 60 6 6 SE...

Page 6: ...INGS ON DISPLAY 68 9 2 ELECTRIC CABLE SIZE AND MAIN FUSES 69 9 3 SETTINGS OF SAFETY VALVES 73 9 4 OVERLOAD RELAY AND FUSE SETTINGS 73 9 5 REFERENCE CONDITIONS 74 9 6 LIMITATIONS 74 9 7 COMPRESSOR DATA...

Page 7: ...off the voltage Depressurize the machine Lock Out Tag Out LOTO Open the power isolating switch and lock it with a personal lock Tag the power isolating switch with the name of the service technician...

Page 8: ...cant bags must be removed before connecting the pipes 5 Air hoses must be of correct size and suitable for the working pressure Never use frayed damaged or worn hoses Distribution pipes and connection...

Page 9: ...consult the manufacturer Also consult following safety precautions Safety precautions during operation and Safety precautions during maintenance These precautions apply to machinery processing or cons...

Page 10: ...mper with the sound damping material 12 Never remove or tamper with the safety devices guards or insulations fitted on the machine Every pressure vessel or auxiliary installed outside the machine to c...

Page 11: ...h open flame for inspecting the interior of a machine pressure vessel etc 14 Make sure that no tools loose parts or rags are left in or on the machine 15 All regulating and safety devices shall be mai...

Page 12: ...3 Separate the harmful from the safe components e g drain oil from oil containing parts 4 Refer to the disposal topic mentioned below Disposal of electrical and electronic appliances WEEE This equipme...

Page 13: ...ors are enclosed in a sound insulating bodywork The compressors are built up with following major components Air filter AF Inlet silencer IS Load no load valve UA Low pressure compressor element El In...

Page 14: ...Aftercooler Ci Intercooler Co Oil cooler Eh High pressure compressor element FC Oil filler plug FN Cooling fan M1 Compressor drive motor M2 Fan motor OF Oil filter not shown SG Oil level sight glass S...

Page 15: ...further compressed in the high pressure compressor element Eh and discharged through the pulsation damper AS and the aftercooler Ca A check valve CV is provided downstream of the pulsation damper AS W...

Page 16: ...The condensate is collected in the electronic water drains A sensor continuously measures the liquid level As soon as the collector is filled up to a certain level the outlet opens discharging the con...

Page 17: ...connected to the side panel of the compressor as shown in the next figure Condensate drain connections Ref Designation Ref Designation 1 Automatic drain aftercooler 2 Automatic drain intercooler 3 Man...

Page 18: ...value The valve is located before the oil filter housing 2 5 Cooling system QOfT compressors are provided with an air cooled oil cooler Co an intercooler Ci and an aftercooler Ca An electric motor dri...

Page 19: ...Control Touch Control panel The detailed functioning of the Q Control Touch is explained in the next chapter Instruction book 9829 3199 74 17 Converter cabinet Converter cabinet QOFT 20 up to QOFT 60...

Page 20: ...Line contactor K22 Star contactor Q15 Fan motor protection K23 Delta contactor T1 Transformer F21 Motor overload protection E1 Q Control Touch E2 IO2 Module S3 Emergency stop button Instruction book 1...

Page 21: ...umber of programmable settings e g the unloading and loading pressures for fixed speed units the set point for units with frequency converter the minimum stop time the maximum number of motor starts a...

Page 22: ...ral alarm LED will light up to warn the operator before t he shutdown level is reached The message disappearsas soon as the warning condition disappears Service warning A number of service operations...

Page 23: ...down is lit in case of a warning condition 3 Service sign Is lit when service is needed 4 Operation sign Is lit when the unit is running in automatic operation 5 Voltage sign Indicates that the volta...

Page 24: ...Data Status Inputs Outputs Counters Aux Equipment Parameters Converters Service Service Overview Service Plan Service History Service functions Clean Screen Week Timer Week Remaining Running Time Eve...

Page 25: ...ameters Aux Equipment Parameters Converter s Fan Auto Restart Controller Settings Network Settings Ethernet Settings CAN Settings Localisation Language Date Time Units User Password Help Information S...

Page 26: ...d to Load Running Loaded Wait Manual Stop Machine Control Mode Local Machine Control Mode Remote Machine Control Mode LAN Automatic Restart After Voltage Failure Week Timer Active System icons Icon De...

Page 27: ...ntenna 100 Change between screens indication Energy recovery Element Drain s Analogue Output Menu Reset Auto Restart Filter s Cooler Valve s Power Meter Input icons Icon Description Pressure Instructi...

Page 28: ...few minutes when there is no touch input Description Reference Designation Function 1 Home button The home button is always shown and can be tapped to return to the main screen 2 Screen information O...

Page 29: ...ields can contain a history chart an input or a counter value depending on the type of the machine Tap the field to view the type of measurement This will be shown in the screen information bar Exampl...

Page 30: ...e icon is tapped again Week timer Week timers can be set by tapping this icon Remaining running time The Remaining running time can be set and modified by tapping this icon Auto restart Auto restart c...

Page 31: ...can be changed through this menu Auxiliary equipment parameters can also be changed The Auto restart function can be set through this menu This function is password protected 6 Controller settings Ne...

Page 32: ...the icons Procedure To enter the Data menu screen 1 Tap the Menu button 2 Tap the Data icon Description Reference Designation 1 Status menu 2 Inputs menu 3 Outputs menu 4 Counters menu 5 Auxiliary eq...

Page 33: ...setting these messages without remedying may damage the unit Inputs menu Tap the Inputs icon to enter the Inputs menu This menu shows information about all the inputs Outputs menu Tap the Outputs icon...

Page 34: ...tions Only visible as advanced user Clean screen These submenus can be entered by tapping the icons Instruction book 32 9829 3199 74 Counters menu Tap the Counters icon to enter the Counters menu Volt...

Page 35: ...service plan can be viewed by tapping icon 2 Through this menu the service plan can be modified 1 Tap the desired service plan A selection screen will pop up 2 Change the Running Hours by tapping or...

Page 36: ...seconds 3 9 Week timer menu Function This screen is used to set up to 4 different week timers with each up to 8 settings per day The week timers can be activated through this screen A Remaining Runni...

Page 37: ...n change the remaining time by tapping or and can confirm by tapping V or decline by tapping X 5 Add setting A selection screen pops up The user can change the setting by swiping up or down and confir...

Page 38: ...ting the status of the unit when the shutdown occurred 3 11 Machine settings menu Function Instruction book 36 9829 3199 74 Figure 19 Saved data screen This screen is used to display the following sub...

Page 39: ...the Alarms icon to enter the Alarms menu A list of all alarms is shown When pressing on one of the items in this list the warning and or shutdown levels are shown for this alarm Regulation menu Tap t...

Page 40: ...g When tapping a list item a selection screen pops up The user can modify the setting by tapping or and can confirm by tapping V or decline by tapping X Auxiliary equipment parameters menu Tap the Aux...

Page 41: ...tapping V or decline by tapping X Modify a setting When clicking a list item a selection screen pops up The user can modify the setting by tapping or and can confirm by tapping V or decline by tapping...

Page 42: ...ned off the settings can be modified Modify a setting When tapping a list item a selection screen pops up The user can modify the setting by tapping or and can confirm by tapping V or decline by tappi...

Page 43: ...User Password icon to enter the User Password menu The user password can be activated or deactivated through this menu Enter and confirm a user password to activate repeat to deactivate Enter a passw...

Page 44: ...ccess Level button at the upper right corner of the screen Description Reference Designation Function 1 User A basic set of parameters is visualized no password required 2 Service A basic set of param...

Page 45: ...s level icon 1 and confirm 2 The screen information bar 1 now shows the current status of the unit instead of the machine serial number In the service menu an extra menu item is now available See Serv...

Page 46: ...4 Installation 4 1 Dimension drawings Dimension drawing QOFT 20 up to QOFT 30 compressor Instruction book 44 9829 3199 74...

Page 47: ...Instruction book 9829 3199 74 45 Dimension drawing QOFT 40 up to QOFT 60 compressor...

Page 48: ...Motor cooling air and compressor air inlet 4 Cubicle cooling air inlet 5 Cubicle cooling air outlet 6 Electrical cable 7 Valve rotation 8 Automatic drain aftercooler 9 Automatic drain intercooler 10 M...

Page 49: ...Instruction book 9829 3199 74 47 4 2 Installation proposal Compressor room example Installation proposal...

Page 50: ...y that any recirculation of cooling air to the compressor is avoided The air velocity to the grids must be limited to 5 m s 16 4 ft s The maximum air temperature at the compressor intake opening is 40...

Page 51: ...ir terminals 3 Check the fuses and the settings of the circuit breakers See section Electrical connections 4 Connect the power supply to terminals L1 L2 L3 of terminal block 1X0 Connect the earth cond...

Page 52: ...stop remote S4 Remote load unload button fixed speed compressors S6 Remote pressure setpoint selection T1 Transformer 1X0 Terminal strip supply connection 1X1 Terminal strip motor 1X3 Terminal strip e...

Page 53: ...Not used K10 Auxiliary relay motor running K11 Auxiliary relay forced intercooler K12 Auxiliary relay compressor loaded K13 Not used K14 Not used K15 Not used Reference Optional equipment R1 K34 Driv...

Page 54: ...ooler 10 Warning under tension 11 Read Instruction book before starting the compressor 12 Lock out tag out 13 Before connecting the compressor electrically consult the Instruction book for the motor r...

Page 55: ...ce Name 16 Switch off the voltage before removing the protecting cover inside the electric cabinet 17 Oil the gaskets screw on the filters and tighten by hand approx one half turn 18 Consult the Instr...

Page 56: ...he bodywork by chain spreaders in order not to damage the compressor The lifting equipment must be placed in such a way that the compressor is lifted perpendicularly Lift gently and avoid twisting 5 2...

Page 57: ...and overload relay F21 8 Close all manual drain valves of the condensate traps Switch on the voltage Start the compressor and stop it immediately Check for correct direction of rotation while the comp...

Page 58: ...ndensate drains see Drain connections 3 Open the air outlet valve customer s installation 4 Switch on the voltage and check that voltage sign 5 lights up 5 Press the start button on the Q Control Touc...

Page 59: ...entre See also Preventive maintenance Regularly check the actual compressor status by pressing the arrow down key from the main screen Before starting any maintenance or repairs Stop the compressor an...

Page 60: ...he compressor from the mains 3 Shut off and depressurize the part of the air net which is connected to the outlet valve Disconnect the compressor air outlet pipe from the air net 4 Drain the water and...

Page 61: ...precautions Warranty Product Liability Use only Quincy authorized genuine parts Any damage or malfunction caused by the use of unauthorized parts is not covered by Warranty or Product Liability 6 2 P...

Page 62: ...les or flexible joints must be replaced 6 3 Service kits Service kits For overhauling and for preventive maintenance a wide range of service kits is available Service kits comprise all parts required...

Page 63: ...Use QuinSyn OF oil which has been specially developed for oil free rotary compressors This oil has a long service life and ensures optimum lubrication Consult section Preventive Maintenance Schedule f...

Page 64: ...are subject to the EU Directive 2012 19 EC for Waste Electrical and Electronic Equipment WEEE As such these parts must not be disposed of at a municipal waste collection point Refer to local regulatio...

Page 65: ...compressor and switch off the voltage to the compressor 2 Remove the air filter cover and remove the filter element 3 Clean the cover Discard the old filter element 4 Install a new filter element and...

Page 66: ...m 2 Press stop button 6 Wait until the compressor has stopped press the emergency stop button and switch off the voltage to the compressor 3 Remove filler plug FC Drain the compressor sump by opening...

Page 67: ...ations of the related service plan the service warning must be reset See also Service Menu 7 3 Motor greasing Fan motor of QOFT compressors The bearings of the fan motor are greased for life Contact y...

Page 68: ...ill light up when the compressor is loaded again Power supply to EWD s faulty Check power supply Compare power supply with voltage mentioned on data label of EWD Power supply board defective Check and...

Page 69: ...ault Remedy Air pressure below minimum pressure Increase air pressure EWD continuously discharges air Control air blocked Check and correct as necessary Sensor dirty Clean sensor Instruction book 9829...

Page 70: ...data 9 1 Readings on display Display Reference Unit Reading Outlet pressure bar e psig Depends on pressure setpoint Maximum working pressure bar e psig See section Compressor data Instruction book 68...

Page 71: ...otection degree of the electric cubicle and to protect its components from dust from the environment it is mandatory to use a proper cable gland when connecting the supply cable to the compressor Pack...

Page 72: ...able configuration Single supply cables Parallel supply cables Phase supply cables Only valid for Y D versions Parallel phase supply cables Only valid for Y D versions Instruction book 70 9829 3199 74...

Page 73: ...al documents Cable calculation method for UL Calculation method according to UL 508A Single supply cables 3 phases PE Add 25 to the total package current Package current from the technical data sheets...

Page 74: ...minal voltage is recommended Example of supply cable calculation IPackage 128 A maximum ambient temperature is 30 C maximum fuse 200 A Single supply cables 3 phases PE I 128 A 25 128 x 1 25 160 A For...

Page 75: ...ig 160 psig High pressure safety valve compressors with maximal working pressure of 8 6 bar 125 psi 9 4 Overload relay and fuse settings The table below gives the values for the setting of the motor o...

Page 76: ...of more than 1000 m above sea level it is possible that the maximum pressure and or the maximum speed must be decreased Consult Quincy 9 6 Limitations Maximum air inlet temperature 40 C 104 F Minimum...

Page 77: ...5 06 5 06 Oil capacity cu ft 0 81 0 81 0 81 Sound pressure level according to ISO 2151 2004 dB A 68 69 5 71 5 Data for 100 psi QOFT compressors QOFT 40 QOFT 50 QOFT 60 Nominal working pressure bar e 7...

Page 78: ...Oil capacity cu ft 0 81 0 81 0 81 Sound pressure level according to ISO 2151 2004 dB A 68 69 5 71 5 Data for 125 psi QOFT compressors QOFT 40 QOFT 50 QOFT 60 Nominal working pressure bar e 8 0 8 0 8 0...

Page 79: ...k bar e 10 10 10 Maximum working pressure Pack psig 145 145 145 Nominal rated motor power kW 15 18 5 22 Nominal rated motor power hp 20 25 30 Oil capacity l 23 23 23 Oil capacity US gal 6 08 6 08 6 08...

Page 80: ...ty Relative humidity 90 No condensation Mounting Cabinet door Digital outputs Number of outputs 9 Q Control Touch Type Relay voltage free contacts Rated voltage AC 250 V AC 10 A max Rated voltage DC 3...

Page 81: ...control must be attached to this vessel or its piping system The devices must protect the vessel against circumstances other than mentioned on the data plate 5 These devices must be designed so that...

Page 82: ......

Page 83: ......

Page 84: ...www quincycompressor com Performance You Demand Reliability You Trust No 9829 3199 74 2020 04...

Reviews: