background image

— 6 —

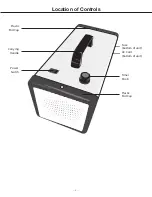
Location of Controls

Power 

Switch

Plastic

End Cap

Fuse

(bottom of unit)
AC Cord

(bottom of unit)

Timer

Knob

Carrying

Handle

Plastic

End Cap

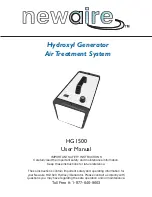
Summary of Contents for NewAire HG1500

Page 1: ...fety and maintenance information Keep these instructions for future reference These instructions contain important safety and operating information for your Newaire HG1500 Hydroxyl Generator Please co...

Page 2: ...ules Operation is subject to the following two conditions 1 This device may not cause harmful interference and 2 this device must accept any interference received including interference that may cause...

Page 3: ...ain or moisture does not operate normally or has been dropped 15 WARNING To reduce the risk of fire or electric shock do not expose this apparatus to rain or moisture Do not place objects filled with...

Page 4: ...tip Keep the eyedropper at an angle to stop the mercury from rolling back out until you can put the mercury into the plastic bag Wrap tape sticky side out around your gloved fingers and carefully use...

Page 5: ...l generator will do the job Hydroxyls are not temperature sensitive and like higher humidity What maintenance is required Very little Simply replace the UV lamps when they burn out see page 9 and repl...

Page 6: ...6 Location of Controls Power Switch Plastic End Cap Fuse bottom of unit AC Cord bottom of unit Timer Knob Carrying Handle Plastic End Cap...

Page 7: ...ns THIS APPLIANCE MUST BE GROUNDED In the event of an electrical short circuit grounding reduces the risk of electric shock by providing an escape wire for the electric current This appliance is equip...

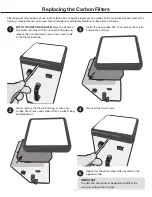
Page 8: ...the new carbon filter then replace the screen and plastic end cap x Re insert the two screws y Repeat for the other carbon filter located on the opposite side IMPORTANT The HG1500 should never be oper...

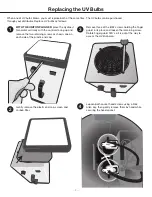
Page 9: ...e of the 8 32 screws holding the finger guard in its place and loosen the remaining screw Rotate finger guard 180 so it is out of the way to access the UV Bulb area x Loosen both socket head screws us...

Page 10: ...fully sliding lamp into lamp holder making sure to align the bottom end of the UV bulb into the bottom recess V Reconnect the power supply then reinsert socket head screws and gently tighten with 5 64...

Page 11: ...g To clean use a damp soapy cloth for standard cleaning WARNING Make sure the unit is unplugged before maintenance is performed WARNING UV Bulbs MUST be disposed of properly see pages 4 and 5 for deta...

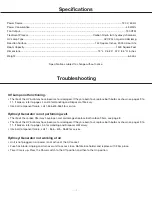
Page 12: ...Handling and Disposal of Mercury Internal Component failure call 1 866 676 9663 for service Hydroxyl Generator is not performing well The life of the carbon filter may have been met or damaged replace...

Page 13: ...BE PERFORMED BY AN AUTHORIZED WARRANTY REPAIR CENTER AT THE TIME REQUEST FOR REPAIR IS MADE EVIDENCE OF THE DATE OF PURCHASE AND DATES OF MAINTENANCE WORK MUST BE PROVIDED UPON REQUEST TRANSPORTATION...

Page 14: ...QUEENAIRE TECHNOLOGIES INC 9483 State Highway 37 Ogdensburg NY 13669 www queenaire com...

Reviews: