


2. Getting Started
2.1 Powering the PILOT
The Pilot can be powered by 4 “AA” batteries, or Quantum Turbo Battery including Turbo, Turbo
2x2, Turbo Compact, Turbo SC, Turbo AC and Turbo Z.
2.1.1 Inserting the “AA” batteries
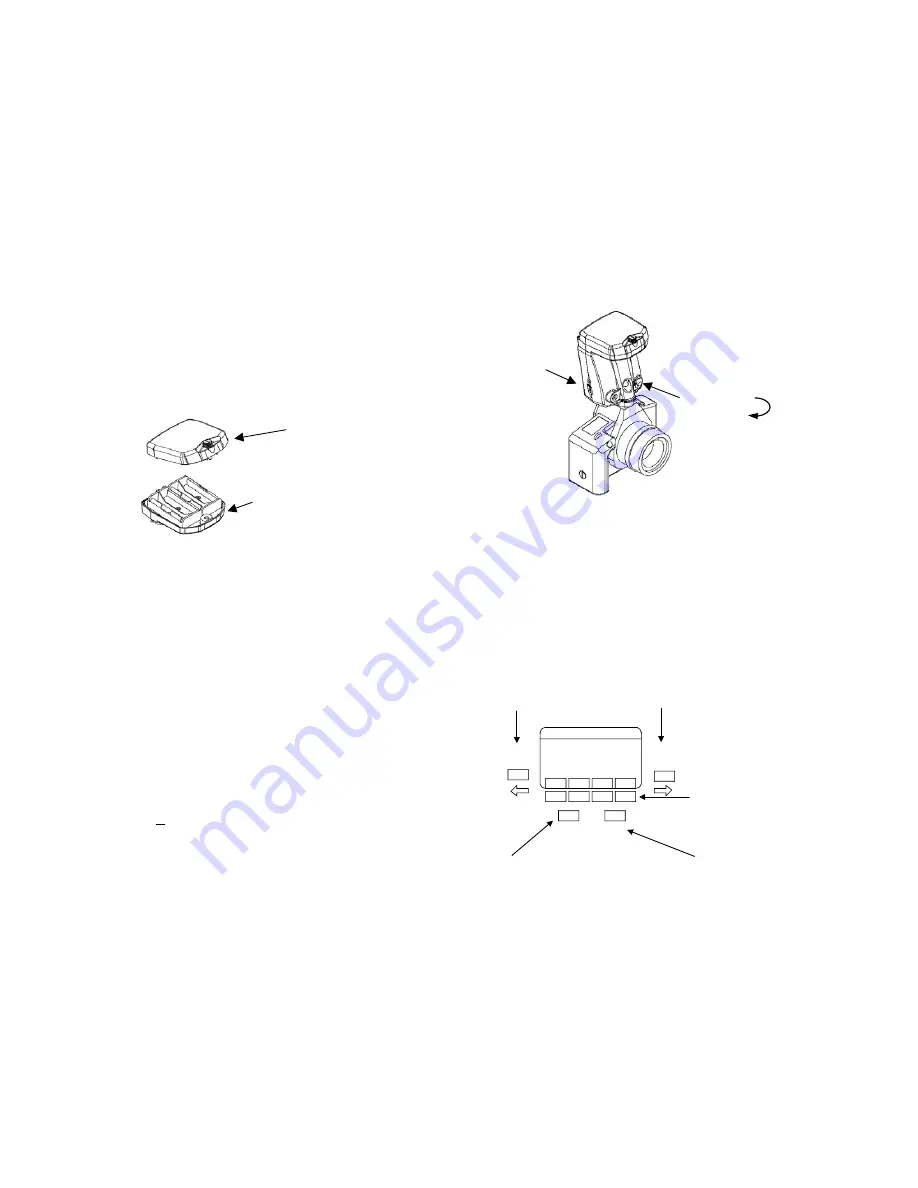
To access the battery compartment,
unscrew the top housing.
Insert 4 “AA” batteries into the battery
holder located in the lower housing.
Close the top housing .
2.1.2 Using a Quantum Turbo.
The PILOT is powered from a Quantum Turbo using a CQ8 or a CCQ8 cable.
Plug the power cable into the Pilot, then into the output connection of the power pack.
Leave the PILOT on/off switch in the off (0) position. Use the power switch on the Turbo to turn
the PILOT on or off.
2.2 Restoring Factory settings
You can restore the factory settings by the following method:
1. Turn the PILOT off using the on/off switch located on the top housing, or by Turning the Turbo
OFF if you are using the power cable.
2. Press and hold any button
3. Turn the PILOT ON.
4. The PILOT will display a reset message and some soft key options
See section 7 for display of reset message.
RESET ALL
- will restore all the factory settings.
KEEP P1 P8
- will keep your stored Program modes, but reset everything else to factory
settings.
EXIT
– will exit the reset menu without changes
You can also reset the PILOT in the OPTIONS menu. See Section 7
2.3 Connecting PILOT to a Camera
Loosen Shoe lock until metal “foot” protrudes fully.
Slide PILOT into
camera hot shoe.
Tighten shoe
lock wheel
Very Important Tips
For consistent exposures with your digital camera and Trio.
●
Always do a custom white balance before shooting
●
When shooting TTL use Aperture or Shutter priority or Manual camera modes (P mode
gives inconsistent exposures)
●
Set your metering area to center weight, partial metering instead of matrix or multi-spot
metering.
3. Basic Navigation
When a selection or setting is highlighted on the display the
Left (-)
Å
and
Right (+)
Æ
buttons will change that selection or setting. For example if the F/number is highlighted
then the
Left (-)
Å
and
Right (+)
Æ
buttons will adjust the F/number up or down.
The
TEST
button will fire the remote
flashes. An option allows you to choose
whether the remotes fire all at once, or
sequentially so you can test individual
exposures.
There are four soft keys located under
the display. The soft keys select the
setting that you wish to adjust.
Once the setting to be adjusted is
selected use the
Left (-)
Å
and
Right
(+)
Æ
buttons to change that selection.
See sections 3.1 - 3.4.
The
OPTION
button will enter the
options menu. See section 7 for
details on which options are
available.
TEST
OPTION
+
-


