


Model WBP-101 Wireless Pulsewave Blood Pressure Monitor
Model WBP-101 Wireless Pulsewave Blood Pressure Monitor
USING SMART PHONE WITH YOUR DEVICE
The integrated Bluetooth connectivity allows you to control your device and
display/store test results using a smart phone. The following instructions
are based on current version of APP’s. Please note that updated versions
may have different features and/or interfaces.
For iOS users, you may scan the 2D barcode on the device to find/install
the APP (BP Secretary). For Android users, please go to
to download and install the APP.
1.
Set up Bluetooth connection:
Go to “Settings” of your smart phone and
turn on Bluetooth. Power on the device by pressing
the button "
". After
a few seconds, you should see “RBPxxxxxxxxxx” in the Bluetooth device
list. Go ahead and pair the device with you smart phone.
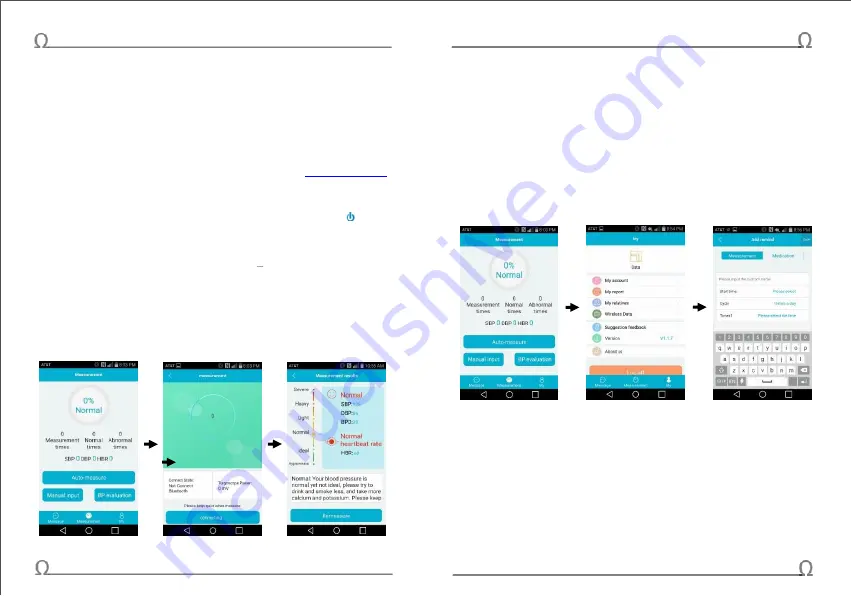
2.
Locate and open the “
BP Secretary” APP on your smart phone.
It should
look like the left screenshot below. Put on the cuff as described earlier
and power on the device. Allow a few seconds for Bluetooth connection
and then t
ouch “Auto-measure” to start measurement. The interface
changes as shown in the middle screenshot below. Meanwhile, the
pump starts to elevate pressure (displayed in the center of the circle).
Once pressure reaches the target, it will start to release gradually and
complete the measurement circle. The results are shown on the right.
3.
Within 60 seconds, you may restart a new measurement by touching the
“Remeasure”, which is not recommended, as blood circulation may not be
fully recovered.
4.
By touching the back arrow on top left “<”, you may return to the initial
window.
5.
Set up online account: In order to save measurement results for future
reference and/or comparison purposes, an online account needs to be
created. Touch
“My” at the bottom right to enter setting page as shown in
the middle below.
Then, touch “My account” to access registration page
shown on the right. Enter prompted information and register. There is no
need to verify information, and therefore, it’s only for your own reference.
6.
Touch “Measurement” in the middle of the bottom to return to home page.
7.
You can access saved results (must login to your account) that previously
measured with your smart phone
by touching “BP evaluation” on home
page. The new page titled as
“Measurement chart” displays data on a 2D
plot as the shown below. The horizontal axis is measurement date, while
the vertical axis represents both blood pressures (SBP in blue, DBP in
yellow) and heart beat rate (purple). You may choose to display data in
certain time span by entering “Start date” and “End date”, then select
“OK”. You may also “zoom in” or “zoom out” by double-finger wiping in
various directions.
11
12


