background image

Section 1: 

Introduction- 

Quick Start

The last applied configuration that is “running” in the DSP-3 when it is turned off becomes the active configuration again once

the power is turned back on to the DSP-3. This ensures that the system “comes up” just as it was left last time it was powered

down.

If you decide to edit an existing configuration, you will need to “unlock” the configuration after opening it. Just select

Configuration from the  Menu Bar, then select Edit. The palettes that were “grayed out”  will now appear in their normal,

colored state and you will be able to edit the configuration. After your editing is complete, select 

Configuration from the Menu

Bar and then 

Apply to DSP.

That’s it for the “Quick Start”. For more information, review this manual and the software’s help file.

11

Now select the OUT1 icon from the same palette (left click on the OUT1 icon). Move your pointer into the upper right area of the

workspace, in line with the IN1 object you just placed, and left click again. The OUT1 object should appear.

Select the GAIN icon in the MISC PROCESSORS palette (it looks like a little wedge and is the left-most icon in this palette). Move your

pointer to the workspace in between (and in line with) the IN1 and OUT1 objects; click the mouse button again. The GAIN object should

appear.

Go to the DRAWING TOOLS palette and select the DRAW (pencil) icon. Notice that the IN1 object has a small yellow-colored “node”

on its right side. This is its connection node or the point that “wires” are drawn from. Similarly, note the same yellow-colored nodes on the

GAIN and OUT1 objects. Draw a “wire” from the IN1 object to the left side of the GAIN object. Draw another “wire” from the GAIN object

(right side) to the OUT1 object.

The DRAW tool works by clicking on one of the nodes that you want to draw  a wire between, then, while holding down the

mouse button, dragging the wire to the other node. You can change the drawing mode from click-drag-release  wiring to

click-click wiring in the 

Tools, Options dialog box; select the Drawing tab and make any desired drawing “behavior” changes.

When everything is placed on the workspace and connected with “wires”, go to the Menu Bar and select Configuration, then Apply

to DSP (or just click on the “Apply to DSP” icon in the DSP Tools palette). This will send your configuration (and any object parameter settings)

from the computer to the DSP-3. The DSP-3’s outputs will be muted while the configuration is loaded. For complex configurations, this could

take several seconds.

If you have active audio inputs connected to the DSP-3 and the amplifier’s gain is sufficient, you will probably hear your audio material

at this point. If not, double-click on each of the GAIN objects and increase the gain setting as required. 

 Also in the Tools, Options dialog,

the 

DSP tab has settings for input and output sensitivity for the DSP-3; these may require adjustment dependant on your particular set up.

The 

Communication Status pane should indicate “ONLINE” and the Configuration Status pane should indicate “ACTIVE”. If you get

an error message when applying the configuration to the DSP-3 (i.e. “Failed to connect to DSP-3”) check the cable connection between the

DSP-3 and the computer’s COM port. Ensure that the correct COM port is selected in Signal Manager’s 

Tools, Options, DSP settings dialog

box.

Repeat the above procedure, this time using IN2, OUT2 and a GAIN object. This will give you a signal path with gain adjustment for

channel 2. Be sure to “Apply to DSP”. This sends your updated configuration from your computer to the DSP-3.

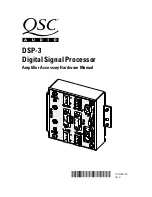
Summary of Contents for DSP-3'

Page 1: ...DSP 3 Digital Signal Processor Amplifier Accessory Hardware Manual TD 000087 00 TD 000087 00 Rev D...

Page 2: ......

Page 3: ...1 Connecting to RS 232 Port 21 Daisy chaining the DSP 3 Outputs 22 Connection to Accessory External DC Power Supply 22 Applications Examples 23 Section 3 SIGNAL MANAGER SOFTWARE System Requirements 26...

Page 4: ...l area is likely to causeharmfulinterference inwhichcase the user will be required to correct the interference at his or her own expense 4 SAFEGUARDS Electrical energy can perform many useful function...

Page 5: ...hatprovides a solid physical mounting platform Connections include three D sub type connections a DB 9 connector acts as the RS 232 interface and an HD 15 through connector provides the DataPort inter...

Page 6: ...controls That way you won t damageyourspeakersorcreateveryloudsoundsifyouapply a configuration that doesn t do what you thought it would As a general rule DO NOT CREATE SIGNAL LOOPS Do not mixtheoutp...

Page 7: ...Mount the DSP 3 remotely and connect a QSC DataPort cable between the amplifier s DataPort and the DSP 3 s backside DataPort External power may be required for older models see top of page 2 Mount th...

Page 8: ...fier The power supply must be plugged into an operational AC power receptacle Then plug the barrel connector coaxialpowerplug fullyintotheEXTERNALPOWERreceptacleontheDSP 3 When power is properly appli...

Page 9: ...5 Using the Menu Bar see below at the top of the window choose the Help item and read the software help section The help system includes the contents of this hardware manual for paperless reference 6...

Page 10: ...thing was connected and set up properly 7 ENSURE THE AMPLIFIER IS TURNED DOWN AND THAT YOU HAVE SUITABLE SPEAKERS CONNECTED FOR YOUR INTENDED CONFIGURATION For familiarization with the DSP 3 and the S...

Page 11: ...re from the GAIN object right side to the OUT1 object The DRAW tool works by clicking on one of the nodes that you want to draw a wire between then while holding down the mouse button dragging the wir...

Page 12: ...CH1OUTPUT CH2OUTPUT These terminal blockjacksprovidespost DSP processed signal from the DSP 3 for downstream devices ampli fiers monitoringbusses daisy chainingthepro cessed signal to a second amplif...

Page 13: ...irectly mounted on a 2 RU QSC DataPortequippedamplifier thisconnectorplugs into the amplifier s DataPort connector Ifusedwith3 RUQSCDataPortequippedamplifi ers the DSP 3 will need to be remotely mount...

Page 14: ...ywhere in signal chain High and Low Pass Shelf Filter Adjustable corner frequency Adjustable Q factor Adjustable gain Graphical response curve provided in software Ability to bypass all EQ with a sing...

Page 15: ...Adjustable Gain Adjustable threshold Adjustable compression ratio Graphical response curve provided in software Assignable anywhere in the signal chain Signal Level Meter Peak or rms response Signal A...

Page 16: ...Section 1 Introduction Block Diagram 16...

Page 17: ...red for all other directly mounted to amplifiersituations When used with the Powerlight series of amplifiers or 3 RU 4 channel amps the DSP 3 requires use of the accessory external supply Theaccessory...

Page 18: ...ght2 The DSP 3 mounts directly to the rear of 2 channel 2 RU DataPort equipped QSC amplifiers 1 Configure the amplifiers DIP switches QSC amplifiers where the DSP 3 covers the configuration switches a...

Page 19: ...racket This accessory is a 19 2 RU panel with mounting facilities for up to four DSP 3 modules It is intended to be mounted to the rear support rails of an equipment rack The bracket kit comes with on...

Page 20: ...t adjacent terminals Unbalanced inputs can be used if required If unbal anced audio sources are used it is preferable to use an appropriate audio transformer or other unbalanced to bal anced converter...

Page 21: ...have to be maintained for the DSP 3 to operate Setup programming can also be done via Ethernet network communication when using QSC s QSControl products Refer to QSControl documentation for detailed i...

Page 22: ...3fromanexternal power supply QSCoffersanaccessory externalpowersupplyforapplica tions where a DataPort that provides 15 VDC is not available Contact QSC s Technical Services Department for details Al...

Page 23: ...d OR Local Control Audio Inputs via DataPort Thefollowingexamplesshowbasichookupinformationthatassumesatwo channel fullrangeaudiosignaldrivingtheload Refertoyour amplifier s hardware manual for other...

Page 24: ...used with QSC DataPort Amplifier Audio Input via Terminal Block Inputs DSP 3 Directly Mounted to QSC Amplifiers Networked Control via QSCcontrol Products 24 NOTE External accessory power supply may be...

Page 25: ...DSP 3 Remotely Mounted connected to any Non DataPort Amplifier Audio Input via Terminal Block Inputs Section 2 Installation Application Examples 25...

Page 26: ...io signals to the inputs Damage to equipment may result if these recommendations are not followed The last applied configuration that is running in the DSP 3 when it is turned off becomes the active c...

Page 27: ...l see appendix Cable type QSC DataPort cable Qualified length 2 meters Daisy chain output 2 1 per channel Connector Phoenix style a k a Euro style detachable terminal blocks Type Electronically balanc...

Page 28: ...50 Celsius Accessory External Power Supply AC Input Voltage 80 240 VAC AC Input Current 0 3 Amps rms Frequency 50 to 60 Hz Output Voltage 15 VDC Output Current 300 milliamperes Output Termination Det...

Page 29: ...compression ratio 29 Contact Closure I O The DSP shall provide a trigger input usableforcontact closure orother purposewhichshall be CMOS TTL signal compatible Power Supply The DSP shall be provided p...

Page 30: ...not intended for inter face to other manufacturer s equipment 30 Note Powerlight 6 0 and Powerlight 9 0 amplifiers require that pin 9 be removed from the remote mounting interconnect cable Amplifier...

Page 31: ...ain Relief Phoenix Contact 17 76 16 8 Phoenix Contact is the trademark of Phoenix Contact Inc Middletown PA Riacon is the trademark of RIA electronic Inc Eatontown NJ On Shore Technology is the tradem...

Page 32: ...adequate power supply voltage to the module requiring the use of the same type of external DC supply as used with Powerlight amplifiers The amps in questionwillhaveaserialnumberPRIORto0899XXXXX where...

Page 33: ...particularfilepathisassociatedwiththealgorithms now loaded in the DSP 3 When you connect a DSP 3 to a computer the Signal Manager software first attempts to locate and display the configuration file t...

Page 34: ...Technical Services 714 957 7150 or 800 772 2834 toll free U S A only ADDRESS QSC Audio Products Inc 1675 MacArthur Boulevard Costa Mesa CA 92626 1468 USA Disclaimer QSC Audio Products Inc is not liabl...

Page 35: ......

Page 36: ...alifornia 92626 USA PH 714 754 6175 FAX 714 754 6174 Copyright 2001 QSC Audio Products Inc QSC is a registered trademark of QSC Audio Products Inc Costa Mesa CA QSC and the QSC logo are registered wit...

Reviews: