


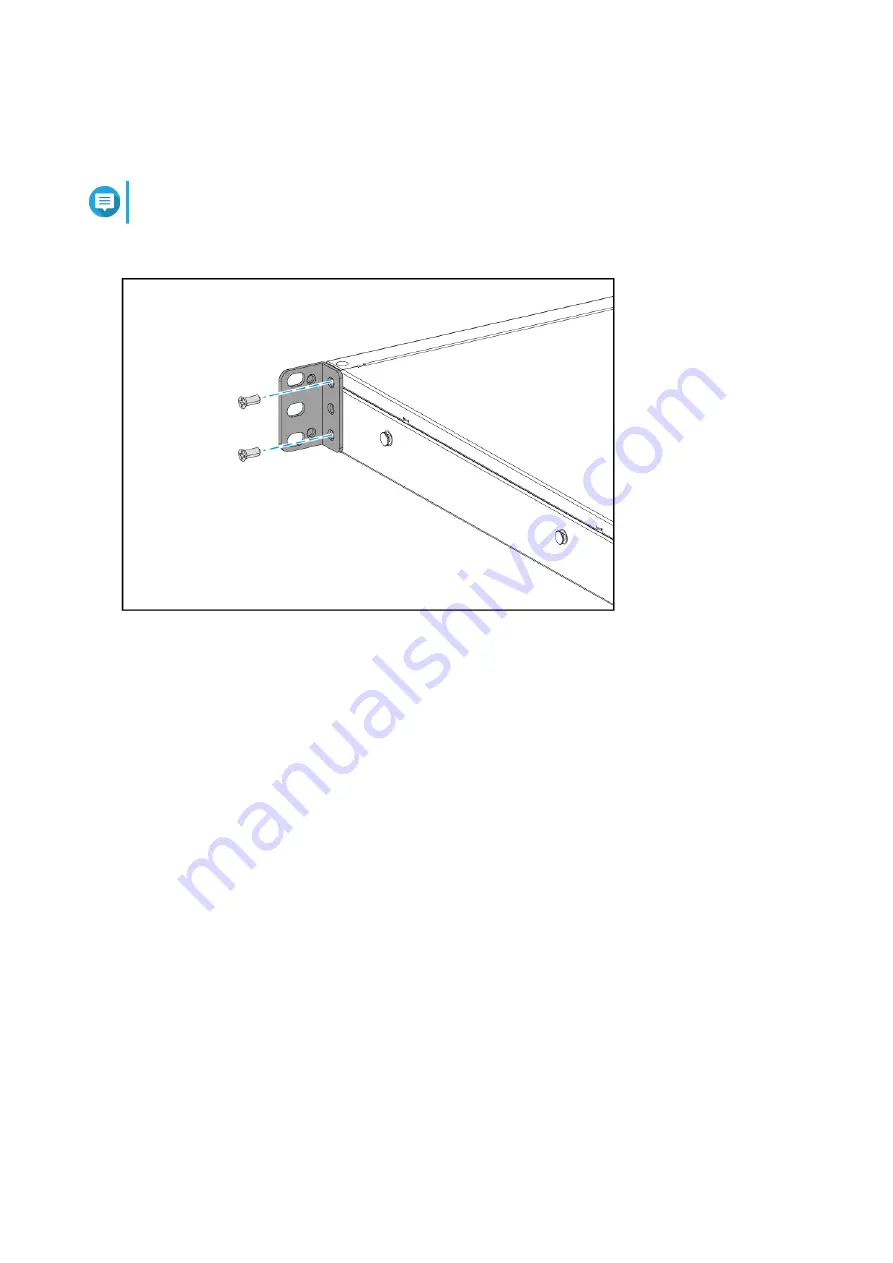
5. Install the angle bracket on the device.
a. Align the holes on the angle bracket with the holes on the chassis.
Note
Ensure that the handle faces the same direction as the front panel.
b. Attach the screws to lock the angle bracket to the chassis..
6. Install a second handle on the other side of the chassis.
7. Connect all cables and external attachments.
8. Connect the power cord to the electrical outlet.
9. Power on the device.
Connecting the Switch to a Computer or Network
You can connect the switch to a computer or local area network. For details, see the following topics:
•
Connecting the Switch to a Computer
•
Connecting the Switch to a Network
Connecting the Switch to a Computer
Connecting the switch to a QNAP NAS allows you to expand storage capacity and back up data to another
NAS through network cable connections to a PoE or host port on the switch. However, you must connect the
switch to a computer to configure the settings.
1. Power on the switch.
2. Connect the switch to a computer.
a. Connect a network cable to the host port on the switch.
QSW-M2106R User Guide
Installation and Access
10


