background image


20 

Operation Manual of Intelligent High Speed Dome Camera 

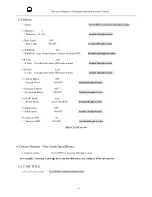
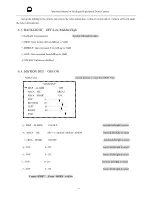
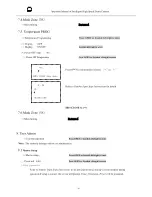
5.5.Others 


<<

 Others


Press OPEN or Joystick left/right to enter


.Sharpness            5


 <<

 Sharpness


(0~15)


Joystick left/right to select 

.Back Light                      OFF


 <<

 Back Light             


ON/OFF


Joystick left/right to select


.WB Mode                                  Auto               


<<

 WB Mode


Auto/Manual/Indoor/Outdoor/OnePush/ATW


Joystick left/right to select


R Gain                                        Auto


 <<R

 Gain


It is adjustable under WB mode manual


Joystick left/right to select


.B Gain                                      Auto


 <<B

 Gain


It is adjustable under WB mode manual


Joystick left/right to select 


.Vertical Mirror


OFF 


 <<

 Vertical Mirror


ON/OFF


Joystick left/right to select   

.Horizontal Mirror                    OFF 


 <<

 Horizontal Mirror


ON/OFF


Joystick left/right to select


.IR SW Mode                            Auto


 <<

 IR SW Mode


Auto/Color/B/W                 

Joystick left/right to select


.Stabilization                            OFF


<<

 Stabilization


ON/OFF


Joystick left/right to select 

.Function OSD                          ON           


 <<

 Function OSD


ON/OFF


Joystick left/right to select 

IRIS CLOSE to exit 


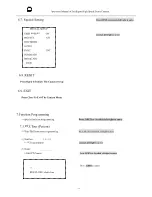
6.Camera Options

For 4 inch SpeedDome


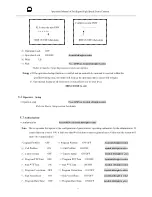
<< Camera options   


Press OPEN or Joystick left/right to enter 

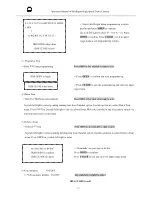
For example: Samsung Camera

the menu has differences according to different cameras. 

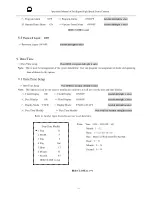
6.1.CAM TITLE


<< The Title of the camera          Press OPEN or Joystick left/right to enter 


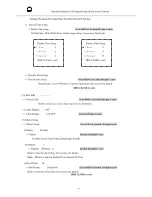
Summary of Contents for PTZ

Page 1: ...3 Intelligent High Speed Dome...

Page 2: ...High Speed Dome Camera Intelligent High Speed Dome Camera Operation Manual English Version Please read this manual carefully before installation and use Announcement This manual will be subject to rev...

Page 3: ...s should be prevented Otherwise may cause damage to the product 4 Please do not remove or disassemble any internal parts of dome video camera by self in order to avoid normal usage being impacted Ther...

Page 4: ...Install camera 7 V Connect the power of dome device 7 VI Controller setting 7 VII Start testing 7 VIII Complete the test Summary 7 Chapter Four English Operation Menu of Dome Device 9 I Operation Ins...

Page 5: ...de IP66 outdoor type 13 Adopts long distance RS 485 transmission mode 14 Transmission speed i e baud rate is selectable Set by the fifth and sixth bit of the on and off switch of the dome device 2400b...

Page 6: ...nistrator and general operators 17 Operation authorization Administrator can perform setup of respective authorities for general operators 18 Display setting of date time 19 Assignment programming tim...

Page 7: ...Interphase Color Orange RS485A Yellow RS485B BNC Video Output RedBl ack Description about Connections for Alarming Function No 1 Alarm Input Red and White No 2 Alarm Input Yellow and White No 3 Alarm...

Page 8: ...pply to the dome device RS 485 Bus It is for the control signal RS 485 signal output of controller connecting to the communication input terminals of control cable of each dome device Video It is for...

Page 9: ...F OFF OFF ULTRACK OFF OFF ON OFF VICON OFF OFF OFF OFF On Off status Baud rate 5th digit 6th digit 2400 OFF OFF 4800 OFF ON 9600 ON OFF 19200 ON ON This figure shows protocol of PELCO D Baud rate of 2...

Page 10: ...III Setting dome device address The figure shows Address of the dome device No 1 Please refer to detailed parameter in next chapter This dip switch located on PCB in the dome device Set address for d...

Page 11: ...identical with that of the dome device VII Start testing When all the above are ready the testing to dome device can be started 1 Direction control test of dome device 2 Zooming control test of camer...

Page 12: ...8 Operation Manual of Intelligent High Speed Dome Camera...

Page 13: ...mber Input Steps Instructions 1 Joystick left right for the cursor to select the data bit to be entered 2 Press OPEN to confirm and the number selection cursor would open and display as indicated in t...

Page 14: ...e correct 6 digits passwords as above After the input is completed press CLOSE Input the iris CLOSE command Error will be prompted on screen if the input is wrong The screen will directly enter into t...

Page 15: ...SET Set preshot Press OPEN or Jovstick left right to enter Move the cursor to select preset position Press CLOSE to finalize your selection The screen displays Stored and return to the previous menu t...
Page 16: ...right to enter Number 1 Number selection 1 8 Joystick left right to select Name _ _ _ _ _ _ _ _ Name editing Press OPEN or Joystick left right to enter Press OPEN to enter Are you sure to do this IRIS...
Page 17: ...Joy stick left or right to select 0 9 or A Z Press OPEN to confirm selection Press CLOSE to exit to upper stage menu when programming is done Setup tilt start point Press OPEN or Joystick left right...

Page 18: ...ess OPEN or Joystick left right to enter 3 1 Set Pan and Tilt Pan Tilt setup of dome device Press OPEN or Joystick left right to enter Pan Reverse OFF Pan Reverse ON OFF Joystick left right to select...

Page 19: ...left right to select 3 4 Auto Flip ON Auto flip On Off Joystick left right to select 3 5 Auto Focus PTZ Auto focus options PTZ Off Z Joystick left right to select 1 255 001 0123456789 IRIS CLOSE when...

Page 20: ...rating authority on this option is only limited to the administrator with correct password As to administrator password input refer to Number Input Steps Instructions 4 1 Clear Memory Clear data in th...

Page 21: ...k left right to selectit can be set only by the R W mode of the comm seting Baud Rate 1 Baud Rate Of The Dome Joystick left right to selectit can be set only by the R W mode of the comm seting Camera...

Page 22: ...ed 7 Zoom Speed 1 8 Joystick left right to select Digital Zoom OFF Digital Zoom ON OFF Joystick left right to select AF Sensitivity High AF Sensitivity High Low Joystick left right to select IRIS CLOS...

Page 23: ...r Number 1 Number 1 24 Joystick left right to select Mask Edit Mask Edit Press OPEN or Joystick left right to enter Mask Display ON Mask Display ON OFF Joystick left right to select IRIS CLOSE to exit...

Page 24: ...ual Joystick left right to select Vertical Mirror OFF Vertical Mirror ON OFF Joystick left right to select Horizontal Mirror OFF Horizontal Mirror ON OFF Joystick left right to select IR SW Mode Auto...

Page 25: ...mode under broad color temperature ATW INDOOR Use this mode under limited color temperature Choose END Press OPEN to Exit MANUAL Manual White Blance Joystick left right to select Joystick left right...

Page 26: ...LC function is disabled 6 4 MOTION DET OFF ON Mask Color Joystick left right to select Press OPEN Enter DISP ALARM ON OFF Joystick left right to select AREA SEL AREA1 AREA2 AREA3 AREA4 Joystick left r...

Page 27: ...tick left right to select DISP ZOOM MAG OFF ON Display available figure for zoom in out on screen ZOOM POS INIT OFF ON Initiate the zoom position Joystick left right to sel LENS INIT Initiate the lens...

Page 28: ...rogramming Special function programming Press OPEN or Joystick left right to enter 7 1 PTZ Tour Pattern Pan Tilt Zoom tour programming Press OPEN or Joystick left right to enter Number 1 3 PTZ tour nu...

Page 29: ...Joystick up down to select Delete a Tour menu Press OPEN or joystick left right to enter Name Display ON OFF PTZ tour name display On Off Joy stick left or right to select IRIS CLOSE to exit Are you...

Page 30: ...nter the selection Joystick left right when programming to select preshot and press OPEN to confirm Joy stick left or right to select 0 9 Press OPEN to confirm Press CLOSE to exit or return to upper s...

Page 31: ...ing Press OPEN or Joystick left right to enter Functional Description The product has totally 8 channels of alarm input and 2 channels of alarm output User can achieve a strong alarm mechanism and ear...

Page 32: ...nput Steps Instructions for details E Lable Display OFF Lable display ON OFF Joystick left right to select F Matter Setup Matter Setup Press OPEN or Joystick left right to enter a Matter PreShot Matte...

Page 33: ...lly the manual scan will be stopped for alarm execution It will enter the next round of alram only when alarm is disabled Situation 2 It will disable the alarm during non operation time Situation 3 Wh...

Page 34: ...eps Instructions for details IRIS CLOSE to exit 7 6 Mask Zone NA Mask Setting Reserved 8 User Admin User Management Press OPEN or Joystick left right to enter Note The authority belongs only to the ad...

Page 35: ...nter Note The setup under this option is the configuration of general users operating authorities by the administrator If certain function is set as ON it indicates that this function is open to gener...

Page 36: ...ess OPEN or Joystick left right to enter Note This option is used for the users to modify date and time as well as to set the date and time display Clock Display ON Clock Display ON OFF Joystick left...

Page 37: ...r Refer to Number Input Steps Instructions to set number Note Number is invalid to PanScan and DayNight optional fucntion it is used to select certain specific preset point and the track when PreShot...

Page 38: ...f 60 seconds under non menu status it would re enter into shutdown status E The priority of Assignment is higher than that of the Power Timer Namely assignment will be first executed no matter it is u...

Page 39: ...91 Invokes the Flashback Function PreShot 92 Call 92 Administrator Logon PreShot 93 Call 93 Operator Logon PreShot 94 Call 94 Restart Dome Power Supply Set No 94 preshot as power supply for shutting...

Page 40: ...default cruise track The device will auto scan point by point from No 1 preset position to No 16 preset position If certain position has not been preset or been cleared after preset cruise track will...

Page 41: ...eed changes along with the automatic regulation of change in magnification by inverse ratio Automatic Flip 10 degree forward tracking after 180 degree automatic flip when dome reach vertical 90 degree...

Page 42: ...istorted character or image Interfered by exterior electronic signal noise or the camera is directed to the monitor screen Grounding the dome device or shut off the surrounding big electronic devices...

Page 43: ...Insensitive control of dome device Overload or too long distance transmission Add driver Mostly happen in the connection Improper contact of control cable Check the circuit Slip ring is damaged Repla...

Page 44: ...40 Operation Manual of Intelligent High Speed Dome Camera...

Reviews: