4
5
About PTZ
The term “PTZ” means Pan-Tilt-Zoom, and describes a camera that can rotate, elevate and zoom in
on a subject. Some cameras, such as the QD6505P, only feature the pan and tilt functions, making
them Pan-Tilt cameras. Throughout this manual we will refer to the PTZ operations. The basic
operations are identical regardless of whether your camera has the zoom feature.
BEFORE YOU BEGIN
You will need:
1. A surge protector
We STRONGLY recommend that you use one that has the following specifications:
• UL-1449 Rated
• Clamping voltage of 330 or lower
• Joule rating of at least 400
• Response time of 10 nanoseconds or less
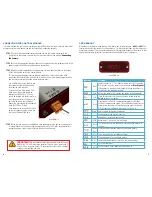
2. A small, Phillips-head screw driver to secure the control wires from the camera into the RS485
module on the Control Module.
INTRODUCTION
This quick-start guide is written for the QD6531Z and QD6505P speed dome cameras with remote
control and was accurate at the time it was completed. However, because of our ongoing effort to
constantly improve our products, additional features and functions may have been added since that
time. We encourage you to visit our website at
www.Q-See.com
to check for the latest firmware
updates and product announcements.
This guide is intended to assist you in adding the remote control function to your camera. Complete
instructions on setting up your PTZ camera itself are included in the accompanying user manual for
your camera.
Throughout the manual we have highlighted warnings and other important information that will assist
you in operating your new system in a safe and trouble-free manner. Please take the time to read and
follow all instructions and pay attention to alerts as shown below:
NOTE!
Text in blue boxes with the Information icon offer additional
guidance and explanations about how to make the most out of your system.
IMPORTANT!
Red boxes with this icon indicate warnings. To prevent
possible injury or damage to the product, read all warnings before use.
NOTE!
If you have your DVR set to record when motion is detected, the movement
of the PTZ camera will trigger recording as well as any alerts that you have set up,
creating the potential for multiple false alarms. Depending upon your situation and
specific needs, you should disable alarms, e-mail alerts and other notifications relating to motion
detection for the specific channel that your PTZ camera is connected to. You may also wish to
change the recording schedule, speed and/or quality for this channel to save disk space, if needed.
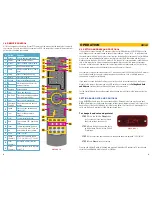
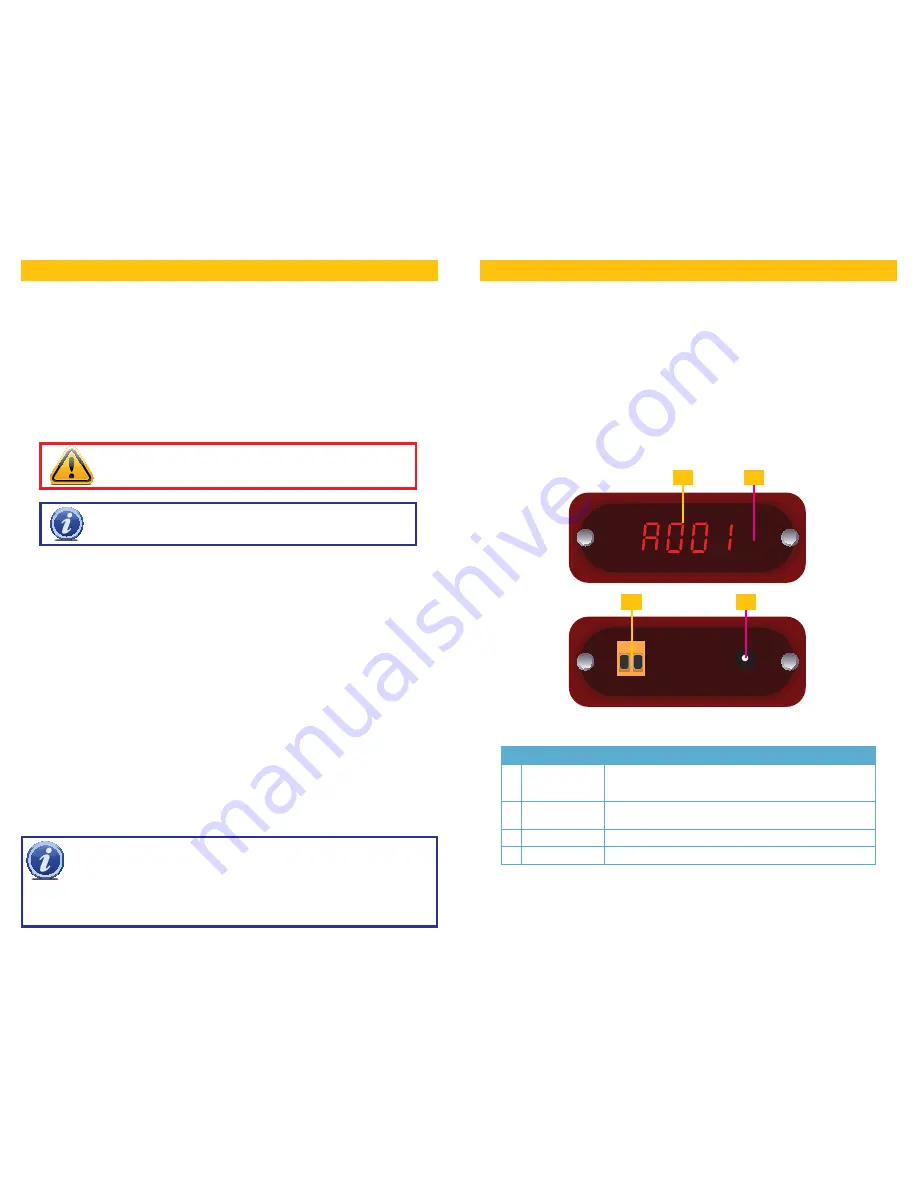
The controller for your camera consists of two parts; the Remote Control, and the Control Module
which contains the infrared receiver as well as a digital readout. The control wires from your camera
connect to ports on the back of the module.
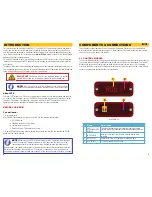
1.1 CONTROL MODULE
The Control Module receives the signals from the Remote Control and transmits control instructions to
the camera through the wires connected to the RS485 block at the back of the module. The Control
Module does not have any control over the video signal sent from the camera as that is delivered
directly to the DVR or monitor. All settings are actually stored in the camera itself, the Control Module
serves to communicate your instructions to your camera.
COMPONENTS & CONNECTIONS
CHAPTER 1
PICTURE 1-1
# Name
Description
1 LED
ALPHA-NUMERIC
DISPLAY
This digital readout displays information regarding camera
address, preset point number, surveillance pattern number, etc.
2 IR RECEIVER
Receives commands from Remote. Located behind front
faceplate.
3 RS485 PORT
Control wires from PTZ camera are connected here.
4 POWER INPUT
12V power supply connects here.
2
3
4
1


