Pyxis SP-350P User Manual Download Page 20

11

Device Maintenance and Precaution

11.1

Maintenance Best Practices and Quick Tips

For greatly increased working life and ease of use of the SP-350P follow the list of maintenance best practices
and quick tips below:

• Rinse the sample cell at least three times with the desired solution before turning on.

• After a successful calibration, the unit does not automatically return to the measurement mode. If

Exit is held down too long the unit will power down rather than returning to the measurement mode.

• After returning to measurement mode after calibration, rinse several times with the first sample. The

unit will continue to read the sample values without any further key presses if it has not powered off.
If there are no key presses for 20 seconds the screen will darken, and after another 20 seconds without
key activity will power down. The press of any key while the screen is dark will reset the timer and
the screen will re-light. (This press will not step along the calibration process; the next press needed
will still be required in the sequence).

• Always rinse the unit with clean water after use and dry by clean tissue or paper towel.

11.2

Methods to Cleaning the SP-350P

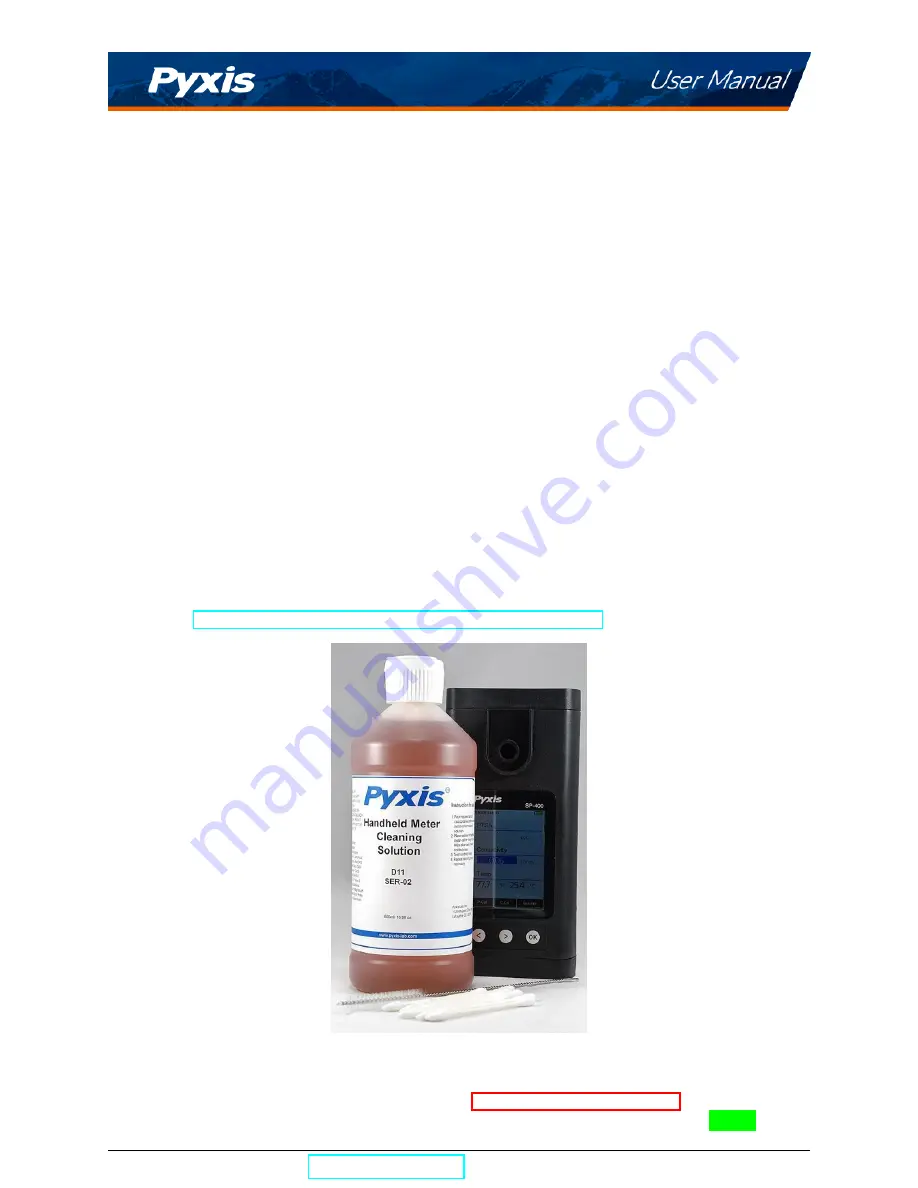
A light deposit on quartz glass inside the conductivity cell can be cleaned by a Q-tip. Aged heavy deposi-
tion, especially iron oxide deposited, can be removed using a cleaning solution that is capable of removing
iron, such as the Pyxis Handheld Device Cleaning Solution Kit (P/N: SER-02) available from Pyxis online eS-
tore/Catalog

https://pyxis-lab.com/product/handheld-device-cleaning-kit/

.

Figure 22.

Handheld Device Cleaning Solution Kit

To clean the SP-350P pour cleaning solution into the sample cell for 10 minutes. Rinse the sample cell with
distilled water and use the Cleanliness Check (see the

Sample Cell Cleanliness Check

section) to confirm

that the SP-350P is clean. Repeat the process as needed until the Cleanliness Check shows

Clean

.

SP-350P User Manual

[email protected]

| +1 (866) 203-8397

17

Summary of Contents for SP-350P

Page 1: ......

Page 2: ...uorescent Polymer Handheld User Manual October 12 2020 Rev 2 00 Pyxis Lab Inc 1729 Majestic Dr Suite 5 Lafayette CO 80026 USA www pyxis lab com 2017 Pyxis Lab Inc Pyxis Lab Proprietary and Confidentia...

Page 3: ...8 Device Information and Diagnosis 8 8 1 Sample Cell Cleanliness Check 9 8 2 Bluetooth Connection to Devices 10 8 3 Factory Reset 10 9 Use with uPyxis Mobile App 11 9 1 Download uPyxis Mobile App 11...

Page 4: ...13 Contact Us 18 SP 350P User Manual service pyxis lab com 1 866 203 8397 1...

Page 5: ...elivery All service interventions are to be reviewed and authorized as correct and complete at the completion of the service by a customer representative or des ignate Pyxis warrants these services fo...

Page 6: ...th the cuvette are eliminated Large color graphic screen that can be read in direct sunlight 2 Specifications Table 1 SP 350P Specifications Item Specification Part Number P N 50228 Fluorescent Polyme...

Page 7: ...ymer 100 ppb PTSA Combined Standard 500 mL 21055 Pyxis 10 ppm Fluorescent Polymer Calibration Standard 500 mL 21054 Pyxis 20 ppm Fluorescent Polymer Calibration Standard 500 mL 21053 Pyxis Handheld Cl...

Page 8: ...and negative terminal signs in the compartment bottom snap four new AA alkaline batteries firmly into the battery holder 4 Replace the battery compartment cover and ensure that the sealing O ring is l...

Page 9: ...reading accuracy Before beginning a measurement use the sample water to rinse the sample cell at least three times Allow 5 10 seconds for the SP 350P to stabilize Figure 2 For a sample containing 10...

Page 10: ...zero blank calibration 6 If the calibration succeeds a checkmark and instructions for the slope calibration will appear Figure 4 7 Rinse the sample cell three times with the desired Fluorescent Polym...

Page 11: ...dule also shown Press Diagnosis or to launch the SYSTEM DIAGNOSIS screen where raw measurement data are displayed Figure 7 The information has no use for normal operation but instead is used for devic...

Page 12: ...DEVICE INFORMATION screen 3 Press Diagnosis or to launch the SYSTEM DIAGNOSIS screen 4 Allow5 10secondsforthe messagein the top rightcornerof thedisplaychangefrom Starting BTLE to BTLE Started 5 Press...

Page 13: ...r b The uPyxis Desktop App see the Use with uPyxis Desktop App section 8 3 Factory Reset Use the following steps to restore all device parameters to factory default 1 Power on the SP 350P by pressing...

Page 14: ...h on your mobile phone Do not pair the phone Bluetooth to the SP 350P Open uPyxis Mobile App Ensure that the SP 350P is discoverable by following the steps in the Bluetooth Connection to Devices secti...

Page 15: ...en connected the uPyxis Mobile App will default to the Setting screen From the Setting screen the user can set the Power off time and Screen off time in seconds Figure 15 SP 350P User Manual service p...

Page 16: ...the entire duration of the update Once the update is complete the SP 350P will reboot which will disconnect the SP 350P from the uPyxis Mobile App Figure 16 10 Use with uPyxis Desktop App 10 1 Instal...

Page 17: ...Pyxis installation 10 2 Connecting to uPyxis Desktop App Ensure that the SP 350P is discoverable by following the steps in the Bluetooth Connection to Devices section Once the app is open to find your...

Page 18: ...e firmware file contact service pyxis lab com for these firmware files and clicking Upgrade Firmware NOTE The firmware update process takes some time and will require the SP 350P to stay within range...

Page 19: ...onth The SP 350P will then populate any relevant log event from the selected datalog which can be viewed in more detail by clicking Read Datalog deleted by clicking Delete or exported by clicking Expo...

Page 20: ...reset the timer and the screen will re light This press will not step along the calibration process the next press needed will still be required in the sequence Always rinse the unit with clean water...

Page 21: ...he following measures Reorient or relocate the receiving antenna Increase the separation between the equipment and receiver Connect the equipment into an outlet on a circuit different from that to whi...

Reviews: