background image

Copyright @ 2011 PurGro Electronics, LLC 

All Rights Reserved 


Page 34 of 47 


Summary of Contents for GroBot Evo 3.12

Page 1: ...Copyright 2011 PurGro Electronics LLC All Rights Reserved Page 1 of 47 GroBot Evolution Robotic Automation for Hydroponic Growers December 26 2011 GroBot Evo 3 12 ...

Page 2: ...r 14 External Devices Part I 15 External Devices Part II 17 Nutrient Pumps 19 EMAIL 21 Email 21 Internet 22 Security 23 SETUP PART I 25 Date Time 26 pH 26 TDS 26 SETUP PART II 27 Channel Test 28 Cleaning Cycle 28 Update 28 Reboot 28 CONNECTING EXTERNAL DEVICES 29 PUTTING YOUR GROBOT EVO ON THE INTERNET 30 WIRELESS PANELBOARD 35 TECHNICAL DATA PERIODIC MAINTENANCE 37 UPDATE RATE AND ACCURACY 37 SOF...

Page 3: ...Copyright 2011 PurGro Electronics LLC All Rights Reserved Page 3 of 47 TROUBLESHOOTING 41 OTHER GOODIES YOU MIGHT WANT 46 EXTRA DOSING CONTAINERS 46 WIRELESS PANELBOARD 46 TRADEMARKS 47 WARRANTY 47 ...

Page 4: ...you printed this manual yourself keep in mind that it s intended to be a spiral bound book so the pages with the screenshots are next to the pages with the text about them Makes it easier FIRST Make sure you ve got everything GroBot EVO controller Plug in wall transformer pH probe TDS probe Water level sensor Pluggable Relay Circulating pump Replacement silicone o rings and sealing washers for dos...

Page 5: ...network to come online then Search for wireless networks in range on your computer or phone EVO makes it s own wireless hotspot so look for it like you were connecting to a new network like in the pic below Connect to the one that says GroBot EVO Open Firefox and check out your new GroBot EVO Doesn t matter what URL you enter this network only goes one place While you have the GroBot up and runnin...

Page 6: ... s female NPT threads The pump input is on the LEFT the return to your reservoir is on the RIGHT Leave the pump unplugged you ll be doing that next Mount the Water Level sensor down low near the bottom of your reservoir The BEST way to do this is to drill a hole in the side of the res and install a bulkhead fitting with NPT threads Screw the sensor into the fitting and tighten it down If that s no...

Page 7: ...the circulating pump and check for leaks NOTE pH sensors are best stored wet If you are going to shutdown your GroBot s circulating pump for more than a day or so remove the sensor and put it in a storage solution For each external device fan light CO2 valve pump configure a Pluggable Relay and plug it in to power Make sure to test each channel on the Setup page before firing up the system in Grow...

Page 8: ...Left to Right since the sensor is on the left Fire up the circulating pump that came with your EVO and make sure nothing leaks and everything is clean and secured Pump pressure comes in on the left return hose to your res on the right Make sure there is nothing else in the return hose like a chiller that could cause backpressure on the EVO So Your GroBot Evo should now be powered up wireless netwo...

Page 9: ...o use on a laptop although you can scroll through them on your mobile if need be We recommend using a laptop to set everything up and then use your phone or whatever you like best to run and monitor the system During setup the more you can see the easier it is Home The Home page shows today s date and time and a run down of what s going on in the grow room or greenhouse From here you can look at t...

Page 10: ...ns into the Stopped symbol GroBot does a few things to stabilize the system before just stopping cold Fill Channel Drain Channel Foliar Pump Nutrient Pump if using Ebb Flow CO2 Heat Cool Humidify and Dehumidify Channels are powered OFF so you can work on them All other channels stay in whatever state they were in so if you re running an Aeroponic or DWC system GroBot s not going to shut down your ...

Page 11: ...or Axis come with a pile of software so you can set up as many as you like arrange them in a matrix zoom in and out etc The Axis even has audio so you can talk back and forth to someone in the room When you click on Cameras the Bot brings up the URL you specified which will drive over to your camera page Enter whatever URL you are using to view your camera per the cameras instructions GroBot Sunfl...

Page 12: ...Copyright 2011 PurGro Electronics LLC All Rights Reserved Page 12 of 47 This page is also blank ...

Page 13: ...is where you are in the Grow Calendar Week 3 Day 6 is a lot more meaningful to a growing plant than 15 December Enter a week from 1 16 and a Day from 1 7 Grow Hour is the same as the hour on the clock UNLESS you are running a shorter than 24 hour day as some growers do This is the hour in your current Grow Day which might be only 18 hours long Set this to the current Grow Hour if you need to adjus...

Page 14: ...eding pH GroBot will maintain any pH setting between 3 0 and 9 0 for you A blank pH target means leave it alone and GroBot will not attempt to control pH for that week PPM Set your PPM nutrient concentration target for this week here Enter a number between 100 and 3000 and GroBot will maintain this level for you too A blank or zero PPM target means Don t do anything here and GroBot will not inject...

Page 15: ...cs LLC All Rights Reserved Page 15 of 47 External Devices Part I This panel has all the details on how your Grow Room is set up and what s connected where The documentation is right on the screen but a few tips that may come in handy ...

Page 16: ...o this so changing your Grow Calendar doesn t do things you wouldn t want or expect Foliar Feed is based on an every N day cycle which starts counting On Grow Day 1 Keep in mind this is based on Grow Days which may have less than 24 hours Heating and Cooling can use either a GroBot Thermostat interface which wires up just like a regular thermostat to your HVAC system or individual Pluggable relays...

Page 17: ...Copyright 2011 PurGro Electronics LLC All Rights Reserved Page 17 of 47 External Devices Part II ...

Page 18: ... reservoir Drain Refill counts down the number of days until drain and starts that cycle at whatever time you specify You choose a number of days from now to repeat the cycle GroBot EVO drains your res until it gets to 2 inches of water then keeps draining until there is no change in level for approximately three 3 minutes This allows GroBot to pump the res dry without burning up your pumps You ha...

Page 19: ...cs LLC All Rights Reserved Page 19 of 47 Nutrient Pumps Your GroBot EVO has four removable dosing containers and you can add another four by plugging in an external dosing rack This panel is where you set up what s in each container ...

Page 20: ...th and treat them as one container Just the thing for A B nutes or things you use a lot of Dosing Ratios are really very nice to work with If you have Nutrients that you mix A B or A B C with additives just enter the ratios from the supplier and you re all set GroBot will inject them according to ratio every time it needs to raise PPM Just type in your formula and the Bot will mix it that way pH c...

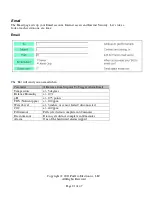
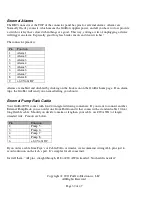
Page 21: ...ime Email The Bot will send you an email when Parameter Difference from Setpoint To Trigger Alarm Email Temperature 5 degrees Relative Humidity 10 pH 0 75 points TDS Nutrient ppm 100 ppm Water Level 3 inches or sensor failed disconnected CO2 400 ppm Fill timeout Fill cycle did not complete in 60 minutes Drain timeout Drain cycle did not complete in 60 minutes Alarm One of the hardwired alarms trip...

Page 22: ...hanged if you have more than one Bot SSID is the name of the network you want the GroBot EVO to join or the name of the network you want it to create in Stand Alone mode Type can be Join an Existing Network or Stand Alone to connect the Bot directly Security can be one of many types supported Key is the security key if used If NOT used set to 0 Region defines which channels are OK to scan Pick USA...

Page 23: ...dmin password you can set so that people can watch your grow but not change anything without logging in This is the password on the home page where it says Login If you don t set one anyone who has access to the page can change anything great for open access in a secure facility If you re going to be on the Internet we suggest locking down changes and using an Admin password GroBot does not announ...

Page 24: ...Copyright 2011 PurGro Electronics LLC All Rights Reserved Page 24 of 47 Except for these words this page is appears to be blank as well ...

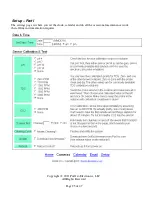
Page 25: ... 2011 PurGro Electronics LLC All Rights Reserved Page 25 of 47 Setup Part I The settings page is where you set the clock calendar and do all the occasional maintenance work that all fine instrumentation requires ...

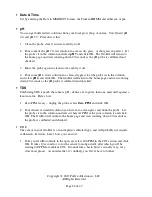
Page 26: ...nd start counting down 20 seconds as the pH probe is calibrated and checked TDS Calibrating TDS is much the same as pH define a zero point then one measured against a known value Here s how 1 Zero PPM is easy unplug the probe select Zero PPM and click OK 2 Pour whatever standard solution you have into a clean glass and dunk the probe Let the probe sit in the solution and select whatever PPM value ...

Page 27: ...Copyright 2011 PurGro Electronics LLC All Rights Reserved Page 27 of 47 Setup Part II ...

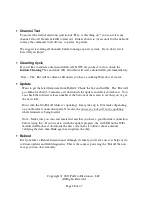
Page 28: ...the box and hit OK The Bot will go offline for about 3 5 minutes as it downloads the update installs it and reboots You can check the software release number at the bottom of the screen to see that you ve got the new stuff Don t turn the GroBot off while it s updating It may take up to 10 minutes depending on your Internet connection speed Note also the onscreen clock will not be updating while fi...

Page 29: ... Lights 2 Secondary Lights 3 Mother Room Lights 4 Foliar Feed Pump 5 Heat 6 Cool 7 Humidify 8 Dehumidify 9 CO2 Generator 10 CO2 Purge Fan 11 Nutrient Feed or Aeroponic Pump 12 Drain Pump 13 Fill Valve Dosing and pH Control is wired internally Setting Channel Switches The Channel switches are set them from top to bottom To set channel 4 set the top switch to 0 the bottom to 4 To set channel 12 set ...

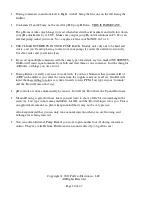
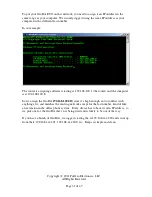
Page 30: ...ter hands out IP addresses which are like phone number for computers every device has to have it s own You can find your computer s IP address in Windows by running the command IPCONFIG by clicking on Start and Run Like this After you click OK you get a command window where you can enter the command IPCONFIG You should get a screen that looks like this Your screen may have a LOT more stuff on it d...

Page 31: ...the router and the computer is at 192 168 100 8 So we assign the GroBot 192 168 100 210 since it s high enough not to conflict with anything else and matches the existing network except for the last number kind of like an extension in the office phone system Every device has to have its own IP address so we pick one for the GroBot that s not being used and is likely to be out of the way If you hav...

Page 32: ...ed IP is the one we picked earlier Note 192 168 100 210 is the default IP as shipped from PurGro Gateway IP is the Router address we got from Windows earlier Netmask indicates anything that doesn t match the first three sets of numbers in the IP address will get handed to the router to go out over the Internet DNS is the IP address of the Domain Name Server for looking up websites like PurGro com ...

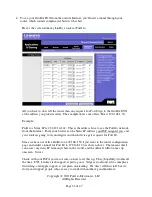
Page 33: ... your browser at the Static IP address your ISP assigned you and your router is going to try and figure out which device gets requests for Port 80 Since we have our office GroBot on 192 168 1 50 I just went to the router configuration page and added a tunnel for Port 80 to 192 168 1 50 as shown above That means that I can access my static IP from anywhere in the world and the office GroBot comes u...

Page 34: ...Copyright 2011 PurGro Electronics LLC All Rights Reserved Page 34 of 47 ...

Page 35: ...he same room Set this to 1 if you only have one GroBot Channel You choose the first channel and each relay is numbered after that one If you choose channel 1 the relays from top to bottom are on channels 1 8 If you choose channel 11 the relays are on 11 18 To keep it simple we suggest channel 11 just set em both to 1 Your GroBot can control Primary Lights Secondary Lights Mother Room Lights Foliar...

Page 36: ... Power The Panelboard runs on 120 volts AC and you need to wire the connector at the top left of the board that s labeled 120V to a 120v circuit to power it up The green power LED will light and the red LED on the radio will flash every so often Wiring Eight 8 Double Pole Relays Each relay has two terminals on the left and two on the right You can connect incoming power from a circuit breaker the ...

Page 37: ...will do her best to let you know when a sensor isn t to be believed by showing onscreen pH is reported to the nearest 1 10 of a point Nutrient level is reported as Total Dissolved Solids in parts per million to the nearest 10 ppm This is calibrated using whatever solutions you used typically the NaCl scale where PPM 500 EC CO2 is also reported to the nearest 10 PPM Sensors are sampled at 40 Hz and...

Page 38: ...wear out Here s how to keep yours in top shape Clean the probe every three months Use a commercial cleaning solution and a toothbrush Recalibrate the probe every three months and you ll always read accurately We recommend verifying calibration rather than just redoing it since the EVO probes don t drift much Atlantis Hydroponics ran almost TWO YEARS and counting without having to recalibrate Repla...

Page 39: ... are enabled and disabled by clicking on the Lock icon on the GroBot home page If an alarm trips the GroBot will send you an email telling you about it External Pump Rack Cable Your GroBot EVO comes with four 4 integrated dosing containers If you want to connect another External Pump Rack you can order one from PurGro and it that comes with a standard cable 10 foot long flexible cable Should you d...

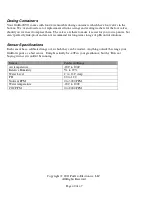
Page 40: ...u to swap nutes but aren t perfectly leak proof and are not recommend for long term storage of pH control solutions Sensor Specifications Each sensor has a calibrated range over which they can be trusted Anything outside this range your GroBot reports as a bad sensor It might actually be 40F in your greenhouse but the Bots not buying it since it wouldn t be running Sensor Calibrated Range Air temp...

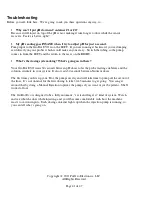
Page 41: ... What s the dosing system doing What s going on in there Your GroBot EVO waits 30 seconds between pH doses to let the probe readings stabilize and the solution circulate in your system It also waits 30 seconds between Nutrient doses The first time you fire up your Bot the pumps are dry and will take time to pump all the air out of the lines It s not unusual for the first dosing to take 30 45 minut...

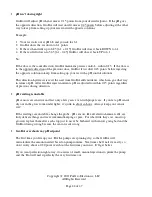
Page 42: ...night be GREEN on later Bots which is also just fine Your EVO will be back in Stand Alone mode and you can connect to it by looking for a wireless network called GroBot EVO Good thing we thought of that eh How do I connect multiple GroBots to the Internet The GroBot EVO has a built in web server and serves pages on port 80 like all web servers If you have a bunch of GroBots you need to assign each...

Page 43: ... t Drain or Fill Make sure you have a Water Level sensor connected and that it s reading correctly If the Bot doesn t know how much water is in the res she won t try to change it possibly flooding your shop I set the Drain or Fill channel but GroBot keeps setting it back to zero You ve got 1 hour to Drain the res You also have 1 hour to Fill it back up If it takes longer than that the Bot assumes ...

Page 44: ...ot adds nutrients which can go either way in terms of pH After GroBot injects nutrients pH is adjusted to within 0 15 points regardless of previous dosing direction pH reading is unstable pH sensors are sensitive and last only a few years even with proper care If you let a pH sensor dry out in the grow room under lights it s junk in about an hour Always keep your sensor wet If the readings are uns...

Page 45: ... free DNS at 8 8 8 8 which is a good one to use Your Gateway is the IP address of your Internet router which you can lookup in Windows by clicking Start Run and entering the command IPCONFIG My Nutrient jar dried out and the pumps are filled with what looks like brown concrete Easy enough to fix just run you dosing containers through the dishwasher You can take the valve apart if you have to by sq...

Page 46: ...gable Relays Plug em in and you re ready to go If you re building a new Grow Room though the Wireless Panelboard is probably going to be cheaper and more flexible The Panelboard has eight 8 big 30 amp double pole relays that you can use to switch eight 240v loads sixteen 120v loads or whatever combination of eight relays with two poles works best for you Think of it as a lighting controller and bo...

Page 47: ...other marks are the trademarks or registered trademarks of their respective holders Warranty PurGro Electronics LLC warrants the GroBot and all supplied products manufactured by PurGro to be free of defects in materials or assembly for a period of one 1 year Products supplied by PurGro and made by other companies carry their respective companies warranties ...

Reviews: