6
THERMAL IMAGING SCOPE
HELION 2 XP50 PRO
DISCRETE DIGITAL ZOOM
The device allows you to quickly increase base magnification (please refer to the Magnification line in the
Technical Specifications Table) by two or four or eight times, as well as to return to the base magnification. To
operate the discrete digital zoom, press successively the DOWN
(8)
button.
QUICK MENU FUNCTIONS
The quick menu allows you to change the base settings (display brightness and contrast) and use the smooth
digital zoom and stadiametric rangefinder.
•
Enter the menu with a short press of the M
(9)
button.
•
To toggle between the functions below, press successively the M
(9)
button.
•
Brightness – press the UP
(10)
/ DOWN
(8)
buttons to change display brightness from 0 to 20.
•
Contrast – press the UP
(10)
/ DOWN
(8)
buttons to change display contrast from 0 to 20.
•
To exit the menu, press and hold the M
(9)
button, or wait 10 seconds to exit automatically.
Note.
Display brightness and contrast settings are saved in the memory when the device is turned off.
•
Smooth digital zoom – press the UP
(10)
/ DOWN
(8)
buttons to change digital zoom value from 2.5x to 20x.
Smooth digital zoom is in 0.1 increments. Smooth digital zoom is in 0.1 increments.
Note.
The actual magnification is the product of the base magnification and smooth digital zoom values. For
example: the device’s base magnification is 3.0x and smooth zoom value is x1.7, so the actual magnification is
5.1x (3.0x1.7).
•
Stadiametric rangefinder
press the UP
(10)
/ DOWN
(8)
buttons to change the distance between
special markers to determine the distance to the observed object. Please refer to section STADIAMETRIC
RANGEFINDER for more details.
•
Base mode
– allows you to select one of the three modes as a base for the User mode.
MAIN MENU FUNCTIONS
OPERATION MODE:
•
Enter the main menu with a long press of the M
(9)
button.
•
Press the UP
(10)
/ DOWN
(8)
buttons to switch between the main menu options.
•
Enter a submenu of the main menu with a short press of the M
(9)
button.
•
Exit a submenu with a long press of the M
(9)
button.
•
Automatic exit takes place after 10 seconds of inactivity.
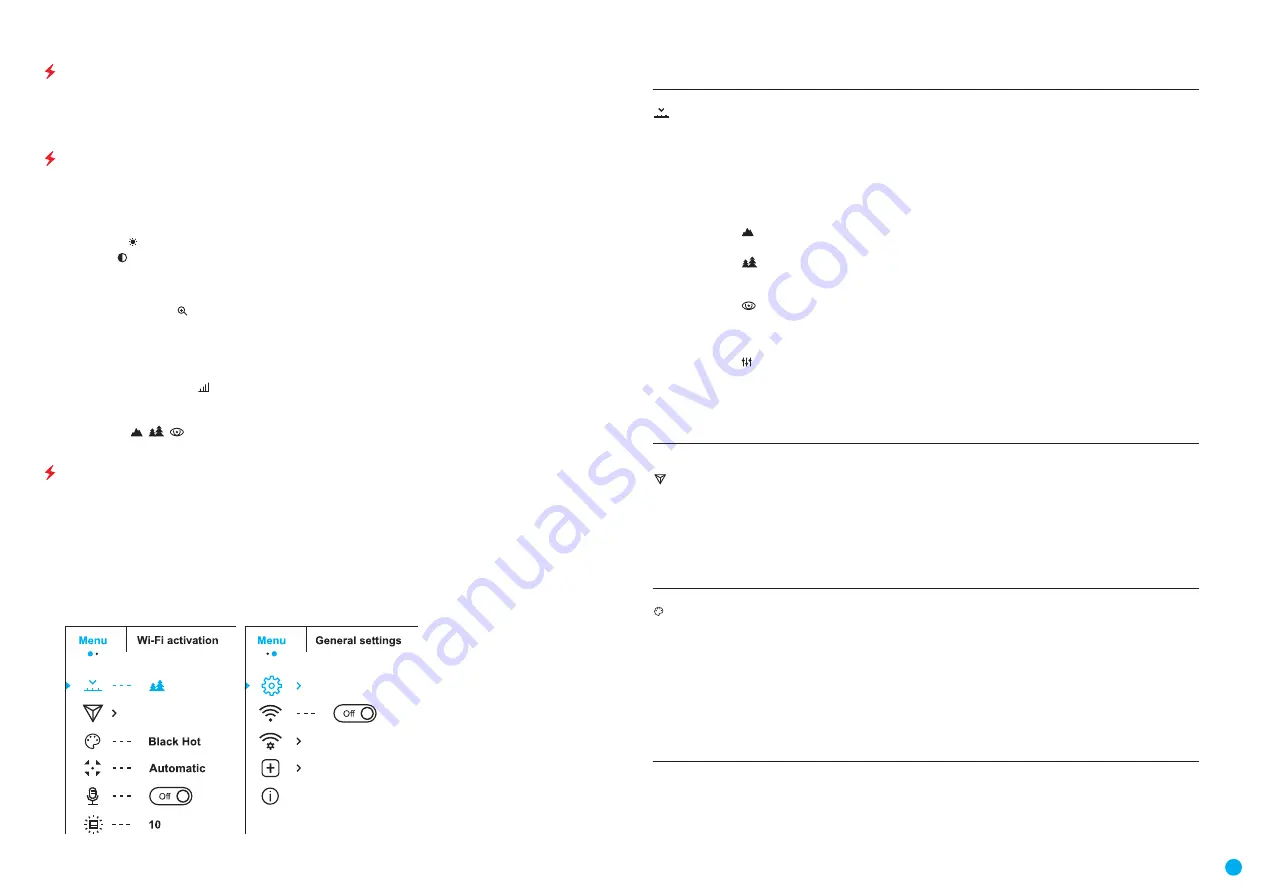
GENERAL VIEW OF MENU:
Tab 1
Tab 2
MAIN MENU CONTENTS AND DESCRIPTION
Mode
The device has four observation modes of the thermal imager: FOREST (mode for object
observation in low thermal contrast conditions), ROCKS (mode for object observation in high
thermal contrast conditions), IDENTIFICATION (high imagery resolution), USER (personalized
brightness and contrast settings).
•
Press and hold the M
(9)
button to enter the menu.
•
Select the Mode submenu.
•
Enter the submenu with a short press of the M
(9)
button.
•
Select one of the settings described below with the UP
(10)
/ DOWN
(8)
buttons.
•
A short press of the М
(9)
button confirms the selection.
Rocks.
This is the best mode for observing objects after a sunny day or within urban
conditions.
Forest.
This is the best mode when searching and observing within field conditions,
against the background of leaves, bushes and grass. The mode is highly informative about an
object being observed as well as landscape details.
Identification.
This is the best mode for identifying objects in adverse weather
conditions (fog, mist, rain and snow). It allows you to recognize the characteristics of an
object being observed more clearly. Increased zoom may be accompanied by insignificant
image graininess.
User.
This mode allows you to configure and save custom brightness and contrast settings,
as well as one of the three modes as a base.
Note.
Selection of the base mode for the User mode setting is also possible in the quick
menu.
Note.
Quick switching of the observation modes is possible by using the UP
(10)
button. A
short press of the button will switch between modes.
Image Detail
Boost
The Image Detail Boost function increases the sharpness of the contours of heated objects,
increasing their detail.
The results of the function depend on the selected mode and the conditions: the higher the
object contrast the more noticeable the effect.
This option is enabled by default but can be disabled in the main menu.
Turn on / off Image Detail Boost:
•
Press and hold the M
(9)
button to enter the main menu.
•
Use the UP
(10)
/ DOWN
(8)
buttons to select the Image Detail Boost menu option.
•
Turn Image Detail Boost on / off with a short press of the M
(9)
button.
Colour palettes
Selection of colour palette.
The base image mode is White Hot. To select an alternative palette:
•
Press and hold the M
(9)
button to enter the main menu.
•
Select the Colour Mode icon with the UP
(10)
/ DOWN
(8)
buttons.
•
Enter the submenu with a short press of the M
(9)
button.
•
Select one of the palettes below using the UP
(10)
/ DOWN
(8)
buttons.
•
Confirm your selection with a short press of the M
(9)
button.
Black Hot – black and white palette (white colour corresponds to low temperature, black
colour to high temperature); Red Hot; Red Monochrome; Rainbow; Ultramarine; Violet; Sepia.
Note.
You can also switch from a selected colour palette to the base mode with a long press
of the UP
(10)
button.


