background image


8.1 Importing objects into Slic3r PE - STL, 3MF, AMF 

Objects ready for multi-material printing come in three file formats  

1.

.3MF/.AMF

 - prefered format which includes all of the parts in a single file 

2.

.STL

 - several separate files, each file for a different part of the object 

 
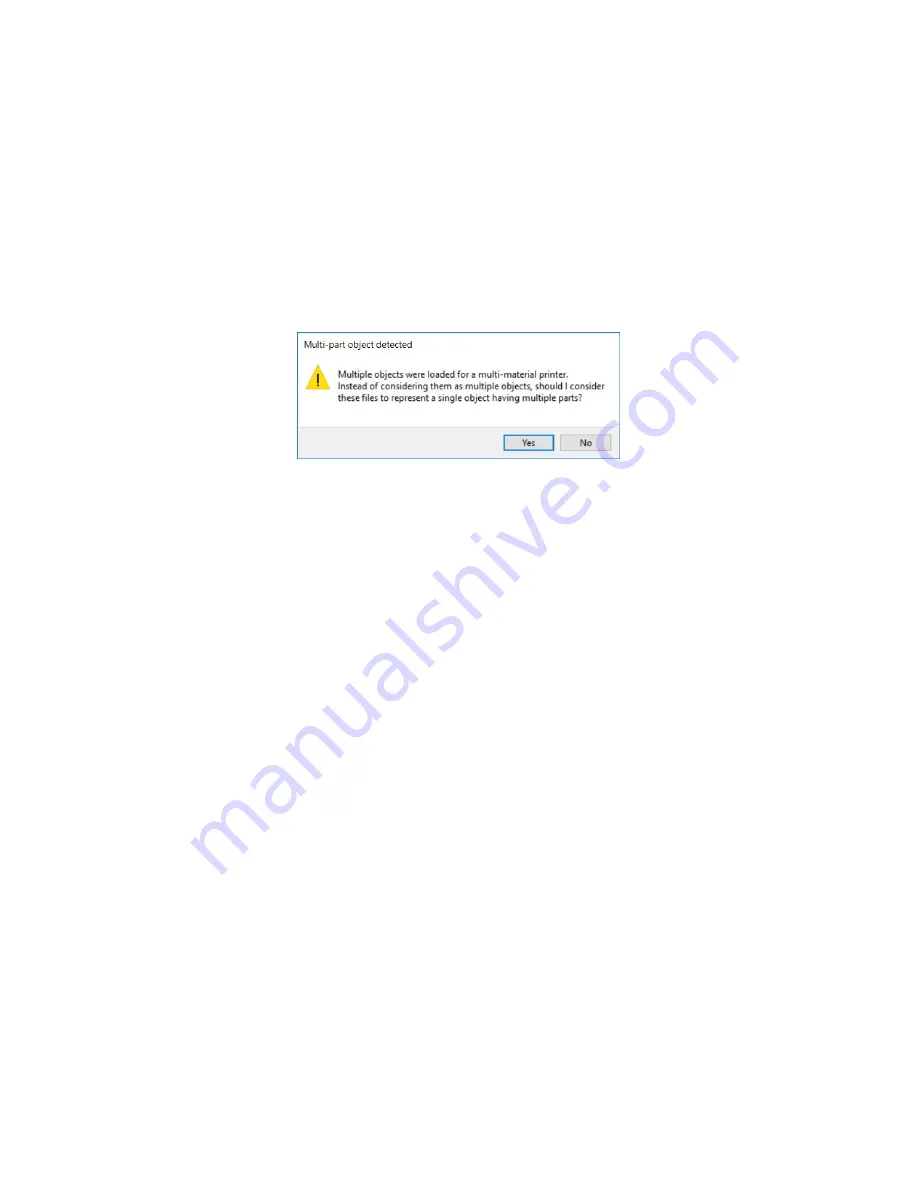
3MF files are automatically loaded with all the parts already aligned. To load multi-part 
model saved as multiple STLs simply drag and drop all of the files inside Slic3r’s window and 
confirm multi-part object auto-detection. 


Pict. 11 - Loading multi part object 

 
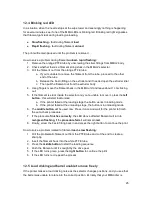
If the files aren’t automatically detected as multi-part object, follow these steps: 
 

1. Open Slic3r PE and make sure the Original Prusa i3 MK3 MMU2 profile is selected in 

the menu on the right 

2. Click the ‘Add…’ button to open the file browser 
3. Select the main part of the object and click Open to import it into Slic3r 
4. Position the main part on the virtual print surface 
5. Double-click the imported object to open the Settings window 
6. Click the ‘Load part’ button 
7. Select all remaining parts of the object and click Open 
8. Check the preview window to see whether the object has been imported successfully 

and no parts are missing 

 
In the next step, we’ll set up colors for each part of the object. 
 

14 

Summary of Contents for Original Prusa i3 MK2.5

Page 1: ......

Page 2: ...al is available at http manual prusa3d com USEFUL LINKS Official website www prusa3d com Newest drivers www prusa3d com drivers Knowledge base https help prusa3d com l en E shop https shop prusa3d com Slic3r PE GitHub www github com prusa3d MMU2 Objects https www prusa3d com printable 3d models Symbols used in this handbook Important notice tip hint or information that helps you print with ease Re...

Page 3: ...till ongoing Currently the Original Prusa i3 MK3 is on the market the third and latest iteration of the original 3D printer It is constantly updated with the latest innovations such as the brand new Multi Material Upgrade 2 0 which you have just purchased Josef Prusa also organizes workshops for the public participates in professional conferences dedicated to the popularization of 3D printing For ...

Page 4: ... Setting up colors 15 8 3 Slicing a multi material object 16 8 4 Smart wipe tower 16 8 4 1 Wipe tower placement 16 8 4 2 Purging volumes 17 8 5 Wipe to infill 18 8 6 Wipe object 19 8 7 Supported Materials 20 8 8 Soluble Supports 20 8 8 1 Soluble support interface only 20 8 8 2 Completely soluble supports 20 9 Printing in Single Mode 22 9 1 Colorprint 22 10 Handling 23 10 1 Mounting Unmounting the ...

Page 5: ...cts To unlock the maximum potential of your printer with the MMU2 use our latest Slic3r Prusa Edition slicing software Offering a multitude of unique features Slic3r PE is your go to solution for single and multi material printing The latest version introduces options such as Wipe to infill or Wipe object and helps you save time and filament by utilizing various smart routines The new generation o...

Page 6: ...first multi material G Code Please note that these instructions are just a quick overview for users who already have experience with 3D printing We highly recommend reading the full instructions 1 Download and install Drivers Apps from www prusa3d com drivers update printer firmware with Slic3r PE 1 41 2 Place filament spools behind the printer and load filaments 3 Run Z axis and First Layer calib...

Page 7: ...ct 2 Placement of the spool holder During filament changes all of the filament is unloaded from the orange PTFE tube The printed parts attached to the spool holders are designed to create loops of filament instead of letting it fall down from the spool and possibly getting tangled up Pict 3 Spool unwinding protection 6 ...

Page 8: ...at there is a different firmware for each of our printers and also a different type of firmware for the MMU2 2 Download the latest Drivers Apps package from the same page and install it Make sure that Slic3r PE and Drivers are selected in the installation wizard 3 Connect your printer to your PC using a USB cable The type of USB cable and the port depend on which type of firmware you want to flash...

Page 9: ...ent into the MMU2 unit You don t need to preheat the nozzle as filament loading only pushes the filament to the MMU2 unit Insertion of the filament to the extruder is done automatically during print Pict 5 Loading the filament 5 1 Loading all five filaments at once 1 Go to LCD Menu Load filament Load All 2 The selector will move to the first position the first LED will start blinking red 3 Insert ...

Page 10: ...uttons 1 Using the left and right control buttons move the selector to the position corresponding with the filament number you d like to load 2 Insert the filament inside the white PTFE tube and continue pushing it until it s not possible to push it any further 3 Press and hold the middle control button for a few seconds 4 The corresponding LED indicator will start blinking red 5 Push the filament...

Page 11: ...nt is pushed through the selector it raises a stainless steel ball Its movement is detected by the F I N D A There is a small red LED light on the back of the probe As soon as the filament is detected the light turns off When the filament is removed the stainless steel ball falls back down Please note that the ball is pulled down by gravity that means the filament sensor won t work if you for what...

Page 12: ...se until both ends of the Z axis hit the top part of the frame Once the Z axis is calibrated you can proceed with the First Layer Calibration 6 2 First Layer Calibration 1 Load a PLA filament into at least one MMU2 slot 2 Check if your printer s print surface is completely clean Please refer to your model s handbook to learn more about surface maintenance 3 On your printer go to LCD Menu Calibrati...

Page 13: ...option to tune the nozzle height in real time by turning the knob The aim is to adjust the nozzle height until the extruded plastic sticks nicely to the bed and you can see that it is being slightly squished The value should not exceed 2 000 mm If you have to adjust it more e g 2 500 move the P I N D A probe slightly higher Please refer to our knowledge base in case the P I N D A probe needs to be...

Page 14: ... G code s on your printer s SD card insert it into your printer s SD card slot and select the object to print in LCD Menu Print from SD Card Wait for the printer to start the process Do not leave your printer unattended during the first print Watch the process closely and in case of any kind of trouble use the Menu Stop print function to cancel the process immediately 8 Printing in Multi Material ...

Page 15: ...lti part object If the files aren t automatically detected as multi part object follow these steps 1 Open Slic3r PE and make sure the Original Prusa i3 MK3 MMU2 profile is selected in the menu on the right 2 Click the Add button to open the file browser 3 Select the main part of the object and click Open to import it into Slic3r 4 Position the main part on the virtual print surface 5 Double click ...

Page 16: ...h part of the object Assigning the same extruder to two parts will result in those parts being printed in the same color Once you re done press OK 4 Use the Filament menu on the right side of the Slic3r window to change colors for each part of the object by left clicking the small red box next to the filament s name Try to match these colors to the colors of your filaments to get a better idea how...

Page 17: ...ted at once The size of the wipe tower is independent of the size of the object being printed Printing multiple copies at once or printing big objects therefore improves the overall efficiency of the filament use 8 4 1 Wipe tower placement As soon as you select Original Prusa i3 MMU 2 0 in the Printer selection box the smart wipe tower will appear in the 3D preview The preview shows its maximum fo...

Page 18: ...lets you optimize the amount of wasted filament by for example decreasing the amount to purge when loading black filament On the other hand you can increase the value when transitioning to very light colors to ensure they are not contaminated by previous colors Pict 15 Right sheep has contaminated white color due to insufficient purging By default 70mm 3 is used for both loading and unloading When...

Page 19: ...8 5 Wipe to infill Since the inside of the model isn t visible it can be used to wipe the nozzle during the color transition The wipe tower cannot be eliminated completely because some models do not have enough infill but wipe to infill can greatly reduce the amount of wasted material To enable this feature double click on a model in the 3D view and tick Wipe to infill Please note that dark filame...

Page 20: ... this is handy in case you don t care about the surface color e g mechanical parts To turn a regular object into a wipe object open it in Slic3r double click on the model in the 3D view and tick Wipe to object Pict 19 Wipe object Wipe object taller than the multi colored object The wipe object will be finished with the last filament used during the multi colored print Multi colored object taller t...

Page 21: ...ately the quality of different PVA brands can vary greatly and we cannot guarantee good results when working with soluble materials from other brands 8 8 1 Soluble support interface only Water soluble filament us usually fairly expensive In order to greatly reduce the amount of water soluble filament needed you can choose to print soluble support interface only With this option turned on only the ...

Page 22: ...Pict 21 Water soluble supports 21 ...

Page 23: ...in the on screen menu and confirm it by pressing the knob 7 The printer will load the selected filament and proceed with single color printing Multi material G codes cannot be printed in single color mode The object has to be sliced again and re exported as a Single Mode G code 9 1 Colorprint The web version of Colorprint tool is compatible with the MMU2 Single Mode 1 Import an object into Slic3r ...

Page 24: ...the thread for the FESTO coupling Using the FESTO coupling to load filament directly without the PTFE tube attached is not recommended as it can lead to various issues Pict 22 Unmounting the MMU2 unit in three steps 10 2 Transporting the printer To transport the printer with the MMU2 unit attached please follow these instructions 1 Unload all filaments completely see chapter 5 Loading and Unloadin...

Page 25: ...u can now easily remove the selector Clean the stuck filament and reassemble the MMU2 unit 12 2 All five LEDs blinking red after power on If there is filament present in the selector during power up it s detected and the standard booting move sequence is interrupted as it would bend or break the filament 1 Try to pull the problematic filament out from the back 2 If you re unable to pull the filame...

Page 26: ...le to move it press the left button this will start load unload a If the printer failed at the loading stage the button works in loading mode b If the printer failed at the unloading stage the button is in unloading mode 6 The middle button will be used now Press it once and wait for the printer to finish the auto check procedure 7 If the procedure finishes correctly the LED above affected filamen...

Page 27: ...sconnect the orange PTFE tube from the selector by removing the silver fitting on top of the selector 2 Remove three screws holding the selector motor in place 3 Pull out the selector motor and two shafts to release the selector 4 Loosen two screws on the blade holder and carefully remove the blade Use needle nose pliers to remove it if possible 5 Insert a new blade tighten the blade holder and re...

Page 28: ...ng LEDs will light up LED 1 both LEDs are on LED 5 only red LED is on 5 Using the left button select LED 4 6 Then by pressing the middle button the filament will be loaded into the extruder 7 Open the extruder idler 8 By pressing left and right button you can move the filament up or down 9 Align the filament as shown on the picture 10 Pressing the middle button will retract the filament back to th...

Page 29: ...Print and share Do not forget to tag your prints with mmu2 while sharing so we can find pin and showcase them with our http www prusa3d com original prusa i3 prints Happy Printing ...

Reviews: