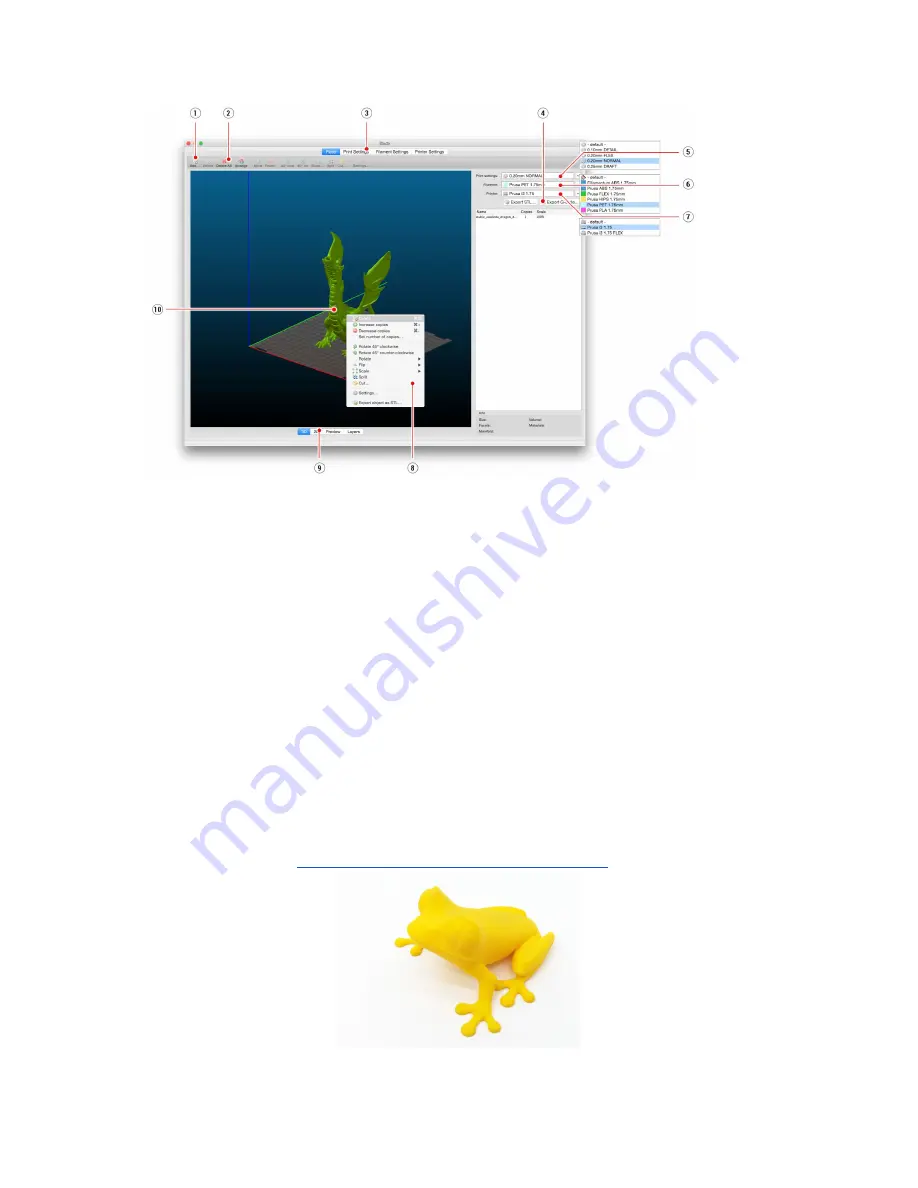
Pict. 19 Slic3r interface
1.
Add
button loads models into Slic3r.
2.
Delete
and
Delete All
buttons remove the
model
(s) from Slic3r.
3. Opens the
detailed
settings
of
,
filament
and
printer
.
4. When the
model
is ready for
this button generates the
.gcode
file.
5. Quality /
Speed
setting of a
6. Material selection
7. Printer selection
8. Rightclick on model opens the menu with rotate, resize and other options
9. Type of
model
preview
10. Model preview
9.4 Bundled 3D models
We asked couple known 3D designers and prepared some printable object for you to print.
They are ideal for the first prints on your new printer. STL and GCODE files are available
after installing the drivers package in “3D Objects” folder or bundled on your SD card. You
can check them out at
http://www.prusa3d.com/printable3dmodels/
.
Pict. 20 50 microns treefrog is commonly used as a 3D printing benchmark.
Summary of Contents for Original Prusa i3 MK2
Page 1: ......


