background image


User Manual kardiomed  cycle 200 med


Version 1.0 

Seite 6 von 15 


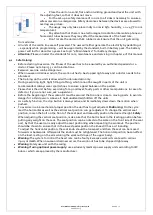
 Place the unit on a solid, flat and non-sliding ground and level the unit with 

the adjusting feet, so that it does not move. 


For the set-up a safety clearance of 100 cm to all sides is necessary to ensure a 

safe access also in emergencies. Safety clearances between the devices are allowed to 
overlap; see picture.  


The usage may only take place in dry rooms (< 65% humidity, > 0 < 45°C room 

temperature). 


Pay attention that there is no electromagnetic radiation like mobile phones or 

fluorescent tubes because they may affect the measurement of the heart rate.  


Don´t locate the units on thick rubber mats. Ensure that the unit gets airing 

from all sides. 


All units of the cardio line are self-powered. The user will either generate the electricity by pedalling or 
– especially while programming – will be supported by the standard, built-in battery pack. The battery 
power will last for about two years. See topic “4 Maintenance” for battery change. 


Attention:

 Please consider the standards for care, maintenance and servicing in chapter 4 of this manual. 

4.2


Safe training 


Before starting to exercise, the fitness of the user has to be ensured by an authorised specialist or a 
doctor. Please note topic 3.3 contra indications.  


Excessive exercise can be dangerous. 


When nausea or dizziness occurs, the work-out has to be stopped right away and a doctor needs to be 
allocated.  


The training on the units is allowed with unbruised skin only. 


During exercising light, tight fitting clothing, which cannot be caught in parts of the unit is 
recommended. Always wear sports shoes to ensure a good balance on the pedals. 


Please check the unit before exercising for a good level, faulty parts or other manipulations. In case of a 
defect or if you are not sure, ask a supervisor.   


Before the beginning of the workout it must be assured that no one is close to moving parts, to avoid a 
danger for a third person. Above all, hold unattended children off the units. 


As a safety function, the stop button is always active and immediately slows down the motion when 
pushed. 


To exercise in a biomechanical proper position the unit has to get adjusted. 

Positioning:

 On the cycle 

med the horizontal as well as the vertical seat position can get adjusted. To change the vertical seat 
position, loosen the bolt on the front of the seat post and manually position the desired height. 

Safety:


When adjusting the vertical seat position, make sure that the bolt is back in the starting position before 
putting any weight on the seat. The seat position can be noted via the scale on the front side of the seat 
post, by that the user can easily adjust the seat positioning when repeating the workout. The position 
should be chosen to ensure that in the lowest pedal position the knee still has a 10° bending. 
To adjust the horizontal position, the seat knob should be loosened, and then the seat can be moved 
forwards or backwards. Afterwards the knob must be retightened. The horizontal position has an effect 
on the load, resting on the arms during the workout (slope of the upper body). 


Warning: 

The system to control the heart rate can be faulty. Excessive workouts can lead to serious 

injury or death. When nausea or dizziness occurs, the work-out has to be stopped right away. 


Warning:

 Solely use unit with the casing.  


Warning if using optional power supply:

 use exclusively medical power supply units according to IEC 

60601-1 which are approved by the manufacturer. 

Summary of Contents for kardiomed 200 cycle

Page 1: ...User Manual kardiomed cycle 200 med Version 1 0 Seite 1 von 15 ...

Page 2: ...9 5 6 Adjusting the resistance 9 5 7 Training control via the storage media 10 5 8 Results 10 5 9 Programs of the cycle 10 5 10 Pulse controlled Training 11 5 11 Interface PC 11 6 Maintenance 12 6 1 Instructions for the error condition detection failure 12 6 2 Instructions for preventive maintenance by the operator 12 6 3 Maintenance for authorised specialists 13 6 4 Performance of the metrologica...

Page 3: ... has to be less than 130 kg 3 Assembly for partly disassembled delivery To ensure a cost reduced transport the unit of this type can get delivered partly disassembled This way up to 4 units fit on one pallet Is this the case the unit has to get assembled as followed 1 Check the main components for completeness 2 and then the screw set 3 First the feet get mounted Therefore place the corpus on a so...

Page 4: ... the red cable coming out of the unit mast through the according hole on the backside of the monitor 15 Place the plug on the horizontal placed socket You can recognize the proper lock in place by a klick 16 Next the monitor front gets put back on and the monitor gets fixed with the four screws D 17 Afterwards the 4 outer casing screws get screwed back in to seal the casing properly 18 The flat st...

Page 5: ... 1 Safe assembly of the unit Adjustment feet for levelling Pedals Handlebar Saddle Adjusting screw for the horizontal saddle adjustment Adjusting lever for the vertical saddle adjustment Position of the Typ Label Monitor for individual settings and visualization of the training data ...

Page 6: ...lance on the pedals Please check the unit before exercising for a good level faulty parts or other manipulations In case of a defect or if you are not sure ask a supervisor Before the beginning of the workout it must be assured that no one is close to moving parts to avoid a danger for a third person Above all hold unattended children off the units As a safety function the stop button is always ac...

Page 7: ...hich transfers the signals This magnetic field can be interfered by several sources The most common reason is the use of breast belts that are not 100 compatible with the Polar System and commonly have a longer range Cell phones speakers TVs power lines fluorescent tubes and motors with high power can also interfere with the Polar Pulse System The measuring of the pulse frequency is ECG precise On...

Page 8: ...e Cool button stops the workout before the end of the chosen program begins with the cool down mode and finishes the workout with a low intensity The workout data is shown and saved on the storage media if the workout has been started using a storage media Reset button Initially the Reset button is not visible for the user It is hidden in the extension of the upper edge of the LCD display to the l...

Page 9: ...ce is displayed K Cal Depending on the program the accumulated calories burned or the remaining calories to be burned are shown Level Display of the actual intensity 1 21 Storage media The symbol for the storage media appears whenever a member card is inserted into the slot If any of the digital figures are shown in combination with this symbol the figures shown are average figures of the workout ...

Page 10: ...tions of the trainer card Deleting the data on member media If you want to delete all data of a medium then you have to insert the trainer medium twice Afterwards you insert the member medium and all the data on the card will be deleted The Results total can be deleted by pushing the buttons and 3 seconds at the same time Only the results will get deleted not the training plan Functioning of the M...

Page 11: ...d but not exceeded Additionally the program can evaluate the development of the heart rate and use the determined fitness level to adjust the resistance which allows for an optimal warm up If the initial resistance is set above a certain limit no warm up will be done and the resistance is immediately adjusted to the desired heart frequency see motion pulse manager brochure This program functions i...

Page 12: ...e material Check the cranks and pedals for damages and tightness In general Clean the devices with mild purifier and a wet cloth to get off aggressive sweat Dry the device afterwards The usage of spray bottles is not allowed it has shown that the unit never dries at spots that can t be reached Rust may occur Pay attention that no liquids run into the monitor as it could destroy parts of the electr...

Page 13: ...professional Contact your dealer in case you need a reference 6 5 Conduction of a safety related control According to the transposition of the medical device directive 93 42 EEC into national law At all medical training devices a technical safety check has to be conducted at least every 12 months and after repair by an authorized employee or partner This check needs to also include the control of ...

Page 14: ...exchange unit is arranged and sent to the user The defective parts must be sent to proxomed within 48 hours Otherwise the cost for spare parts that have been delivered will be charged If causes for repairs lie outside of the warranty conditions proxomed Medizintechnik GmbH reserves the right to require payment for all costs of the repair Some consumable parts are excluded from the warranty These i...

Page 15: ...ed ch Changes proxomed reserves the right to change any product if this action in our opinion leads to improved quality and functionality All images in these operating instructions are due to printing only similar We take no responsibility for printing errors Errors and omissions excepted User Manual kardiomed 200 cycle valid since Oct 2015 emotion fitness GmbH Co KG is a company certified by the ...

Reviews: