


33
Installation & Basic Configuration
NOTE:
If your Access Point does not show up in the Scan List, click the
Rescan
button to update the display. If the
unit still does not appear in the list, see
Troubleshooting
for suggestions. Note that after rebooting an
Access Point, it may take up to five minutes for the unit to appear in the Scan List.
8. Highlight the AP’s entry and click the
Change
button.
–
Result: the
Change
screen appears.
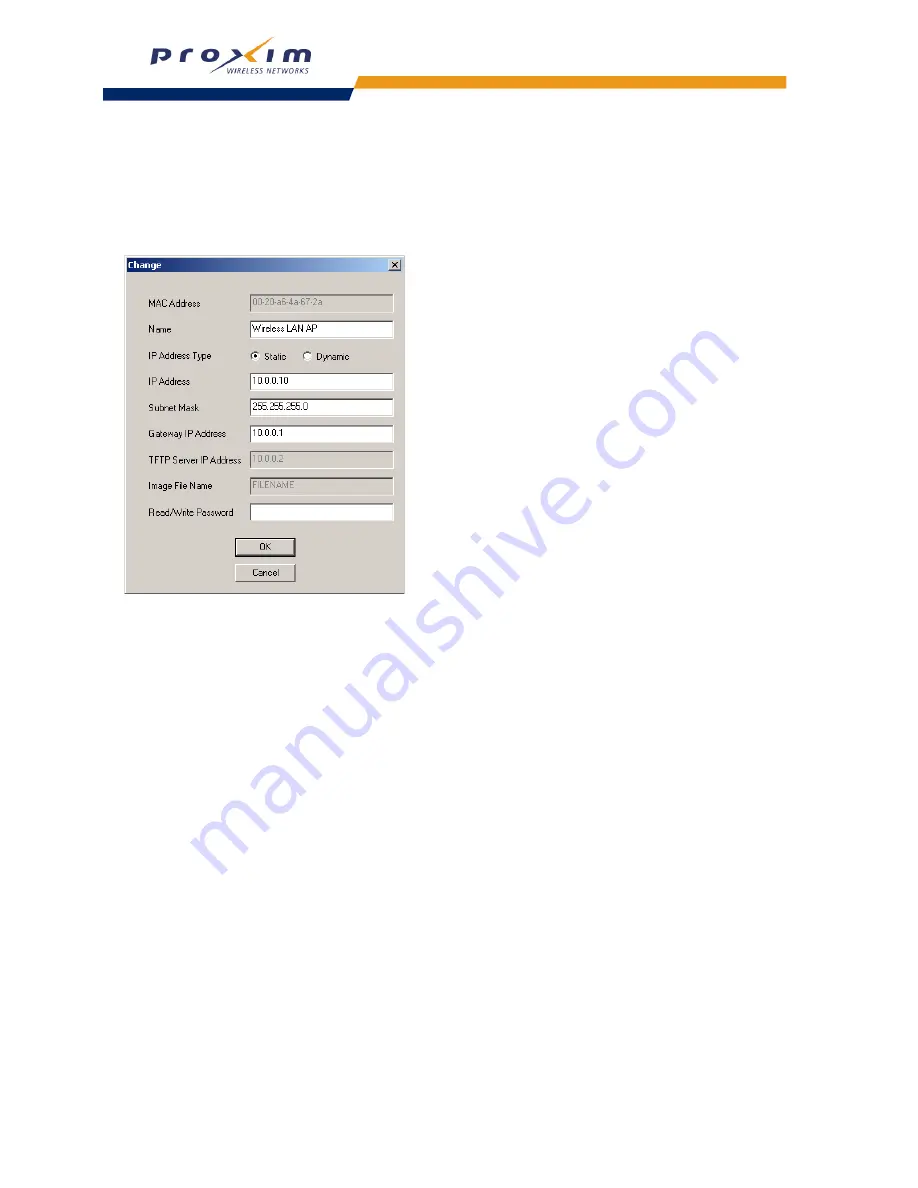
Figure 2-16 Scan Tool Change Screen
9. Configure the
IP Address Type
to
Static
or
Dynamic
.
•
The AP will become a Dynamic Host Configuration Protocol (DHCP) client when
IP Address Type
is set to
Dynamic
. Note that it requests an IP address only during boot-up (so it will not obtain an IP address if you
connect it to the Ethernet after turning it on).
•
Proxim recommends that you assign the AP-2500 a static public IP address (that is, an address that is
routable on the Internet). Some of the Public Space features will not work properly if the AP’s IP address
changes at a later date.
10. If you set IP Address Type to Static, follow these additional steps:
•
Enter a static
IP Address
for the AP-2500 in the field provided. This should be a routable public IP address.
Contact your network administrator if you need assistance selecting an IP address for the unit.
•
Enter your network’s
Subnet Mask
in the field provided.
•
Enter your network’s
Gateway IP Address
in the field provided.
11. Enter the SNMP Read/Write password in the
Read/Write Password
field (for new units, the default SNMP
Read/Write password is “public”).
NOTE:
The TFTP Server IP Address and Image File Name fields are only available if ScanTool detects that the AP
does not have a valid software image installed. See
Download a New Image Using ScanTool
.
12. Click
OK
to save your changes.
–
Result: The Access Point will reboot automatically and any changes you made will take effect.
13. When prompted, click
OK
a second time to return to the
Scan List
screen.
14. Click
Cancel
to close the ScanTool.


