


145
Public Space Parameters
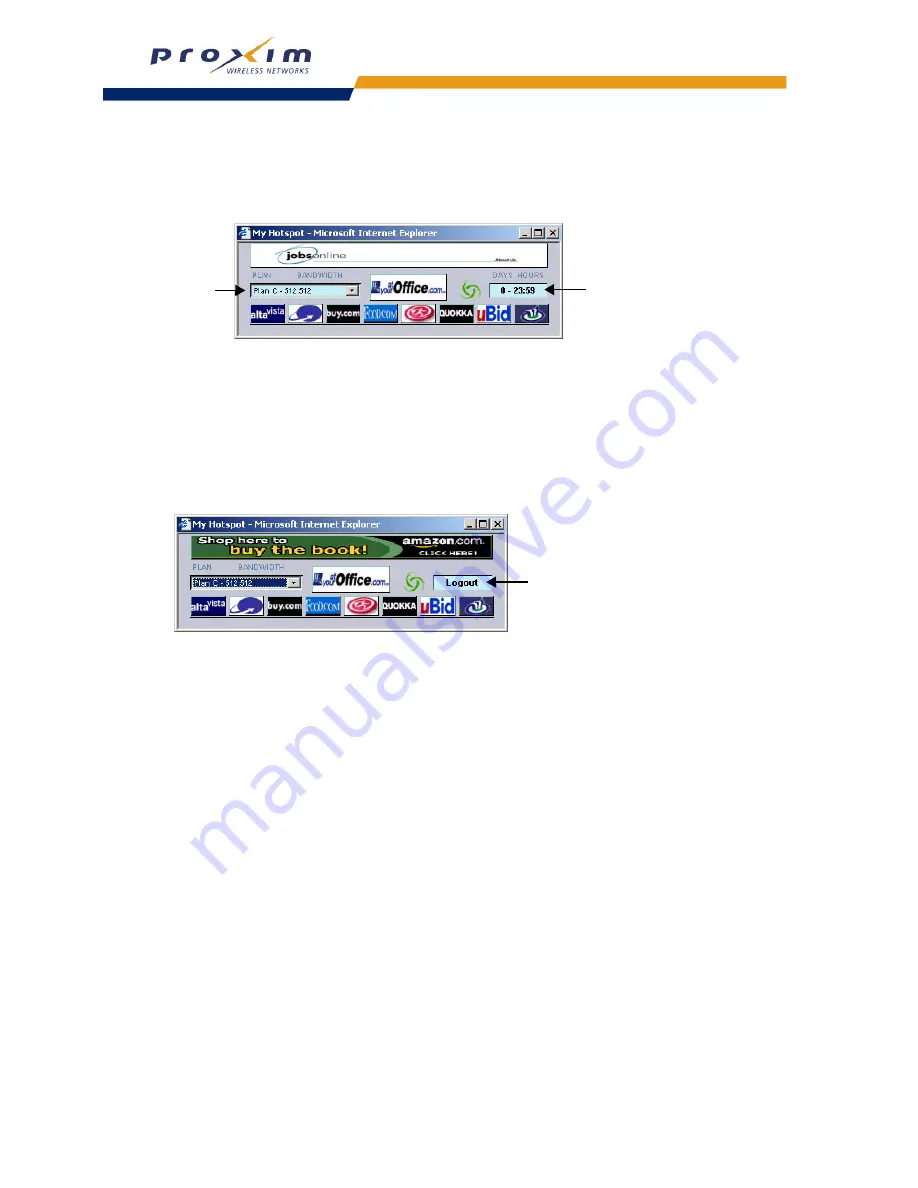
Credit Card Purchase
If a subscriber purchased access time by credit card, the ICC includes the Count-down Timer and the Dynamic Billing
Plan Selection field:
Figure 5-23 ICC Screen -- Credit Card
Authenticated by RADIUS
If a subscriber has been authenticated by a RADIUS server (if using Internal authentication with RADIUS), the ICC
includes a Logout button so customers can end their session. The ICC also displays the subscriber’s current billing
plan in the Dynamic Billing Plan Selection field. Note that the subscriber will not be able to change the billing plan
unless you enable the Nomadix-IP-Upsell RADIUS Vendor Specific Attribute (VSA). See
Install and Configure
RADIUS
and
RADIUS Messages and RADIUS Attributes
for details.
Figure 5-24 ICC Screen -- RADIUS
Customizing the ICC
You can customize the buttons, banners, and ISP logo button that appear on the ICC. Follow these steps:
1.
Determine the design of the ICC and decide which buttons you want to customize.
2.
Obtain or design the images that will appear on the ICC.
•
You can customize:
— Up to 5 Banners: 373 pixels (width) x 32 pixels (height)
— One ISP Button: 98 pixels (width) x 26 pixels (height)
— Up to 8 Small Buttons: 45 pixels (width) x 26 pixels (height)
•
The images should confirm to the size restrictions listed above and be in JPG or GIF format.
•
Assign names to the files so they can be easily identified and remembered.
3.
Login to the AP’s Web browser interface.
4.
Click
Commands
>
Download
.
5.
Use the
Download
command to download the new image files to the AP.
6.
Click
PublicSpace
>
ICC
>
Basic
.
Billing Plans
Count-down Timer
Logout Button


