NAS System
154
User Manual
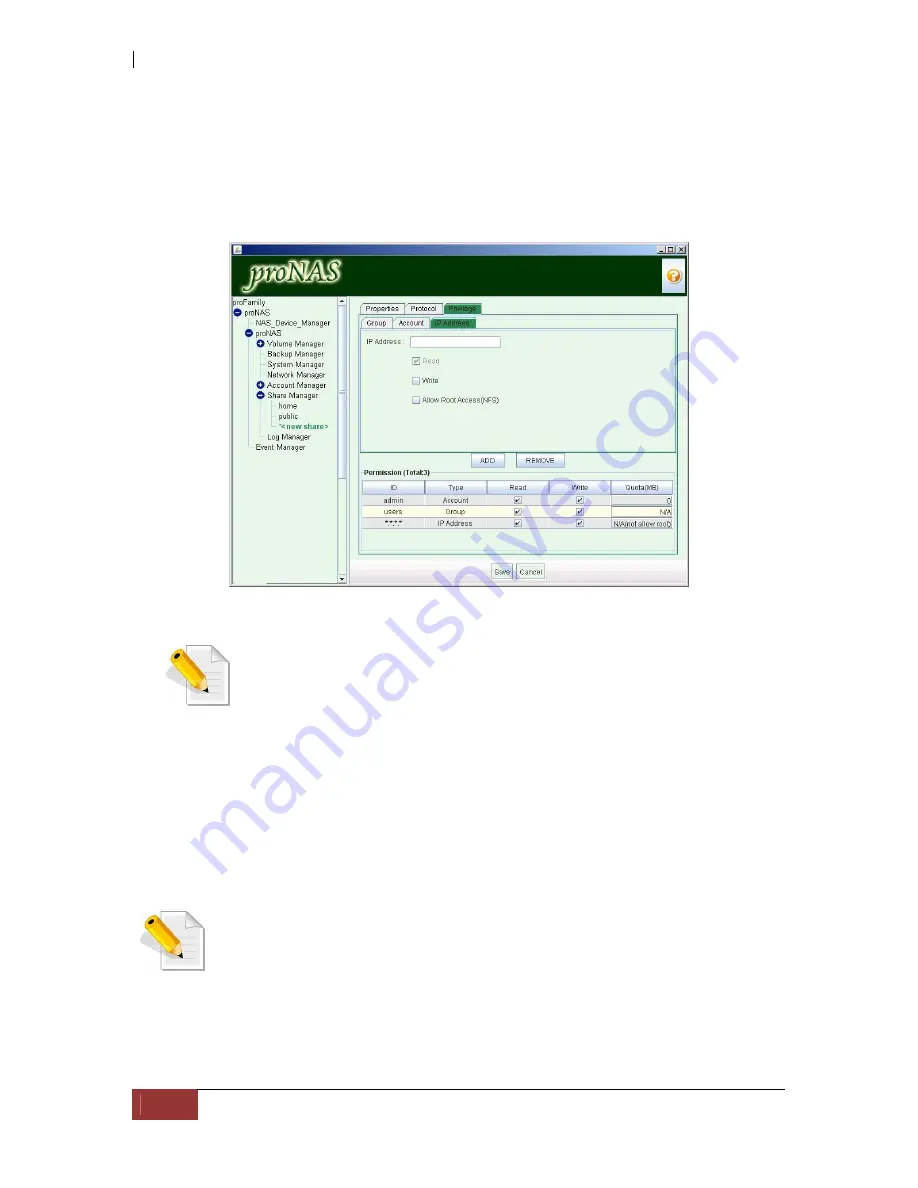
9.4.4.3 IP Address
This option allows you to set a certain range of hosts to have an access into proNAS.
By default, the IP address is set to *.*.*.* which means that it will accept
connections from any host. If set to 192.168.100.*, this will only allow connections
from your private network 192.168.100 and all other connections will be refused.
Note: Not all ACL permission settings may be applicable to all
share protocols. If you set NFS protocol, it can support all ACL
setting mentioned above. If you set CIFS protocol, read only IP
address will not be honored. If you set AppleTalk or Netware
protocol, you can only set ACL permission by account or group.
Sample Steps to Limit Share Connections to Selected IP Range:
1.
Select Share Manager. Select the share name where account will be giver
permission, and click Privilege tab.
2.
Click “Edit”. Select IP Address tab.
NOTE: BY default, all IP addresses (*.*.*.*) have Read/Write access
to the NAS. If you restrict NAS connections from specific IP range,
only the selected IP range can access the NAS share. Group
Permission or User Account Permission is still needed to be assigned
in order for users to gain access to the share folder.
3.
To remove *.*.*.*, select “*.*.*.*” from Permission list and click “REMOVE”.
4.
To add an IP range, enter the IP range (e.g.: 192.168.1.*) in the “IP Address”
box, check the “Write” box to assign Read-Write access if necessary, and click
“ADD”.
Summary of Contents for Epica
Page 1: ...NAS System User Manual Revision 1 2 P N PW0020000000351...
Page 10: ...NAS System 10 User Manual PART I Hardware Components and RAID Subsystem...
Page 39: ...NAS System User Manual 39...
Page 78: ...NAS System 78 User Manual PART II proNAS System...
Page 99: ...NAS System User Manual 99 4 Verify the new LV size...
Page 107: ...NAS System User Manual 107 4 The deleted snapshot will no longer exist in the Snapshot List...
Page 123: ...NAS System User Manual 123 4 The iSCSI logical volume capacity is extended...


