- 8 -
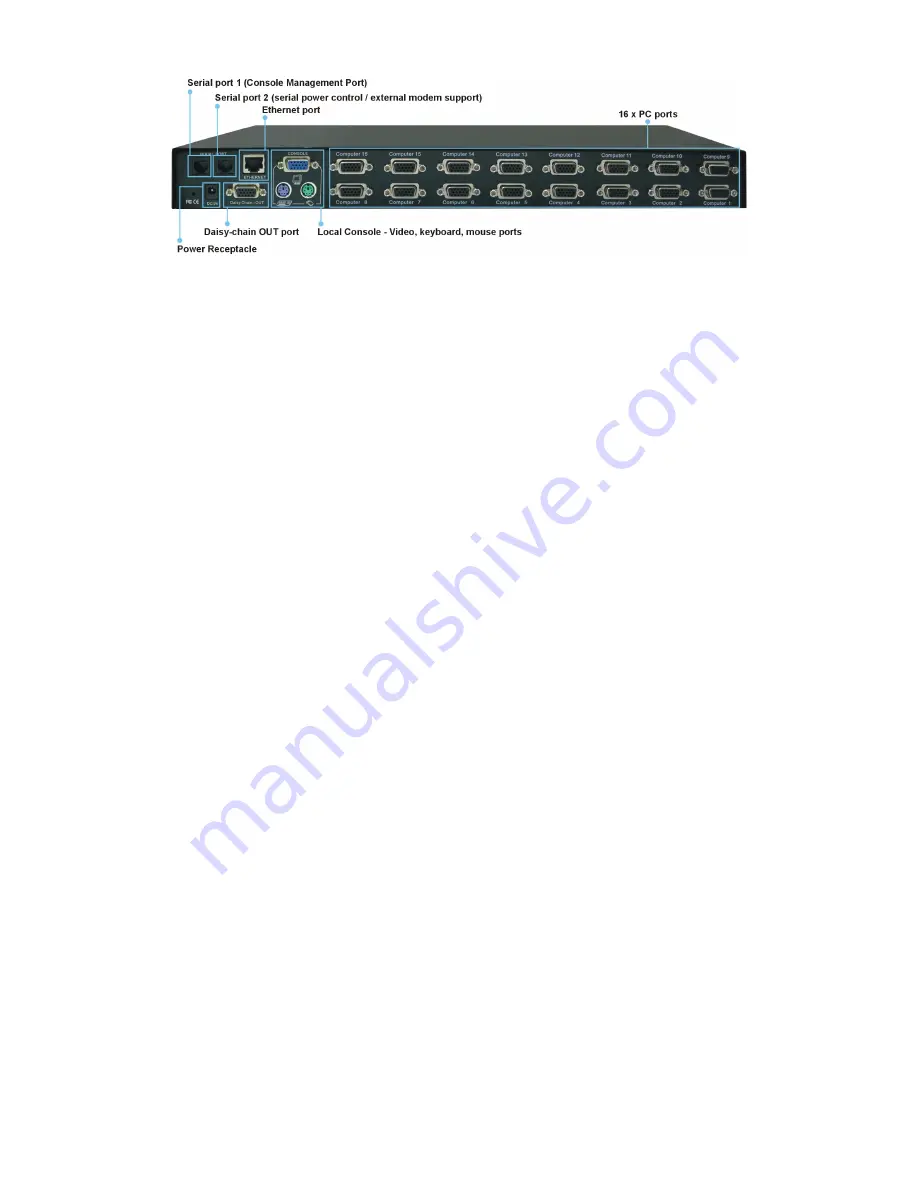
Figure 8: Prima IP 16 - Rear-panel
8 x 16 PC ports:
The PC port is where you connect to your computer. The PC port is a HDB 15 connector
integrated with USB and PS/2 keyboard, mouse and video. To connect PC port to one of your computer, you
may use either USB KVM Combo Cable, or PS/2 KVM Combo Cable, or Combo-free USB PS/2 KVM
Cable, depending on your package option.
Local Console - PS/2 Keyboard port:
This is where you connect the PS/2 keyboard for local console.
Local Console - PS/2 Mouse port:
This is where you connect the PS/2 mouse for local console.
Local Console - Monitor port (HDB-15):
This is where you should plug in the Monitor for your local
console on Prima IP.
Ethernet Port (RJ-45):
The Ethernet port, or digital port, offers anytime anywhere access of Prima IP and
subsequently the conventional KVM Switch(es) and servers/computers connected behind it to the remote
login clients lover LAN/Internet.
The Daisy chain OUT Port (RJ-45):
The Daisy chain OUT port is of a HDB 15 female connector, where
you can daisy-chain downstream to a Prima KVM switch.
Serial Port 1 (RJ-12):
This is the so-called Console Management port, and it is where you connect the serial
console cable for advanced console management of Prima IP unit via a serial terminal emulation utility such
as Windows HyperTerminal or Minicom on Linux/Unix.
Serial Port 2 (RJ-12):
The serial control port allows you to connect to either an external modem or a power
control unit or to a cascaded chain of power control units. When added with an external modem to its serial
control port, Prima IP could serve either as a PPP server to allow direct cable connection or dial-in
connection from its peer computers, or as a PPP client to dial-in to the ISP or an enterprise PPP server.
Furthermore, through serial commands sent over its serial control port, Prima IP can perform remote power
on/off and power cycling task via the (cascaded) power control module(s).
Prima IP Power Receptacle:
You must use the DC9V 4A adapter provided within the package. The center
pin is of a positive polarity. Use of any other adapter will nullify the warranty.
Restore-to-Default Button:
The Restore-to-Default button is a tiny recessed button located to the left of the
Power Receptacle, and can only be accessed by prying down with a pointed needle tip. To depress the
recessed button for over 5 seconds, and upon release, it will restore Prima IP to factory default – the default
IP settings and user account settings that come with factory default.


