Princeton VL1514 Reference Manual Download Page 4


2

Installing the Monitor 


z


DO NOT

 install the monitor where sudden temperature changes may occur, or in 

humid, dusty, or smoky areas as it may cause fire, electric shock or damage. 

z


DO NOT

 place your LCD Monitor near a window as it may be severely damaged if 

exposed to rain, water, moisture, or sunlight. 

z


MAINTAIN

 good ventilation; covering of ventilation slots or holes may cause fire. 

z


PLACE

 the monitor at least 4” (or 10 cm) way from the walls. 

z


SAFE

 storage temperature of the LCD Monitor is in a range of –20 to +65

HOW TO INSTALL YOUR LCD MONITOR 

1) 

Assemble the base plate included in the accessory kit.   


2) 

Check and make sure that the Signal Cable is connected to the PC Video card.     

3) 

Plug the female end of the 1.8m power cord into the AC adaptor.    Then, plug 

the DC connector of the adaptor to your monitor’s DC jack.   

4) 

When you’ve completed the above steps, connect the male end of the power 

cord into a wall socket.     

NOTE 

For added protection, it is recommended to use a Surge Protection device plugged between the 
AC Adapter and the electrical wall outlet to prevent the effects of sudden current variations 
from reaching the LCD Monitor. Sudden peaks of electricity may cause damage to the Monitor.


 Audio in    

(optional) 

Connect with your audio device. 

 Signal cable  Connected with PC Video card   

 DC Jack   

Plug into the AC power adapter. 


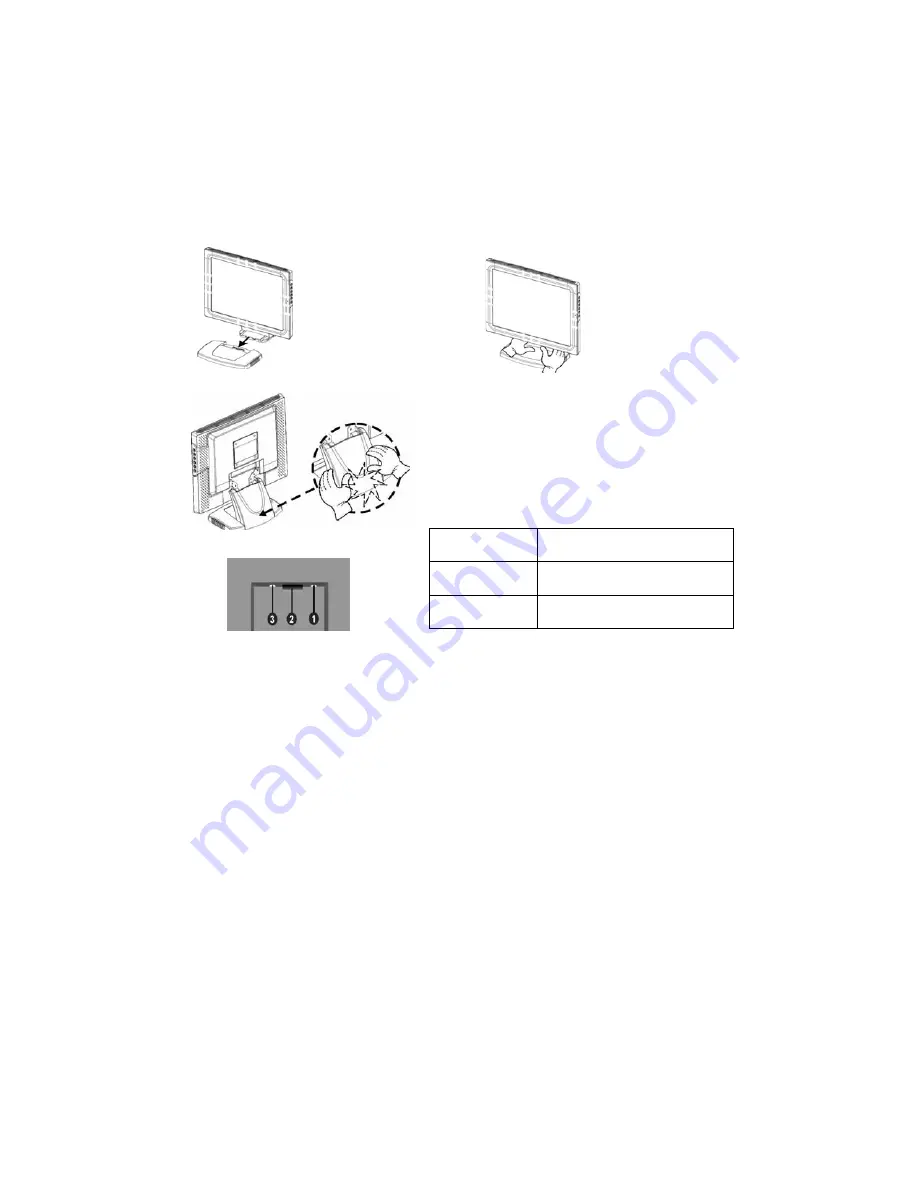
Hold the base plate with 

one hand and the stem of 

the monitor with the other 

hand (the monitor should 

be in an upright position).

Gently slide the stem 

of the monitor into 

the base plate slot.


Position the monitor with the back facing you; 

secure the base plate with your fingers and push 

the stem of the monitor in towards you with your 

thumbs. When you hear a click sound, then it is 

securely locked-in. 

(check and make sure that 

the security clip is properly locked-in).


Summary of Contents for VL1514

Page 1: ...D I G I T A L R E F E R E N C E M A N U A L VL1514...

Page 2: ...THE MONITOR 2 CONNECTING YOUR MONITOR TO PC 3 ADJUSTING THE VIEWING ANGLE 3 OPERATING THE MONITOR 4 HOW TO USE THE OSD ON SCREEN DISPLAY 4 THE ADJUSTMENT OF MONITOR S SCREEN DISPLAY 4 MENU TABLE 5 FO...

Page 3: ...00 x 600 VGA 640 x 480 720 x400 and 640 x 350 for a perfect graphics performance Digital Character Smoothing Automatic Set Up Ergonomic Design TCO Approved VESA DDC2B Plug Play Compliant VESA Wall Arm...

Page 4: ...monitor s DC jack 4 When you ve completed the above steps connect the male end of the power cord into a wall socket NOTE For added protection it is recommended to use a Surge Protection device plugge...

Page 5: ...VGA port C Then tighten the connecting screws to ensure a secure connection D Turn on your computer and then turn on your LCD Monitor Adjusting the Viewing Angle Your LCD Monitor is designed to allow...

Page 6: ...tting bars i e CONTRAST BRIGHTNESS etc to increase setting values of the OSD 6 Power For turning ON OFF the monitor 7LED power status display Green Normal operation Amber 5W when receiving no horizont...

Page 7: ...turn up down audio volume Menu Table Main Menu Sub Menu Function Name Function BRIGHTNESS Adjusts the level of brightness and darkness CONTRAST Adjusts the RGB color pattern set of the contrast BL BL...

Page 8: ...or splashed onto the monitor may cause fire or electric shock BAD WEATHER CONDITIONS It is advisable not to operate the monitor during heavy thunderstorms as intermittent breaks in power may cause ma...

Page 9: ...the power switch and unplug the monitor before cleaning z Do not scratch or rub the screen with a hard object z Never use any of the following solvents on the LCD monitor Such harsh chemicals may caus...

Page 10: ...ted c Power indicator is amber If the signal timing of the computer is within the spec Display is too dark or too bright If the video output level of the computer is within the spec Display is not in...

Page 11: ...ielded signal cord and power cord supplied with this unit The Federal Communication Commission warns that changes or modifications of the unit not expressly approved by the party responsible for compl...

Page 12: ...cifications are subject to change without notice Princeton Digital USA Corp is not responsible for printing or clerical errors Windows is a registered trademark of Microsoft Corporation Apple and Maci...

Reviews: