


5
Dual
Bay
Mounting
System
Optional
Thumbscrews
are
included
if
your
specific
computer
case
requires
them.
These
brackets
are
designed
to
give
the
reservoir
more
flexibilty
on
where
and
how
the
reservoir
is
installed.
The
following
steps
explain
how
to
mount
the
reservoir
into
the
2x
5
¼
Drive
Bays.
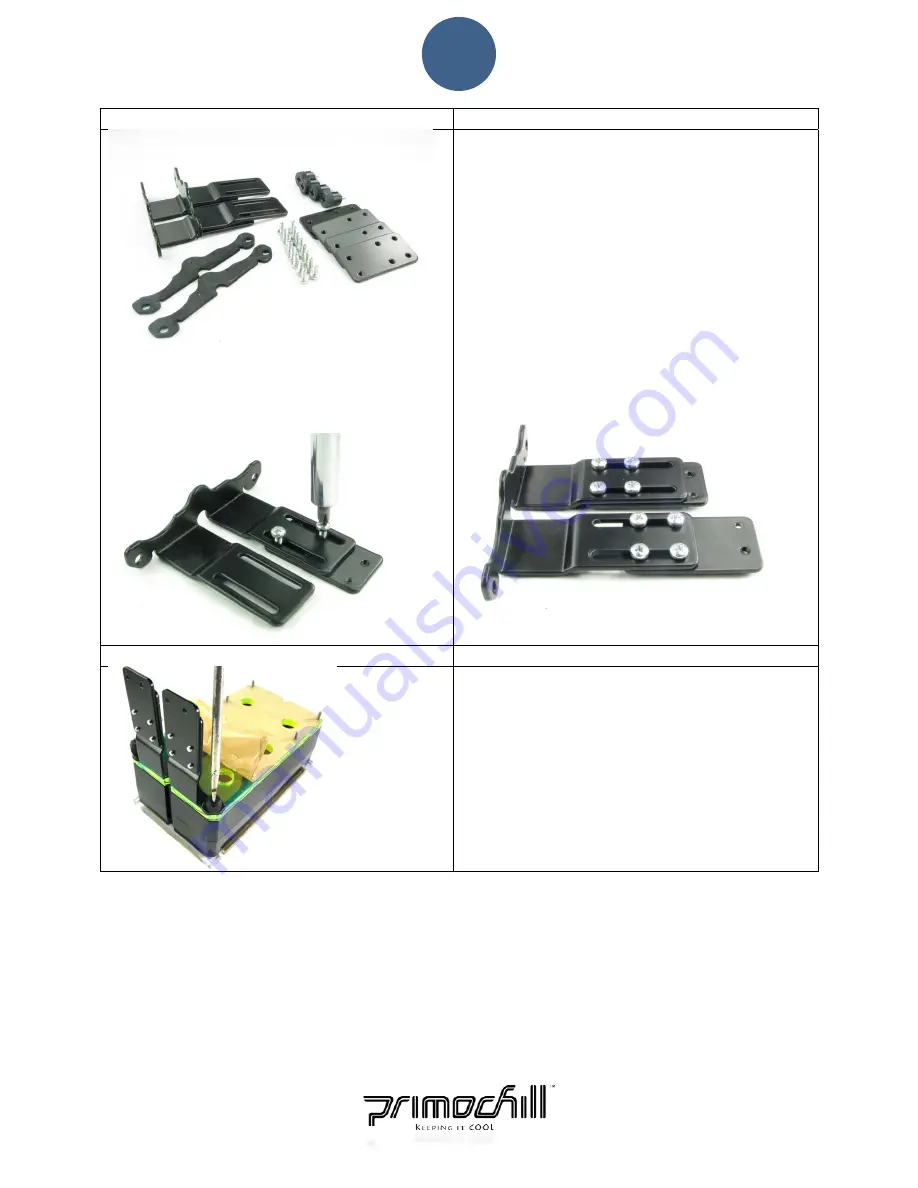
a.
Assemble
the
mounting
brackets:
Place
the
first
bracket
on
a
flat
surface
and
slide
one
of
the
plates
underneath
it
and
tighten
screws
into
plate.
Tighten
the
screws
all
the
way
down
and
then
untighten
approximately
½
turn
or
until
the
plate
slides
back
and
forth.
Repeat
for
other
bracket
.
There
are
8
screws
per
bracket
to
be
installed.
Marry
body
With
Mount
Now,
gently
place
the
reservoir
on
its
face.
Next,
lay
the
anti
‐
vibration
pad
over
the
2
exposed
screws
and
line
up
the
shape
to
match
the
cut
‐
out
on
the
reservoir.
Finally,
line
up
the
bracket
with
the
cut
‐
out
shape
and
screw
on
the
nut
caps.
Repeat
for
other
side.
These
caps
secure
the
brackets
to
the
reservoir
and
allow
you
to
mount
it
into
your
drive
bays.


