PRG Bad Boy Spot Luminaire, Service Manual
The PRG Bad Boy Spot Luminaire is a powerful lighting fixture designed for professional stage productions. For detailed information on installation, operation, and maintenance, download the free Service Manual from our website. Ensure optimal performance and longevity by following the instructions provided in the manual.
Share
Download


Reviews:
No comments
Related manuals for Bad Boy Spot Luminaire

PS8
Brand: Unitary products group Pages: 28

QUAD ENVELOPE
Brand: Malekko Pages: 2

MJ2000
Brand: Major Pages: 26

TRAKTOR KONTROL S4
Brand: Native Instruments Pages: 86

Maschine
Brand: Native Instruments Pages: 245

Contrology Cadillac
Brand: Balanced Body Pages: 7

Disc Hydrator
Brand: Posture Pump Pages: 2

GRMC3E
Brand: Cuisinart Pages: 159

DJ Laptop stand +tray
Brand: Power Dynamics Pages: 3
CareTips Provox FreeHands FlexiVoice
Brand: Atos Medical Pages: 2

ZS2110
Brand: Emos Pages: 8

HKF 50 E
Brand: Kärcher Pages: 60

CTR 1 7858-600
Brand: Kettler Pages: 20

WeedHex AS 50
Brand: AS MOTOR Pages: 36
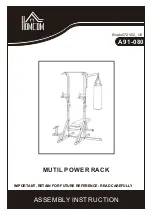
A91-080
Brand: HOMCOM Pages: 11

Powerator 1800 compact
Brand: Seto Pages: 39

VaporTEK
Brand: Veeder-Root Pages: 58

Pivot track filler
Brand: Norwest Pages: 16


