


INITIAL
SYSTEM
SET
‐
UP
&
CONFIGURATION
First
things
first!
Upon
initial
powering
of
your
PressurePro
Monitor,
please
take
a
minute
to
configure
your
unit’s
time
and
date
and
vehicle
configuration,
and
–
if
you
want
–
set
your
custom
alert
settings.
GIVE
IT
POWER!
Find
your
PressurePro
power
cord.
Connect
your
the
6
‐
Pin
Molex
connecter
to
your
Monitor.
Connect
opposite
end
to
a
12V
power
source
(via
an
accessory
lighter
or
hard
‐
wiring).
SET
TIME
AND
DATE:
Your
Monitor
will
automatically
take
you
to
a
screen
prompting
you
to
set
your
time
and
date
and
will
walk
you
through
the
set
‐
up.
Use
arrow
keys
to
select
date
and
time
settings.
When
complete,
press
MENU
to
leave
‘Display’
screen
and
return
to
the
Vehicle
Settings
Menu.
From
Vehicle
Settings
Menu,
Select
“Alert
Settings”
and
select
the
alert
option
you’d
like
to
customize
and
follow
the
Monitor’s
prompts
to
change
alert
settings.
When
finished,
press
MENU
until
returned
to
the
main
Menu.
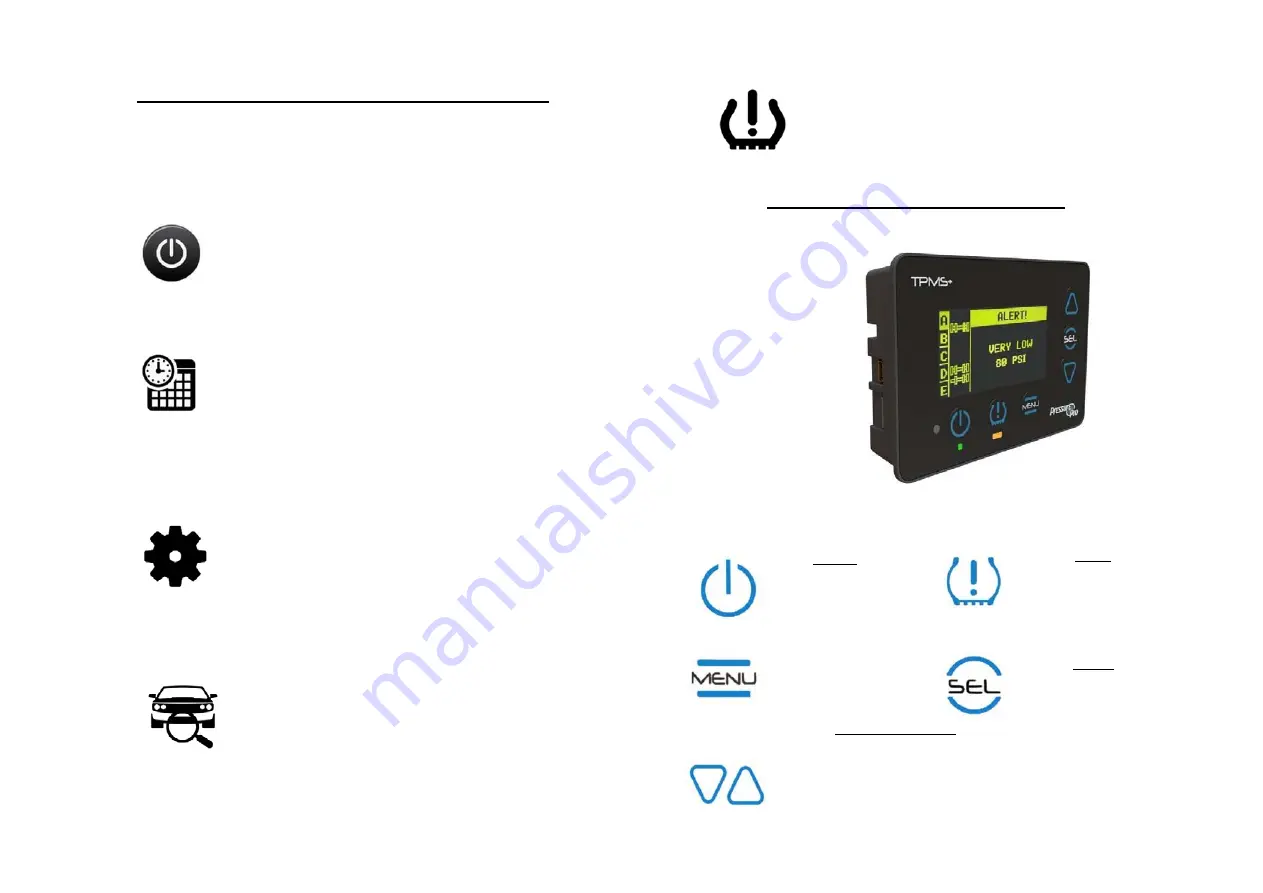
MONITOR
BUTTON
FUNCTIONS
CONFIGURE
VEHICLES
(if
monitoring
more
than
1
unit):
From
the
main
menu,
use
UP
arrow
to
scroll
to
“Vehicle
Settings”
and
push
SEL.
If
you
have
a
tow
vehicle,
or
are
monitoring
multiple
vehicles,
select
“+/
‐
Vehicles”,
and
use
arrows
to
scroll
through
and
activate
the
desired
number
of
vehicles.
When
finished,
press
MENU
to
return
to
the
Vehicle
Settings
Menu.
SELECT
VEHICLE
ID
(NAME
TSA
001):
From
Vehicle
Settings
Menu,
Select
“Vehicle
ID”
and
select
the
vehicle
you
want
to
name.
Follow
the
Monitor’s
prompts
(using
the
arrows
to
name
vehicle).
Repeat
as
needed
for
all
vehicles.
When
finished,
press
MENU
to
return
to
Vehicle
Settings
menu.
SET
YOUR
ALERTS:
POWER
Power
Monitor
Returns
Monitor
to
normal
operation
MENU
Power
Monitor
Returns
Monitor
to
normal
operation
UP/DOWN
ARROWS
Navigates
through
screens
and
positions
ALERT
Quick
access
prioritization
of
alerts
Alert/Warning
Indicator
Reminder
Light
SELECT
Selects
(and
moves
forward)
Monitor
functionality
during
programing
and
use.


