12
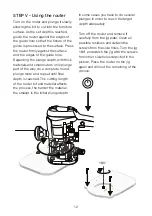
STEP V - Using the router
Turn on the router and plunge it slowly
allowing the bit to cut into the furniture
surface. As the set depth is reached,
guide the router against the edges of
the guide hole so that the fixture of the
guide is processed to the surface. Press
the router firmly against the surface
and the edges of the guide hole.
Regarding the plunge depth, with thick
materials and small routers only plunge
part of the way, do a complete round,
plunge more and repeat until final
depth is reached. The cutting length
of the router bit and material affects
the process, the harder the material,
the smaller is the initial plunge depth.
In some cases you have to do several
plunges in order to reach the target
depth adequately
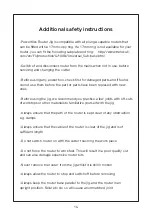
Turn off the router and remove it
carefully from the jig plate. Clean all
possible residues and detach the
screws from the side holes. Turn the jig
180° and attach the jig with the screws
from other side holes depicted in the
picture. Place the router on the jig
again and drill out the remaining of the
groove.
180°
Summary of Contents for Jig
Page 1: ...PowerKiss Router Jig ...
Page 2: ...PowerKiss Router Jig User Guide Version 2 0 PowerKiss 2011 ...
Page 16: ......


