V4.0
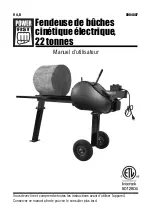
22 Ton Electric Kinetic Log Splitter
8904807
Visit www.princessauto.com for more information
9
2. Clean all rust-protected parts with an ordinary household grease or
spot remover. Do not use gasoline, paint thinner, or mineral spirits, as
they may damage painted surfaces.
3. Install the front bracket (Fig. 2-5) and rear bracket (Fig. 2-4) onto the
log splitter.
4. Install the two wheels (#54) onto the rear bracket (Fig. 2-4).
5. Install the tray (Fig 2-1) onto the log splitter.
6. Thread the Safety Clutch Handle
(Fig. 2-2) onto the small stud
protruding from the housing.
7. Thread the Ram Release Handle
(Fig. 2-3) onto the large stud below
the housing.
OPERATION
WARNING! Always operate the log splitter from the rear during the
splitting task to protect yourself from ejected splinters or pieces of
wood, expecially when splitting irregular or knotty wood.
BEFORE USE
1. Verify that the log splitter is on a flat and stable surface prior to
operation.
2. Verify that all nuts and bolts are tight. Make sure the log splitter is in
good condition before use.
3. Operate the log splitter from the back of the unit behind the motor.
Familiarize yourself with the operating sequence by practicing without
logs before use.
4. Maintain a clear area free from obstructions, including split and unsplit logs.
OPERATING THE LOG SPLITTER
IMPORTANT! The area beneath the ram can accumulate debris and
splinters, which can prevent the ram from fully returning to the start
position. Keep this area clear of debris to ensure correct operation.
Fig. 2


