background image

14

SERVICE

WARNING:

Disconnect the spark

plug before performing maintenance except

for carburetor adjustments.
We recommend all service and adjustments

not listed in this manual be performed by an

authorized or Master Service Dealer.

HELPFUL TIP

IMPORTANT:

Have all

repairs other than the rec-

ommended maintenance

described in the instruction

manual performed by an

authorized service dealer.

If any dealer other than an authorized

service dealer performs work on the

product, Electrolux Home Products,

Inc., may not pay for repairs under war-

ranty. It is your responsibility to maintain

and perform general maintenance.

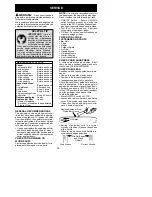
MAINTENANCE SCHEDULE

Check:

Fuel mixture level

Before each use

. . . .

Bar lubrication

Before each use

. . . . . . .

Chain tension

Before each use

. . . . . . .

Chain sharpness

Before each use

. . . . .

For damaged parts

Before each use

. . .

For loose caps

Before each use

. . . . . .

For loose fasteners

Before each use

. . .

For loose parts

Before each use

. . . . . .

Inspect and Clean:

Bar

Before each use

. . . . . . . . . . . . . . . .

Complete saw

After each use

. . . . . . .

Air filter

Every 5 hours*

. . . . . . . . . . . . .

Chain brake

Every 5 hours*

. . . . . . . . .

Spark arresting screen

and muffler

Every 25 hours*

. . . . . . . . . .

Replace spark plug

Yearly

.

Replace fuel filter

Yearly

. . .

* Hours of Operation --

Each hour of operation is approximately

2 tanks of fuel.

GENERAL RECOMMENDATIONS

The warranty on this unit does not cover

items that have been subjected to operator

abuse or negligence. To receive full value

from the warranty, the operator must main-

tain unit as instructed in this manual. Various

adjustments will need to be made periodical-

ly to properly maintain your unit.

S

Once a year, replace the spark plug, air filter,

and check guide bar and chain for wear. A

new spark plug and air filter assures proper

air-fuel mixture and helps your engine run

better and last longer.

CHECK FOR DAMAGED OR

WORN PARTS

Contact an authorized service dealer for re-

placement of damaged or worn parts.

NOTE:

It is normal for a small amount of oil

to appear under the saw after engine stops.

Do not confuse this with a leaking oil tank.

S

ON/STOP Switch -- Ensure ON/STOP

switch functions properly by moving the

switch to the STOP position. Make sure en-

gine stops; then restart engine and continue.

S

Fuel Tank -- Do not use saw if fuel tank

shows signs of damage or leaks.

S

Oil Tank -- Do not use saw if oil tank shows

signs of damage or leaks.

CHECK FOR LOOSE

FASTENERS AND PARTS

S

Bar Nuts

S

Chain

S

Muffler

S

Cylinder Shield

S

Air Filter

S

Handle Screws

S

Vibration Mounts

S

Starter Housing

S

Front Hand Guard

CHECK CHAIN SHARPNESS

A sharp chain makes wood chips. A dull

chain makes a sawdust powder and cuts

slowly. See CHAIN SHARPENING.

CHECK GUIDE BAR

Conditions which require guide bar mainte-

nance:

S

Saw cuts to one side or at an angle.

S

Saw has to be forced through the cut.

S

Inadequate supply of oil to bar/chain.

Check the condition of guide bar each time

chain is sharpened. A worn guide bar will

damage the chain and make cutting difficult.

After each use, ensure ON/STOP switch is

in the STOP position, then clean all sawdust

from the guide bar and sprocket hole.

To maintain guide bar:

S

Move ON/STOP switch to STOP.

S

Loosen and remove bar nuts and clutch

cover. Remove bar and chain from saw.

S

Clean the oil holes and bar groove after

each 5 hours of operation.

Remove Sawdust From

Guide Bar Groove

Oil Holes

S

Burring of guide bar rails is a normal

process of rail wear. Remove these burrs

with a flat file.

S

When rail top is uneven, use a flat file to re-

store square edges and sides.

Correct Groove

Worn Groove

File Rail Edges

and Sides

Square

Summary of Contents for 545047503

Page 1: ...g Instructions before using this product Failure to do so can result in serious injury ADVERTENCIA Lea el manual de instrucciones y siga todas las advertencias e en strucciones de seguridad El no hacerlo puede resultar en lesiones graves AVERTISSEMENT Lire le manuel d instructions et bien respecter tous les avertisse ments et toutes les instructions de sécurité Tout défaut de le faire pourrait ent...

Page 2: ...operating instruc tions before attempting to use the unit S Restrict the use of your saw to adult users who understand and can follow safety rules precautions and operating instruc tions found in this manual S Wear protective gear Always use steel toed safety footwear with non slip soles snug fitting clothing heavy duty non slip gloves eye protection such as non fog ging vented goggles or face scr...

Page 3: ...efore refueling S Mix and pour fuel in an outdoor area on bare ground store fuel in a cool dry well ventilated place and use an approved marked container for all fuel purposes Wipe up all fuel spills before starting saw S Move at least 10 feet 3 meters from fuel ing site before starting engine S Turn the engine off and let saw cool in a non combustible area not on dry leaves straw paper etc Slowly...

Page 4: ...ipon thesaw withboth hands when the engine is running and don t let go A firmgrip willhelp youreduce kickback and maintain control of the saw Keep the fingers of your left hand encir cling and your left thumb under the front handlebar Keep your right hand com pletely around the rear handle whether your are right handed or left handed Keep your left arm straight with the elbow locked S Position you...

Page 5: ...autho rized servicing dealer Take your unit to the place of purchase if purchased from a servic ing dealer or to the nearest authorized master service dealer S Tipcontactinsomecases may cause alight ning fast reverse REACTION kicking guide bar up and back toward operator S Pinching the saw chain along the top of the guide bar may push the guide bar rapidly back toward the operator S Either of thes...

Page 6: ...Inc in accordance with ANSI B175 1 2000 American National Standards for Gasoline Powered Chain Saws Safety Requirements CSA Z62 1 03 Chain Saws Occupational Health and Safety CSA Z62 3 96 Chain Saw Kickback Occu pational Health and Safety ASSEMBLY Protective gloves not provided should be worn during assembly ATTACHING THE BAR CHAIN If not already attached WARNING If received assembled repeat all s...

Page 7: ... around guide bar If the chain does not rotate it is too tight Ifthe chainis tooloose itwill sagbelow the bar Chain Adjustment Tool Bar Tool Guide Bar Adjusting Screw Bar Nuts Adjusting the tension Chain tension is very important Chains stretch during use This is especially true during the first few times you use your saw Always check chain tension each time you use and refuel your saw 1 Loosen ba...

Page 8: ...tle trigger This feature prevents you from acci dentally squeezing the trigger CHOKE FAST IDLE LEVER The choke and fast idle are set by pulling the CHOKE FAST IDLE LEVER out to the full ex tent for cold starting or after refueling The choke provides additional fuel to the engine during cold starting PRIMER BULB The PRIMER BULB circulates fuel to the car buretor to provide quicker starting CHAIN BR...

Page 9: ...ture thinning If Poulan or Poulan PROR bar and chain oil is not available use agood gradeSAE 30oil S Never use waste oil for bar and chainlubri cation S Always stop the engine before removing the oil cap IMPORTANT Experience indicates that alcohol blended fuels called gasohol or using ethanol or meth anol can attract moisture which leads to sepa ration and formation of acids during storage Acidic ...

Page 10: ...thin it may break when the chain brakeis triggered Withabroken brakeband the chain brake will not stop the chain The chain brake should be replaced by an autho rized service dealer if any part is worn toless than 0 020 0 5 mm thick Repairs on a chain brake should be made by an autho rized service dealer Take your unit to the place of purchase if purchased from a ser vicing dealer or to the nearest...

Page 11: ...de of the terrain as the tree is likely torollor slidedownhill afterit is felled S Study the natural conditions that can cause the tree to fall in a particular direction Natural conditions that can cause a tree to fall in a particular direction include S The wind direction and speed S The lean of the tree The lean of a tree might not be apparent due to uneven or sloping terrain Use a plumb or leve...

Page 12: ...es pinched or hung in a log don t try to force it out You can losecontrol ofthe sawresulting in injury and or damage to the saw Stop the saw drive awedge ofplastic orwood intothe cut until the saw can be removed easily Re startthesaw andcarefully reenterthecut To avoid kickback and chain damage do not use a metal wedge Do not attempt to restart your saw when it is pinched or hung in a log Use a we...

Page 13: ...ension in the wood fibers is released S Keep a clear work area Frequently clear branches out of the way to avoid tripping over them LIMBING S Always limbatreeafter itis cut down Only then can limbing be done safely and prop erly S Leave the larger limbs underneath the felled tree to support the tree as you work S Start at the base of the felled tree and work toward the top cutting branches and lim...

Page 14: ...er assures proper air fuel mixture and helps your engine run better and last longer CHECK FOR DAMAGED OR WORN PARTS Contact an authorized service dealer for re placement of damaged or worn parts NOTE It is normal for a small amount of oil to appear under the saw after engine stops Do not confuse this with a leaking oil tank S ON STOP Switch Ensure ON STOP switch functions properly by moving the sw...

Page 15: ...able to replace your air fil ter with a new one after every 50 hours ofop eration or annually whichever comes first 1 Loosen 3 screws on cylinder cover 2 Remove cylinder cover 3 Remove air filter cover and air filter 4 Clean the air filter usinghot soapy water Rinse with cleancool water Air dry com pletely before reinstalling 5 Reinstall air filter and air filter cover 6 Reinstall cylinder cover a...

Page 16: ...g idle too slow The idle speed screw is located in the area above the primer bulb and is labeled T S Turn idle screw T clockwise to increase engine speed S Turn idle screw T counterclockwise to decrease engine speed If you require further assistance or are unsure about performing this procedure contact your authorized service dealer or call our customer assistance help line at 1 800 554 6723 STORA...

Page 17: ... ON 2 See Difficult Starting in Operation Section 3 Fill tank with correct fuel mixture 4 Install new spark plug 5 Check for dirty fuel filter replace Check for kinked or split fuel line repair or replace Engine will not idle properly 1 Idle speed requires adjustment 2 Carburetor requires adjustment 1 See Carburetor Adjustment in the Service and Adjustments Section 2 Contact an authorized service ...

Page 18: ...TY RIGHTS AND OBLIGA TIONS The U S Environmental Protection Agency California Air Resources Board Envi ronment Canada and ELECTROLUX HOME PRODUCTS INC are pleased to explain the emissions control system warranty on your year 2005 and later small off road engine In California all small off road engines must be designed built and equipped to meet the State s stringent anti smog standards ELEC TROLUX...

Page 19: ...ranted part still under warranty WHAT IS NOT COVERED All failures caused by abuse neglect or improper maintenance are not covered ADD ON OR MODIFIED PARTS The use of add on or modified parts can be grounds for disallowing a warranty claim ELECTROLUX HOME PRODUCTS INC is not liable to cover failures of warranted parts caused by the use of add on or modified parts HOW TO FILE A CLAIM If you have any...

Reviews: