


5
Login to the configuration page with:
User name:
admin
Password:
admin
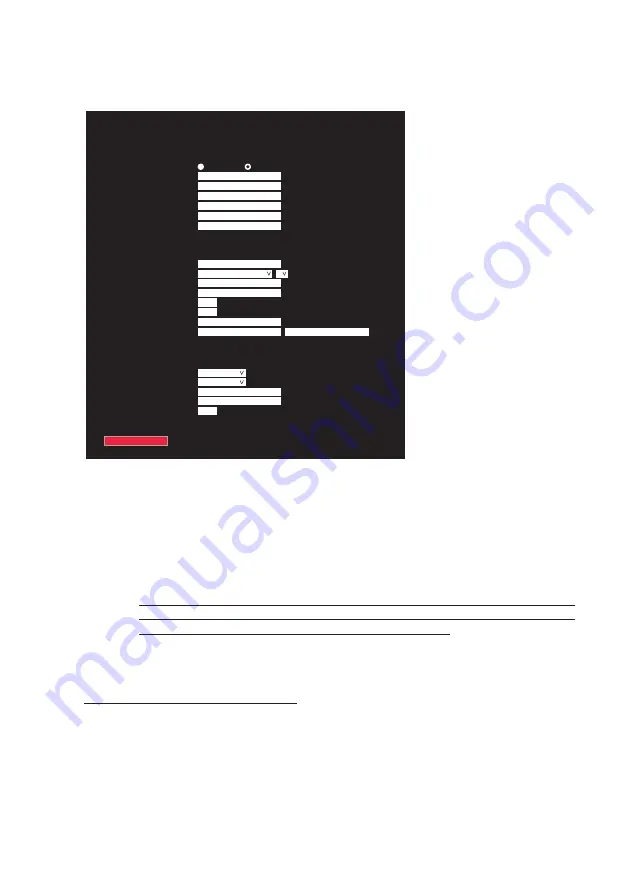
Figure
4:
DoorSign
configuration
Click on the red „Submit and Reboot“ button after having changed the configuration data. All pa-
rameters will be checked for correctness. If all parameters are correct, the DoorSign101 loads the
new configuration and reboots.
If incorrect data has been detected, an error message is displayed.
5.2. LAN
Note:
A wrong network configuration can compromise the stability of the whole network and
cause a breakdown of the network. Please contact your network administrator before
making changes to the LAN configuration of the DoorSign101!
DoorSign101 is shipped with DHCP setting and will receive the network configuration from a DHCP
server. Do not change this setting unless a static network configuration is required.
Change from DHCP to a static IP address
Perform the following steps if a static IP address is required:
Select radio button „
Static
“
Enter your new configuration:
IP-Address:
IP address of the DoorSign101
Netmask:
Network mask
Gateway:
IP address of the gateway
DNS-Server:
IP address of the DNS server
room!MATE DoorSign101 Configuration
LAN
System
IP Addressing:
Hostname:
IP Address:
Netmask:
Gateway:
DNS Server:
MAC Address:
Time Zone:
Select Time Zone:
Time Server 1:
Time Server 2:
Display off [h]:
Display on [h]:
User Name:
Password [two times]:
System
Template:
Language Module:
Room Name:
Server:
Time Offset [minutes]:
Submit and Reboot
Static
DHCP
ds1
192.168.1.129
255.255.255.0
192.168.1.1
192.168.1.1
b8:27:eb:3e:28:62
Europe/Berlin
Select continent first
srv-doorsign
0.europe.pool.ntp.org
admin
0
doorsign-3
German
Berlin
srv-doorsign


