background image

38

39

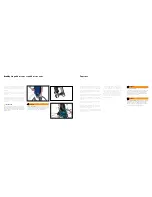
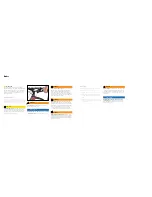
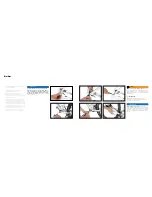
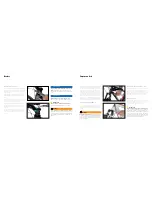
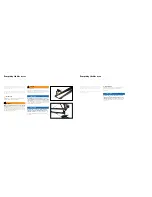
Normally, you operate the large lever with your thumb. 
The smaller lever in front of the handlebars is operated 
with your index finger or thumb [ Shimano Syfront forke 
with 2-way release ].

Checking and adjusting the derailleur

After the first hours of using your bike, the Bowden 
cables of your derailleur may be elongated, which will 
reduce shifting accuracy. The derailleur may therefore 
have to be adjusted. We recommend that the derailleur 
is adjusted by an experienced bicycle mechanic.  
If you want to adjust your derailleur yourself, consult  
the additional owner’s manuals of the derailleur manu-
facturer. If in doubt, contact the Porsche Bike hotline.

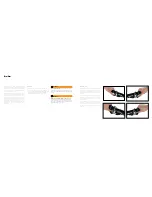
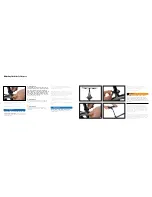
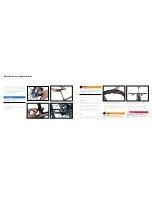
Use the adjusting screw located on your shifter to 
make fine adjustments to the rear derailleur.

Sudden loss of power and propulsion. 

Shifting  

under a load may cause the chain to slip or fall off  
the chain rings. The loss of power and propulsion 
may cause a crash. When shifting, continue to pedal  
without applying excessive force.

Failure to remain alert on public roads. 

Practicing 

shifting on public roads may distract one’s attention 
from traffic and potential risks, which may result in  
an accident or crash. Only practice shifting when on  
a surface away from traffic.

Risk of damage to the chain and frame when  
shifting under a load. If the chain falls off, it may 
cause chain suck [ deadlock of the chain ] between 
the front chain ring and the chain stay. This may 
damage the frame. 

When shifting, continue to pedal 

without applying excessive force.

Risk of damage to the chain due to increased 
wear. 

Avoid a gear ratio where the chain is in an  

extremely oblique position.

WARNING

WARNING

PLEASE NOTE

PLEASE NOTE

When making the first fine adjustments, try turning  
the adjusting screw counter-clockwise to compensate 
for the stretching. Make gradual adjustments with the 
adjusting screw. Check the adjustment by shifting one 
gear up and then back down. If this is successful, shift 
through all gears on the cassette in both directions.

Set the front derailleur so that the chain is able to  
run through the derailleur cage without chafing on  
the lateral guide plates. Pay attention to the diagonal 
position of the chain [ chain line ].

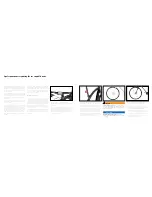
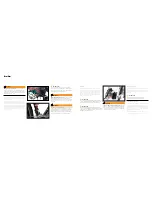
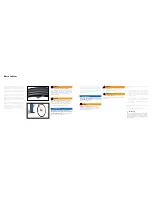
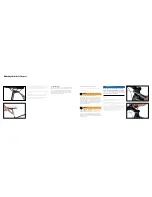
To set the limit stops for your gears, shift to the highest 
gear, that is, the smallest rear sprocket, using the small 
right shifter. Now look at the derailleur from the back. 
The cage of the derailleur and both guide rollers must 
be directly under the smallest sprocket. 

Use the top limit stop screws to make the adjustment 
for the smallest sprocket.

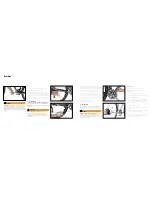
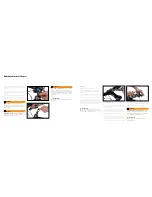
Do the same to set the limit stop for the largest 
sprocket. Set the limit stop with the bottom limit stop 
screw. Make sure that the chain does not come off of 
the largest sprocket into the spokes.

In addition to setting the chain line, you can set  
the limit stops on your rear and front derailleur.  
This prevents your chain from coming off the rear  
cassette sprocket or the front chain rings.

Make adjustments on a proper workstand. This will  
allow you to freely rotate the rear wheel and shift 
through all gears. 

Properly adjusted chain clearance between  
left and right limit stop.

 If the limit stops are not set 

correctly, the chain may fall off and catch between the 
chain ring and chain stay or rear cassette and spokes. 
The bike will no longer be propelled forward or the rear 
wheel may jam as a result. There is a risk of loss of 
control or crashing. Exercise utmost care when setting 
the limit stops or have this done by a bike specialist.

We recommend that adjustments to the rear  
derailleur and front derailleur should be per-
formed by a specialist. Improper adjustments 
may result in mechanical damage. 

Please observe 

the additional instructions of the shifter manufacturer. 
Contact the Porsche Bike hotline if you have ques-
tions.

If the chain falls off, it may cause chain suck 
[ deadlock of the chain ] between the front chain 
ring and the chain stay. This may damage the 
frame. 

Exercise utmost care when setting the limit 

stops or have this done by a bike specialist.

INFORMATION

WARNING

PLEASE NOTE

PLEASE NOTE

Derailleur

Summary of Contents for Porsche bike

Page 1: ...Assembly instructions for the Porsche Bike RX the Porsche Bike RS and the Porsche Bike Porsche Driver s Selection ...

Page 2: ...Porsche Bike RX ...

Page 3: ...Porsche Bikes Porsche Bike RS Porsche Bike ...

Page 4: ...ds 28 Mounting the reflectors 28 Notes on safe use on public roads 31 Tips for using public roads 31 Notes on off road cycling 32 Headset 53 Adjusting Ahead set headsets 54 Suspension fork 55 Positioning the DT Swiss XMM Fork 55 Positioning the SR Suntour NCX D Lo Fork 55 Negative spring travel 55 When riding 56 Special Lock Out function 56 Damping adjustment DT Swiss XMM Fork only 56 Adjusting th...

Page 5: ...uous development the shape specification configuration and engineering of your bike may not be as illustrated or described in this manual Parts on the bike are sometimes optional or vary depending on legal requirements or on the country in which the bike is sold Should your bike be fitted with any parts which are not described in this manual the Porsche Centre who sold the bike to you will be glad...

Page 6: ...Pedal crank 7 Brake calliper front 8 Brake disc front 9 Bike RX suspension fork Bike RS rigid fork 10 Rear fork 11 Rims 12 Tyres 13 Seat 14 Seat post 15 Seat quick release 16 Stem 17 Handlebars 18 Headset 19 Front wheel quick release 20 Chain rings 21 Derailleur 22 Chain 23 Rear derailleur 24 Sprocket 25 Pedals 26 Inside bearing 27 Seat tube 28 Top tube 29 Seat stay 30 Chainstays 31 Downpipe 32 St...

Page 7: ...ank 7 Brake calliper front 8 Brake disc front 9 Suspension fork 10 Rear fork 11 Rims 12 Tyres 13 Seat 14 Seat post 15 Seat quick release 16 Stem 17 Handlebars 18 Headset 19 Front wheel quick release 20 Front pulley front 21 Belt 22 Pulley rear 23 Pedals 24 Gear hub 25 Side center kickstand 26 Eccentric inside bearing 27 Seat tube 28 Top tube 29 Seat stay 30 Chainstays 31 Downpipe 32 Steerer tube 3...

Page 8: ...mponent may suddenly fail In the event of a fibre fracture please be careful when handling the material the fine carbon fibres pose a risk of injury Carbon components may never be worked back into shape if damaged Instead immediately replace the damaged component Damages to the paint should be repaired immediately to prevent the material from absorbing moisture as this may negatively influence the...

Page 9: ...ke lever In countries with right hand traffic Porsche Bikes are shipped such that the left brake lever controls the front wheel brake and the right the rear wheel brake In countries with left hand traffic Porsche Bikes are shipped such that the right brake lever controls the front bike brake and the left brake lever the rear wheel brake Determine the location of the front and rear wheel brake leve...

Page 10: ...lted connections Please lift your bike approximately 10 cm and then drop it from this limited height onto the ground Rattling sounds indicate loose components Locate the source of the rattling and check the screwed connections and bearing Biking on public roads If you intend to use public roads you must equip your bike to comply with the legal requirements of your country Sluggish or impaired stee...

Page 11: ...lete setup of the bike may result in serious accidents Do not use the bike before working through each of the points listed in this chapter Contact the Porsche Bike hotline with any questions or if you are unsure how to set up the bike WARNING WARNING WARNING WARNING Safety precautions when riding at night or in the dark If you are cycling with your lights on at night or in poor visibility conditi...

Page 12: ...ars and front fork are not twisted against one another in the assembly To do so hold the front tyre between your knees and attempt to twist the handlebars Derailleur Please check that your chain is located on the front chain rings and rear cassette A crash on the rear derailleur side may damage it Attempt to shift through the gears and make sure the shifter or dropout which may be bent does not co...

Page 13: ...k handlebars stem and seat post Immediately replace bent parts WARNING WARNING What to check after a crash Further important instructions for your Porsche Bike Deficient technical condition Deficient technical condition of the bike may result in damages and cause a crash or accident Only use your bike if it is in perfect technical condition Porsche only recommends use of original Porsche spare par...

Page 14: ...quick release axles are not secured properly components may become loose and cause you to crash Check to make sure all quick releases or quick release axles are secure and tighten them if necessary WARNING CAUTION One step quick releases have a single lever You only have to open this lever You open the quick release axle Bike RX by turning the lever in an anti clockwise direction To make it easier...

Page 15: ...for travel on paved and unpaved paths and roads Failure to comply with the safety instructions in this on manual may cause the bike to break down Porsche is not liable for resulting damage to the bike These Porsche bikes are not suitable for downhill free ride parks jumps or competitions The permissible weight for the bike rider and gear amounts to 120 kg 265 lbs The bike is not suitable for use w...

Page 16: ...eflector The fasteners and reflectors are directly labelled with the respective codes Push the open holder over the handlebar Then push the holder as close as possible to the middle of the handlebars and screw it in place with a Philips screwdriver Once the clamp is securely positioned on your handlebar push the white reflector RR 180 SL onto the holder Proceed similarly when mounting your rear re...

Page 17: ...egwear from catching in the derailleur Wear a helmet and protective glasses for your safety The following traffic points and situations pose an increased accident risk Exercise extreme caution At intersections even if the bike path runs parallel to the lane There is a risk of vehicles turning across the bike path When crossing tracks When you are in a vehicle s blind spot and the driver is unable ...

Page 18: ...s on your front fork to overheat This may reduce the braking effectiveness or cause the brake to fail completely and poses a danger of accident To avoid this do not apply the brakes for prolonged periods during longer descents always be sure to release the brake occasionally In case of doubt stop and allow the brakes to cool off Please familiarise yourself with the location of the left and right b...

Page 19: ...ponents The brake disc and brake calliper heat up when braking Under these condi tions there is a burn risk if your skin comes in contact with these components Let the brake components cool off before working on them Brake fluid damages the surface of the bike and the components Do not open the brake lines PLEASE NOTE CAUTION WARNING WARNING WARNING WARNING INFORMATION Brake chafing Continual chaf...

Page 20: ...This reduces the lifetime of your chain and or the chain rings and sprocket Chain and chain ring Trousers with wide legs may catch in the chain or the chain ring and cause a crash Wear trousers with tight fitting legs or use leg bands or clips WARNING WARNING Changing gears With Shimano derailleurs the shift levers are mounted so that the lever for controlling the front derailleur is located on th...

Page 21: ... shift through all gears on the cassette in both directions Set the front derailleur so that the chain is able to run through the derailleur cage without chafing on the lateral guide plates Pay attention to the diagonal position of the chain chain line To set the limit stops for your gears shift to the highest gear that is the smallest rear sprocket using the small right shifter Now look at the de...

Page 22: ...t WARNING WARNING WARNING INFORMATION Gear hubs The advantage of gear hubs lies in their enclosed construction In most cases you can switch through all gears with one shift operation A thumb shift is used to change gears By pushing the large shifter with your thumb you will change to a higher gear By pushing the small shifter with your index finger you will change to a lower gear Adjusting gear hu...

Page 23: ...d the lifecycle of your chain rings and your cassette To easily assess the condition of your chain shift to the largest front chain ring and pull the chain off the chain ring with your thumb and index finger If the chain can be lifted substantially it is excessively elongated and must be replaced Have a bike specialist perform an in depth inspection of your chain with special tools Bike belt drive...

Page 24: ...on by turning the eccentric inside bearing Risk of damage due to incorrect belt tension If the belt tension is insufficient the belt may slip over the pulley and be damaged Excessive belt tension may damage the bearings causing the system to be stiff Have a bike specialist change and adjust the belt PLEASE NOTE Adjusting the belt may differ from the method described here Please consult the documen...

Page 25: ...ded size PLEASE NOTE WARNING WARNING The air pressure of your tyres determines the risk of flat tyres e g insufficient air pressure when riding over a curb but also rolling friction wheel grip and suspension comfort The air pressure recommended by the manufacturer is generally located on the tyre side wall or the type label Sunlight and the elements Tyres may become brittle and crack There is a ri...

Page 26: ...then you can fix your flat tyre quickly in most cases Chapter Handling the quick releases or quick release axles on p 24 describes how to properly mount and remove wheels if necessary you should also observe the notes under Mounting the wheels on p 48 If your bike has a gear hub Bike you must first remove the gear cable in order to completely remove the wheel from the frame If your bike has a belt...

Page 27: ...ir the tube If you would like to replace your tyre you can simply lift the second tyre side wall over the rim edge by hand In the event of a flat tyre you should check the inside of the tyre for thorns or the like and replace the tyre if necessary Also check the position of the rim protector It must cover all sharp edges The rim protector must be replaced if damaged When the tyre has been removed ...

Page 28: ...or quick release axles on p 24 Brake function Assembly errors and contamination with e g oil and grease on the brake discs and brake pads may negatively effect the function of the brakes Test the brakes regularly WARNING Headset The headset is a rotatable interface between the front forks in the steerer tube During use the headset is subjected to considerable forces and torques which may loosen th...

Page 29: ... countryside Impacts caused by rough terrain are generally transmitted to a spring element integrated in the left hand fork leg when viewed in the direction of travel To ensure optimum performance from the suspension fork you need to adjust the suspension fork to your body weight and your style of riding Positioning the DT Swiss XMM Fork You can continuously adjust the suspension stiffness by regu...

Page 30: ...dden impacts are also transmitted to the wrist joints directly which may cause you to lose control and fall from your bike INFORMATION Adjusting the bike to the user When you purchased the bike you already decided on a frame size that suits you When adjusting screw connections please be sure to never exceed the designated tightening torques For the tightening torques consult the chapter Recommende...

Page 31: ...tube the seat post must always end under the top tube or the seat stay Observe the minimum insertion depth for the seat post Risk of damage associated with unstable or firm seat post in the seat tube Never forcefully loosen a seat post which is firmly clamped into the tube Consult your bike specialist INFORMATION INFORMATION INFORMATION PLEASE NOTE Check whether you are still able to safely reach ...

Page 32: ... You can now take the stem off the fork shaft Remove the spacer rings under the stem to lower the position of the stem Please note that at least one spacer ring must be located between the stem and headset You can also adjust the height of the headset by turning it Adjusting the bike to the user Changes to the handlebars and stem The handle bars and stem are components which are essential for bike...

Page 33: ...ot twisted too far to the outside Once you have found the right gripping position tighten the handlebar clamping screw by applying the specified tightening torque Make sure that the han dlebars are centred in the stem clamp Attempt to turn the handlebars in relation to the stem to check the clamping connection Brake and shifter grips You have the option of adjusting the incline of your brake and s...

Page 34: ...ect your brake discs against damage Make sure that the gear cables or brake cables are not kinked If your bike cannot be transported in the boot trunk Porsche also offers two systems for roof and trailer coupling Vehicle load limit lights and license number A load extending above the vehicle and blocking of the vehicle lights may result in accidents Only load the bike rack so that the bike does no...

Page 35: ... the total vehicle height with a loaded bike rack Measure the total vehicle height and label it inside the vehicle for easy reference Consider the total vehicle height when entering parking garages garages underground garages and tunnels Risk of damage to the bike brake rear fork and front fork when transporting wheels in a removed state Mount the transport guards for the disc brake Mount the spac...

Page 36: ...mproperly fitted helmet To protect yourself in the event of an accident always wear a helmet when riding your Porsche Bike A helmet with the wrong size or which is not properly fitted increases the risk of severe injury in the event of an accident Always use a helmet when cycling Make sure that the helmet has the right fit that the strap is properly adjusted and fastened Improper bike attire Unsui...

Page 37: ... pressure washer or steam blaster may cause water to penetrate the bearing seal and damage the bearings Do not use any pressure washers or steam blasters Brake function Contamination e g with care prod ucts or chain oil on the brake discs and brake pads may negatively effect the function of the brakes Do not apply any care products or chain oil to the brake pads and brake discs PLEASE NOTE PLEASE ...

Page 38: ...care for it properly and it is not left unused for prolonged periods You only need to ensure that your bike is kept in a well ventilated dry area If you want to store your bike for a prolonged period of time please consider that your tyres will gradually deflate To prevent damage to your tyres you should hang your bike on a bike rack or check the tyre pres sure regularly Make sure your bike is cle...

Page 39: ...ly incorrect the warrantor may refuse to provide the services prescribed in the warranty A corresponding warranty is offered for the parts installed in or repaired in the scope of subsequent performance up to the expiry of the bike s warranty period This also applies if a replacement bike is delivered If the warrantor delivers a new bike on the basis of a warranty claim it may demand the return of...

Page 40: ...rive chain belt rear cassette chain rings and pulleys handlebar grips rear derailleur derailleur cables handlebars and stem seat post and seat brake pads and discs wheels including tyres and tubes brake cables Brake pads Due to their function the disc brake pads are subject to wear Athletic use or trips on mountainous terrain may reduce the replacement intervals for the pads Check the pad conditio...

Page 41: ...ystem pedals Clean lubricate coupling mechanism x Seat post stem Check clamping screws x Rear derailleur front derailleur Clean lubricate adjust x Quick releases wheel bolted connection Check position check screws x Nuts and bolts Check and or tighten x Valves Check position x Seat post Remove and renew lubrication x Cables derailleur Remove and lubricate and or replace x Inspections and repairs w...

Page 42: ...2 5 Nm Brake lever Magura MT8 3 Nm Brake caliper Magura MT8 10 Nm Brake discs Magura Storm SL 6 bolt rotor hub 6 2 Nm CB Crank E13 TRSr double Adjusting screw left crank arm 40 48 Nm Pedals Crankbrothers Mallet 2 35 40 Nm Cassette Shimano HG81 Lockring 30 50 Nm Stem Crankbrothers Iodine 2 5 Nm Seat clamp Crankbrothers Cobalt 2 12 Nm Handles Ergon GA1 Clamp 3 Nm Component Manufacturer Description T...

Page 43: ... Cable hanger clamps down tube 2 3 Nm Seat stay opening 4 6 Nm Hub Alfine SG S501 Axle nut 30 45 Nm Crank FC S500 Adjusting screw left crank arm 0 7 1 5 Nm Adjusting screw left crank arm 12 15 Nm Shifter lever SL S 503 Fastening screw handlebar clamp 5 Nm Inside bearing 35 50 Nm Handles Ergon GA1 Clamp 4 Nm Brakes Magura MT26 Handlebar clamp 3 Nm Brake caliper 10 Nm Brake disc Magura Storm Centerl...

Page 44: ...urer websites http bike shimano com http www crankbrothers com http www magura com http www ergon bike com http www carbondrivesystems com http www fizik it http www schwalbe com http www cateye com de http www CODE No com ...

Page 45: ...ered trademarks of Dr Ing h c F Porsche AG Porsche reserves the right to alter specifications and other product information without prior notice Errors and omissions excepted Edition 06 13 Printed in Germany Porsche Lizenz und Handels gesellschaft mbH Co KG Porschestraße 1 74321 Bietigheim Bissingen Germany www porsche com ...

Page 46: ...www porsche com ...
Reviews: