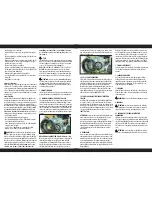
Remove the lower cover by unscrewing the 4 screws (Photo 10),
remove the diaphragm and the gasket, check that the inside part
is clean in particular the metallic filter provided on the Walbro
WG8 model only (Photo 11) and assemble it again using the new
diaphragm and the new gasket. Reassemble the carburettor fol-
lowing the instructions in the opposite way, being very careful to
place the gaskets in the right places.
10
11
10- HOW TO BEHAVE IN FLIGHT
Maximum acceleration is recommended only to take off (full
power) or when really necessary!
In order to avoid a poor mixture from acceleration/ascension to
level flight conditions, loosen the engine till a descending phase
and then gradually accelerate again till achieving a level flight
or a glide angle or a rise angle wished. In this way you will be
sure to maintain firm and efficient the carburation, avoiding to
be over rpm with a minimum valve/throttle opening.
Two stroke engines do not stand constant range for a long time
too much. Take care of your engine by varying now and then the
rpm range. In this way the engine will have constant performan-
ce and a good elasticity improving its working during the time.
10.1 TEMPERATURE THERESHOLDS
Your 100/200 Thor engine, according to the pilot weight and
wind size, must have a flight temperature between 230° and
250° under sparkplug (these measures have been taken with
Polini thermocouple tool – 928.830.002). This parameters may
vary according to different factors: environment temperature,
working height, wet, quality of the fuel used, anyway this tempe-
rature has not to exceed 265°/280 for short period.
Furthermore it is important to say that carbon deposits caused by
a richer mixture may limit during the time the exceeding loss of
heat, favouring high temperatures that can compromise the relia-
bility of the engine. For these reasons we remind you to follow
very carefully the section concerning the servicing.
11- ENGINE FITTING ON THE FRAME
The engine is supplied in a packaging and it is screwed on a cage
to protect it during its carriage. Unscrew the 4 M8 screws that fix
it and extract the engine. KEEP THE PACKAGING AND ITS CAGE
FOR POSSIBLE REPARATIONS UNDER WARRANTY. WARRANTY IS
NOT ACCEPTED IF THE ENGINE IS NOT SHIPPED IN THE ORIGINAL
PACKAGING. The engine must be fixed on the frame using the 4
clamps with the silent-block and positioning some spacers (on
the Thor 100 only) if the frame doesn’t have the necessary space
to fit the manual starter. Refer to the drawing for the engine
fixing measures.
ATTENTION:
The engine must be positioned as indicated in
the picture. To assure a perfect lubrication, do not rotate it.
Because of the overall dimensions during the carriage the filter is
180° rotated. Do not unscrew the clamp to rotate it to reach the
original position. The filter has a hole at the top to be used to
avoid its rotation when using. Place the clamp or a small cable
(they are not provided with the engine) fixing them in a proper
zone of the frame.
ATTENTION:
the filter may rotate if you do not fix it and it
could collide with the propeller, breaking it. This may be very
dangerous for your safety.
11.1 FUEL SYSTEM
Prearrange the frame with a proper tank and its pump to make
the fuel reach the carburettor. Connect the fuel pipe to the mani-
fold on the carburettor, fix it using a clamp and verify that there
is not air coming in.
11.2 ACCELERATOR
Fix the carburettor by using the proper accelerator support (not
supplied). After assembling the accelerator, check that its travel is
enough to reach the carburettor throttle valve opening and check
that recovery is good in order to avoid the engine staying accele-
rated. Check the presence and the right supplementary spring
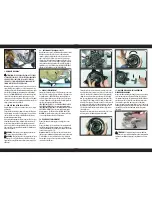
installation (photo 12) provided with the Thor 100 with Walbro
carburettor only. Connect the electrical wires of the throttle, one
on the mass wire of the coil and the other on the + of the coil
(female connector)
12
11.3 SPARK PLUG
Remove the spark plug and check that the gap between the
spark plug electrodes is 0,9mm. Fit the spark plug hood inside
the conveyor cap being careful to fit it completely. Now engage
on the spark plug and enter the small rubber inside the hole in
the plastic conveyor (photo 13). Spark plug type: NGK BR10EG
13
11.4 PROPELLER
Use propellers by Polini Motori, both for Thor 100 and 200 . The
use of a not proper propeller may compromise the engine wor-
king.
11.5 HOW TO CONNECT THE VOLTAGE REGULATOR
(OPTIONAL)
Connect the voltage regulator to the connector. Connect the red
cable (E) to the positive pole on a lead battery (photo 14).
WARNING.
Use lead batteries only. The usage of other kind
of batteries could provoke explosions or bursts.
Connect the negative pole of the battery to earth on the engine.
During its working the voltage regulator, if connected in the right
way, will give a 14,5 Vdc voltage on the battery.
14
OPTIONAL
A
B
E
C
D


