- 20 -
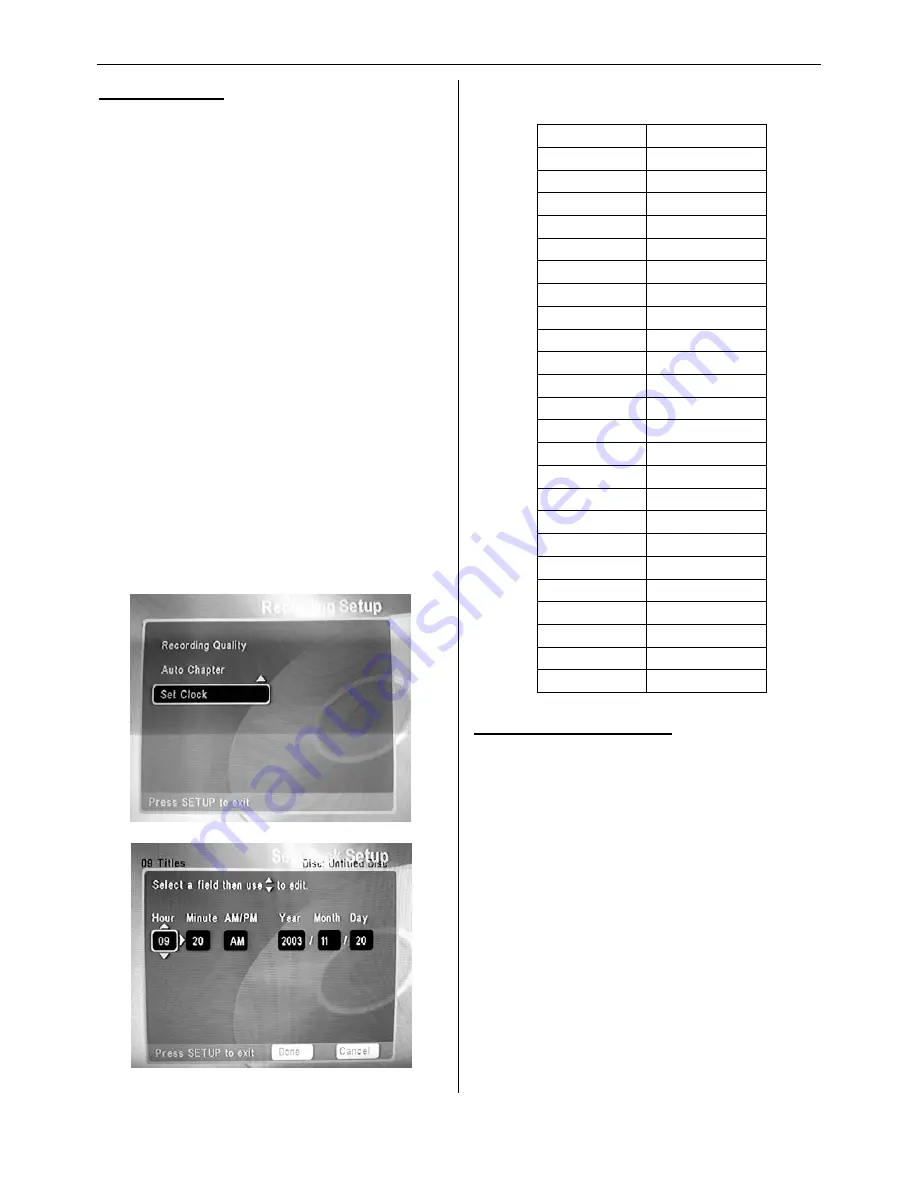
Setting The Clock
In order for the DVD-Recorder to record using a
programmed setting, the internal clock must be set to
the correct time.
1.
From the main menu use the arrow buttons to
highlight “Setup Menu”
2.
Press the
ENTER
button to select “Setup
Menu”
3.
Press the
ENTER
button to select “Record
Setup”
4.
Use the arrow buttons to highlight “Set Clock”
5.
Press the
ENTER
button to select “Set Clock”
6.
Use the Up and Down arrows to change the
“Hour”. Note: This is a 24 hour clock;
please see the chart for assistance
7.
Once the “Hour” is set use the right arrow
button to move to “Minute”
8.
Continue to use the Up and Down arrows to
edit each field. Once the field is set use the
right arrow key to move to the next field
9.
Once “Done” is highlighted using the right
arrow key, press the
ENTER
button to save
the new setting.
Clock Time Chart
AM/PM 24
HOUR
1:00 AM
1:00
2:00 AM
2:00
3:00 AM
3:00
4:00 AM
4:00
5:00 AM
5:00
6:00 AM
6:00
7:00 AM
7:00
8:00 AM
8:00
9:00 AM
9:00
10:00 AM
10:00
11:00 AM
11:00
12:00 PM
12:00
1:00 PM
13:00
2:00 PM
14:00
3:00 PM
15:00
4:00 PM
16:00
5:00 PM
17:00
6:00 PM
18:00
7:00 PM
19:00
8:00 PM
20:00
9:00 PM
21:00
10:00 PM
22:00
11:00 PM
23:00
12:00 PM
24:00
TV / Media Playback Display
1.
From the
Setup Menu
go to the
Video Setup
option and select the desired TV display mode
you want to use during playback of your
recording, using the
TV Display
function. The
DVD-Recorder can display video information
several ways during playback.
•
Normal/PS (pan-and-scan): Cuts the top and
bottom of the picture to fit your television.
•
Normal/Letterbox (LB): The picture displays
in wide screen with black bars at the top and
bottom of your television screen.
•
Wide-screen (Wide TV): If you have a
wide-screen TV, it shows the movie as it was
original intended without the black bars.
Figure 4. Setting The Clock


