


01-999-2534
Page 6
2. To prevent breakage, carefully release
and remove impeller base plate from
the pump body.
3. Using a mild detergent solution and
clean cloth, clean deposits from pump
screen, around impeller and base plate.
4. Spin impeller to dislodge any foreign
material.
5. Remove any foreign material in the
adapter between the pump and hose,
or between the hose and the water
distributor assembly.
Drawer Slides
Twice yearly, lubricate the drawer slides with grease or equivalent
where shown below.
Draining
Drain the cooler cabinet (with power off) as follows:
1. Move cooler to the area appropriate to dump water.
2. Remove drain bushing assembly as shown in figure 3.
3. Drain, clean and dry reservoir.
Alternative draining options for units that will not be moved
frequently:
1. Remove overflow stand pipe from drain bushing assembly as
shown in figure 3.
2. Attach suitable size hose and route it to the desired drain area.
3. Put a cap on the end of the hose.
4. Drain every 8-10 hours of operation.
Touch-Up
The hardness, adhesion and smoothness of the internal and
external finish on your cooler makes it extremely unlikely that
scratches or chipping will occur. In the event that finish damage
does occur, it should be promptly repaired by the following
procedures:
1. Sand the area around bare metal spots.
2. Prime and paint with a quality paint.
Do not use asphalt type cooler undercoat material in water
reservoir. Undercoat will break free, clogging the pump and
water distributor.
LUBRICATION
Motor Bearings
Some motors used in Shop Blaster coolers have ports for
lubricating the motor and are oiled at the factory. If the need for
oiling is indicated, see the motor nameplate for specific instructions
on re-lubricating the motor. Under normal use, these motors require
oiling about every 12 months of operation.
Do Not Over-Oil
.
Blower Shaft Bearing
Blower shaft bearings need periodic lubrication. They should be
checked 20-30 days after initial start-up of operation. The oil cups
on the bearings should be filled with a good grade of SAE 20W or
30W non-detergent oil when necessary. Under normal use, oiling is
required every three months of operation.
Do Not Over-Oil
.
Pump Bearings
The pump motor does not require lubrication.
Cleaning Water Pump & Hose
CAUTION: Do not allow pump to fall over and become
submerged; water will damage pump motor.
Clean water pump and hose assembly as follows:
1. Unplug pump cord, remove mounting bracket screw and
remove pump from cooler. Shake gently to remove water.
Toolbox Lock
Yearly, lubricate the lock with graphite.
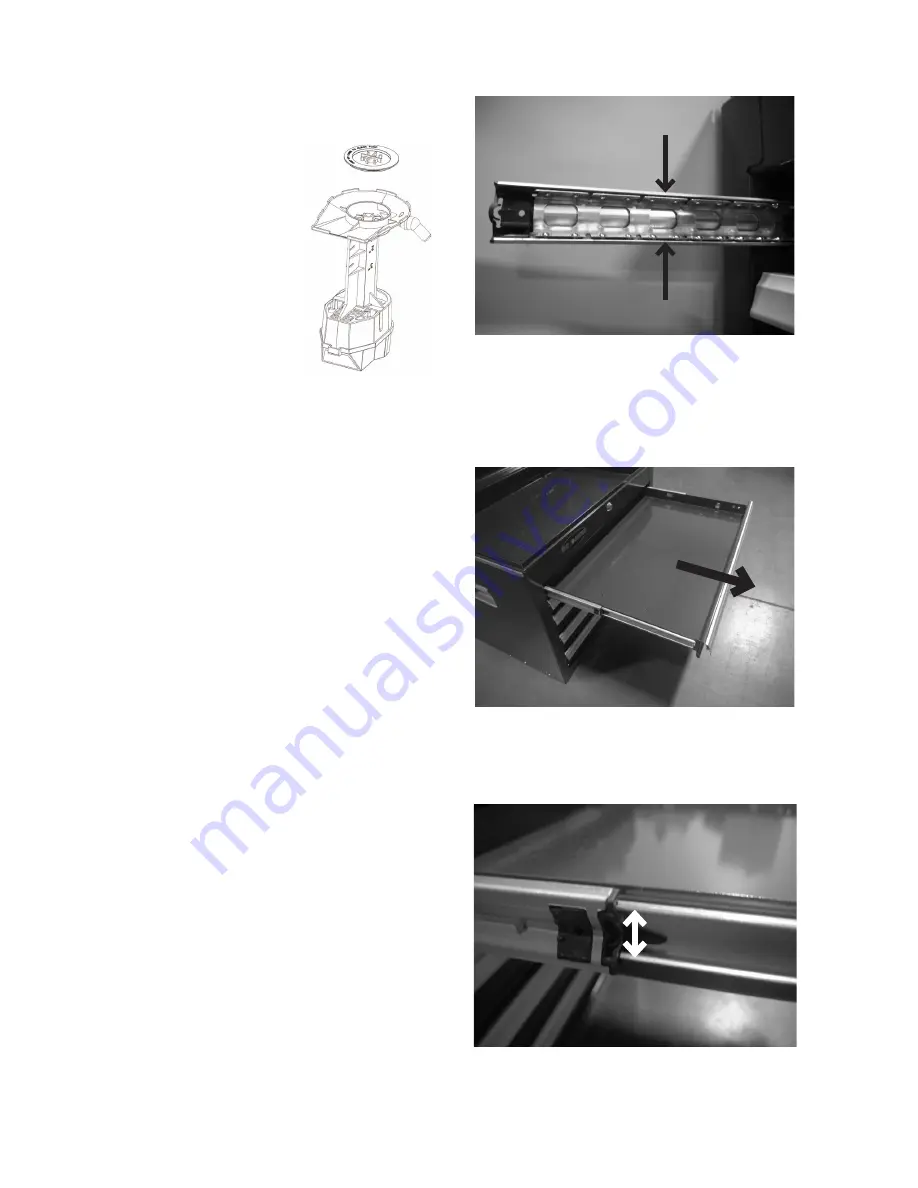
REMOVAL AND INSTALLATION OF DRAWERS
Removal of drawers
1. Empty and fully extend the drawer to be removed.
2. Push the levers on both sides up or down to release the section
of the slide connected to the drawer from the section of the slide
connected to the cabinet. Pull the drawer out to remove it from
the cabinet.


