4
5
en
en
1 Connecting USB Adapter to PC
1-1.
Insert the USB adapter into USB Port on PC.
The indicator light on the USB adapter will
be solid red to indicate the USB adapter is powered on and will turn solid green when it finds
the headset.
1-2.
The USB adapter can be folded as shown.
NOTE
The headset may need to be charged before the USB adapter can find it.
2 Connecting Power Supply to Charger Base
2-1.
Connect the base power supply into the power jack on the charger base.
2-2.
Connect the power supply to the outlet.
The power indicator light will be solid green.
3 Installing Battery to Headset
3-1.
Position the battery as shown on headset and slide into position until the battery
snaps into place.
NOTE
This product has a replaceable battery. Use only the battery type supplied by Plantronics.
4 Choosing and Assembling Headset Wearing Style
4-1.
Choose a headset wearing style and use the fit kit to assemble.
NOTE
Ensure the large end of the eartip faces towards the microphone.
5 Docking and Charging Headset
5-1.
Gently push the headset into the charge cradle.
The charging indicator light on the headset will flash white to indicate that the headset
battery is charging.
5-2.
Charge for at least 20 minutes prior to the first use.
A full charge takes 3 hours.
5-3.
To conserve battery life and increase talk time,
turn the battery on/off switch to the Off
position when not in use.
NOTE
The USB charging cable can also be used to charge the headset.
6 Charging Spare Battery - Charger Base or USB Cable
6-1.
Deluxe Charger Base -
Ensure the battery is correctly seated in the battery compartment.
Charging indicator light flashes green while charging and solid green when fully charged.
6-2.
Deluxe USB Charging Cable -
Connect the USB charger to an available USB port on PC and
set
the battery on the receptacle as shown. Gently push down and then slide the battery until it
clicks into place. Charging indicator light flashes green while charging and solid green when
fully charged.
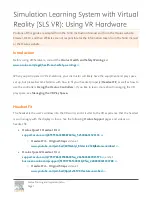
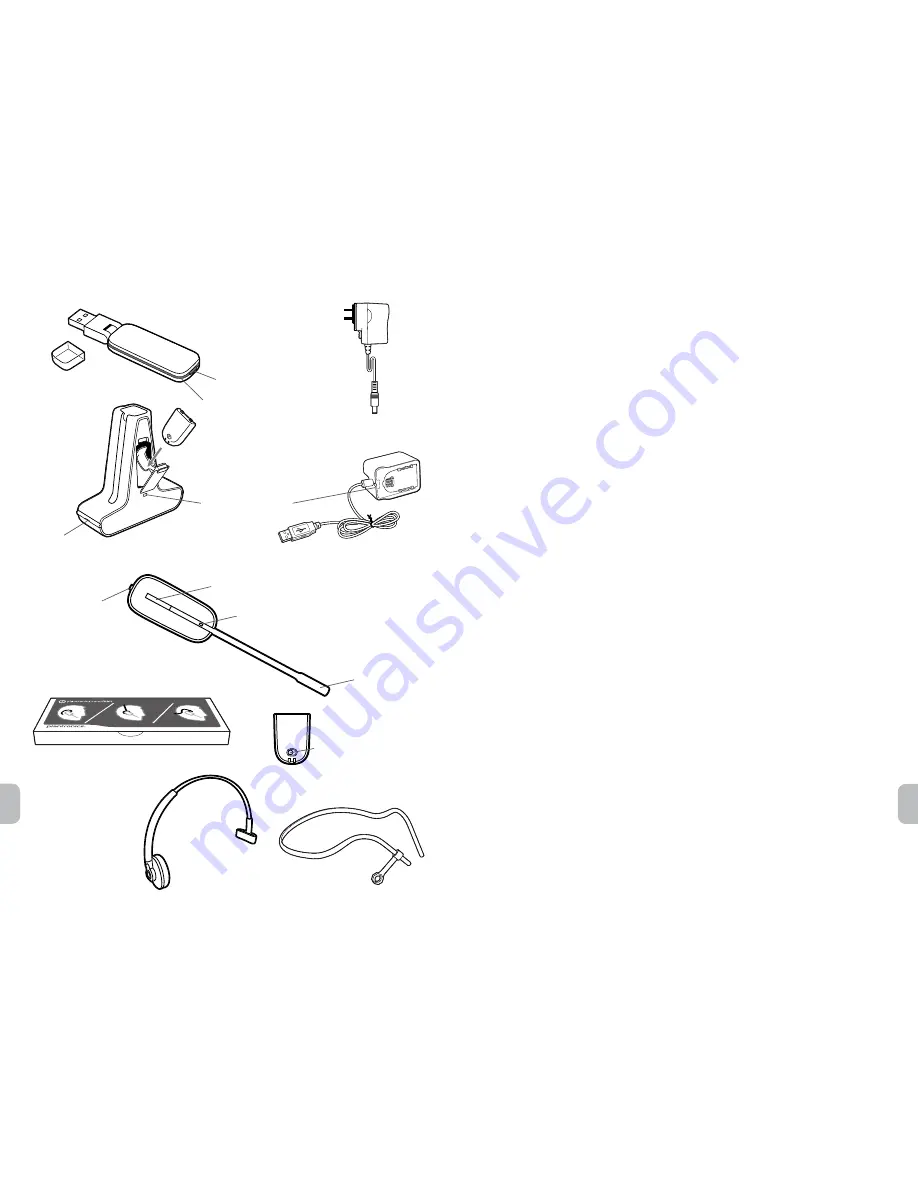
Base power supply
Deluxe USB Charging Cable
USB adapter (D100)
Indicator light
Subscription button
Deluxe Charger Base
and Spare Battery
Indicator Light
Microphone
Call Control Button
Volume Button
(Press in to mute/
unmute)
Headset
Headbands
Fit kit with extra earloops and eartips
Power
Indicator Light
Charging Indicator
Light
Battery
Power
On/Off Switch