


4-Bay SATA NAS RAID Server with iSCSI
NAS-7410
76
8.2 Accessing from windows
There are some configuration jobs to do before Windows users can access the NAS server.
Please enter the administration homepage first.
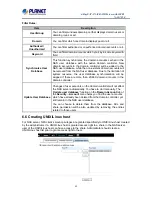
1. Go to Server
→
Maintenance page select a volume as system folder then click Apply button
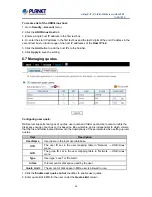
2. Please configure the NAS server to operate either in the workgroup mode or the domain mode.
Go to the
Network
→
Windows
menu and select either
Workgroup Mode
or
Domain Mode
. Also
specify the workgroup/domain name.
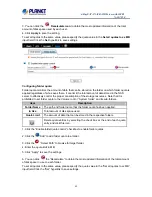
3. Create local accounts if the NAS server is in the workgroup mode. Go to the
Security
→
Account
→
Local Account
page and use the
Add User
or
Add Group
button to create
local accounts.
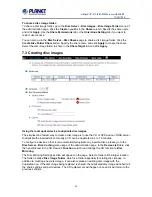
4. Get domain accounts from the domain controller if the NAS server is in the domain mode. Go to
the
Security
→
Account
→
Domain Account
page. Get domain user account for the domain
controller. Next, tick some domain account to be cached in NAS server.
5. Share the volume to network users.
Go to the
Security
→
File/Folder
menu. Find the
volume01
entry and click
Create
in the
Sharing
column (or click
Modify
if the volume has been shared). On the
Property
page, check the
Windows Network (SMB/CIFS)
checkbox and click
Apply
.
6. Set the share permissions.
After sharing the volume, specify the access rights of local users/groups and domain
users/groups.
Now Windows users can access the NAS server. They can run the Windows Explorer and open
the path of
\\nasserver
. The shared folder
volume01
will appear in the window. Windows users
can also map a network drive to
\\nasserver\volume01
or use the
net use
command in the
Command Prompt
window. The command will be like: net use n:\\nasserver\volume01
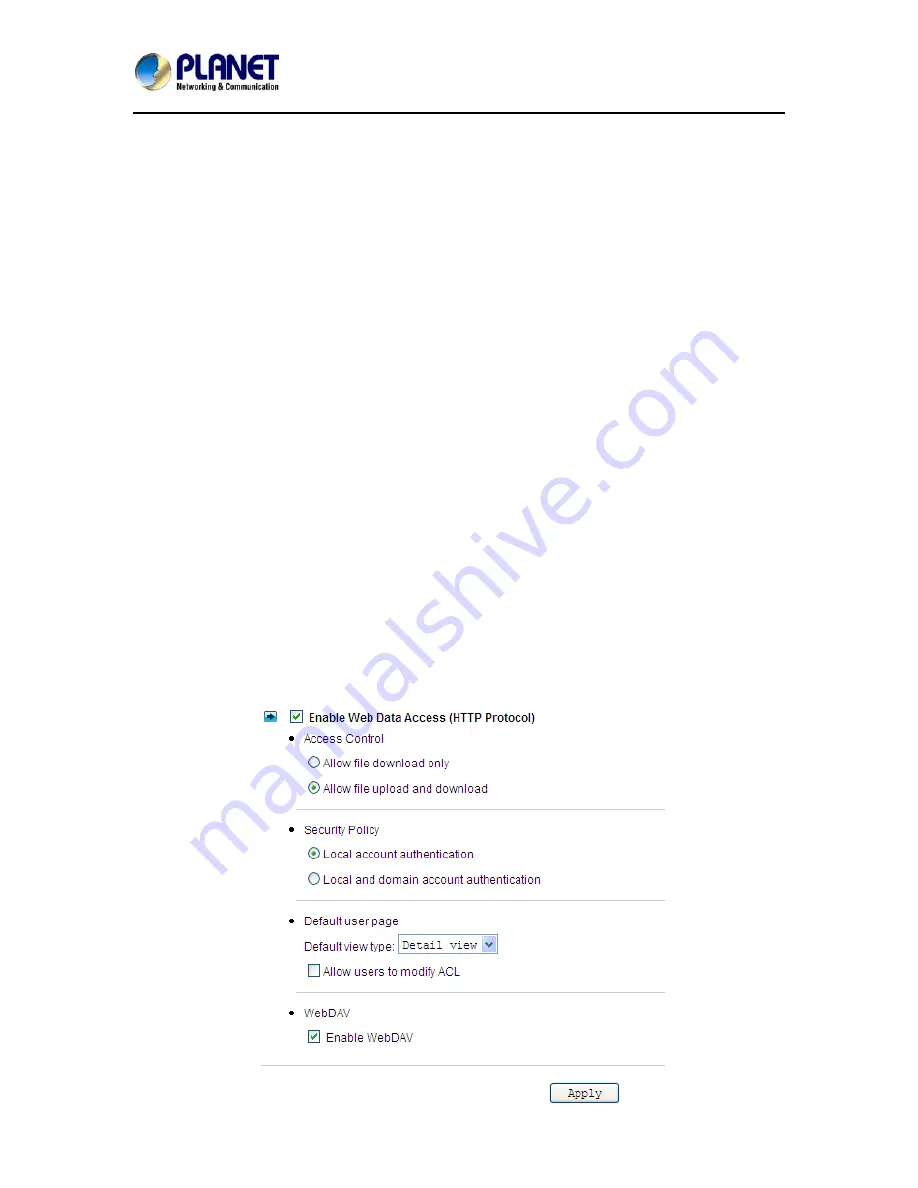
8.3 Accessing from web browsers


