Authentication User
User has to pass the authentication , then connect to the network by Policy .
VPN Trunk
To apply the IPSec and PPTP VPN into VPN trunk by policy .
Action
To assign the path when the data packets pass through the WAN1 , WAN2 ,
WAN3 or WAN4 in the BM-2101 or select to deny .
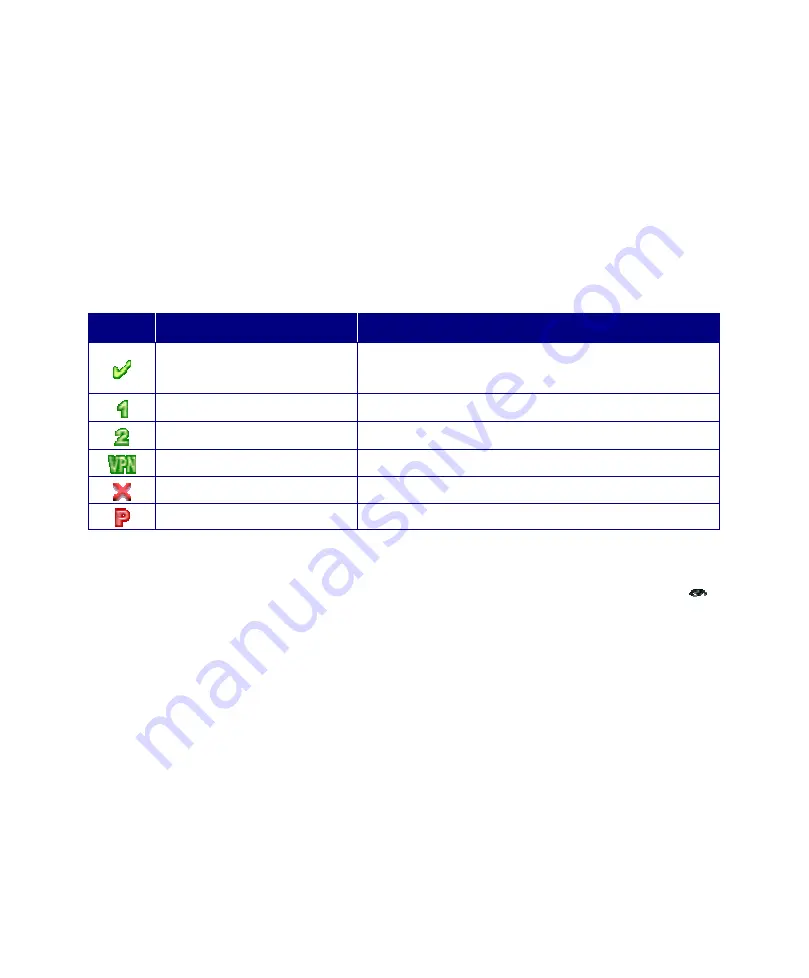
Icon
Name
Definition
PERMIT ALL
To permit the qualified packets can go through
WAN1 , WAN2.
PERMIT WAN1
To permit the qualified Packets can pass by
WAN1
PERMIT WAN2
To permit the qualified Packets can pass by
WAN2
PERMIT VPN Trunk
To permit the VPN Trunk qualified by Policy .
DENY
To deny the Packets qualified by Policy .
PAUSE
To stop the Policy .
Traffic Log
To record all the packets pass through the policy . The MIS engineer can click
to view .
Statistics
Use the graphic charts to display the flow statistics .
Content Blocking
To manage the packet contents which applied policy .
188
Summary of Contents for BM-2101
Page 1: ...Bandwidth Management Gateway BM 2101 User s Manual...
Page 44: ...3 9 Language Step1 In Configure Language to select the language Click OK Select language...
Page 56: ...Complete to set the Dynamic IP address...
Page 85: ...The used QoS Flow M Bandwidth 400 Kbps G Bandwidth 200Kbps...
Page 91: ...z To add the settings in the authenticaion management Authentication management...
Page 100: ...Step3 Select Internet Authentication Service Add new network authentication service components...
Page 102: ...Step5 Right click RADIUS Clients New RADIUS Client Add new RADIUS client...
Page 107: ...Step10 Select Ethernet The way to add new romote access policy...
Page 108: ...Step11 Select User Add new romote access policy user and group...
Page 110: ...Step13 Right click on the Radius Properties The network authentication service setting...
Page 112: ...Step15 Add Service Type Add new RADIUS properties attribute...
Page 113: ...Step16 Add Authenticate Only from the left side Add RADIUS properties service type...
Page 124: ...Step3 In Preliminary Steps window click Next The Preliminary steps Web UI...
Page 125: ...Step4 In Server Role window select Active Directory and click Next The server role window...
Page 126: ...Step5 In Summary of Selections window click Next The summary of selections window...
Page 138: ...Step17 In Summary window click Next The summary window...
Page 142: ...Step21 In New Object User window enter the settings click Next Add new object user setting 1...
Page 143: ...Step22 In New Object User window enter the password click Next The new object user setting 2...
Page 145: ...Step25 In Authentication User Group add LDAP User Add new LDAP user...
Page 194: ...Traffic Log Web UI...
Page 197: ...IM setting Download setting...
Page 221: ...Send the NetBIOS Alert Notification to the MIS engineer...
Page 228: ...Step3 Monitor Traffic it shows the packets traffic through policy The traffic log Web UI...
Page 234: ...Step2 Click Download File Download Save Save the connection log files...
Page 243: ...Outbound accounting report...
Page 244: ...Outbound use information...
Page 246: ...Outbound site accounting report...
Page 249: ...Inbound user accounting report...
Page 250: ...Inbound user information...
Page 252: ...Inbound site accounting report...
Page 262: ...Ping results...
Page 265: ...Traceroute results...
Page 270: ...Search the specific record...
Page 272: ...The interface information...
Page 274: ...The system information...


