


Planar UltraLux Remote Monitoring
52
Planar UltraLux Series Installation Guide
b
You do no need to fill in anything under the Static (non-DHCP) Network
Settings section. However, if you do, these settings will be used in the event
that the DHCP attempts to time out.
c
Go to step
6
.
5
Under the DHCP section, choose
No, use static settings
.
a
In the Static (non-DHCP) Network Settings section, enter the
IP address
given
to you by the network administrator.
b
Enter the
Network mask, DNS server
(s), and
Gateway
as instructed by the
network administrator.
c
Go to step
6
.
6
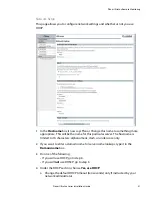
Scroll to the bottom of the page and click
Confirm and apply new network
settings
to receive the Confirm Network Change page.
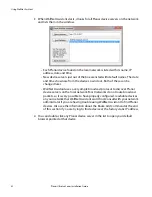
7
Review the settings to make sure they are correct. Click
OK, apply changes now
to receive the Applying Network Changes page. This shows the network settings
to be used.
Note:
If you have changed the static IP address or changed from static to DHCP setup, you
may need to point your browser at the new address.
8
You may have to click the
Refresh
button on your browser to see the new name
in the upper left corner of the page.