6
C
HAPTER
2
The Display Controls
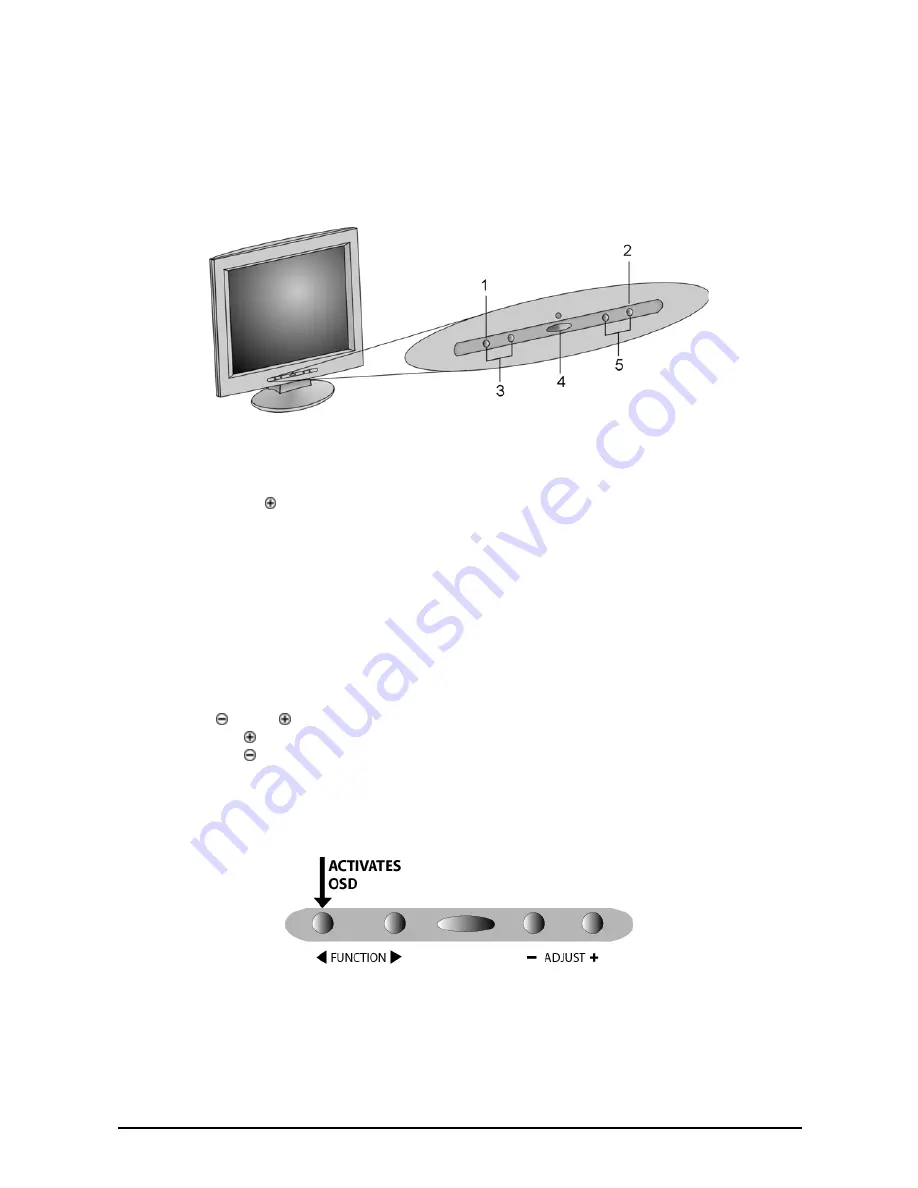
LCD Monitor Control Panel
1.
OSD Menu Button
Press this button to activate the OSD (On-Screen Display) menu. This button is also used as
the
◄
Selection button.
2.
Adjust Button
This button allows you to apply settings and enter submenus in the OSD. This button also is
used to increase the value of the selected menu item.
3.
◄►
Function Select Buttons
These two buttons allow you to select the control functions in the OSD. Press either button to
scroll through the main menu and submenu items.
4.
Power Switch
Push the power switch to turn the monitor on and off. When you shutdown your computer,
the monitor will enter power-saving mode. The LED will slowly flash indicating the display
is in power saving mode.
5.
Adjust Control Buttons
The button allows you to increase the menu item value.
The
button allows you to decrease the menu item value.
Adjusting the Display
The LCD monitor features an intuitive, menu-driven, On-Screen Display (OSD). You can access the OSD any time that
the PC is powered up. If the PC is in a power saving mode, or is powered down, the OSD is inaccessible.
OSD Main Menu
To activate the OSD Main Menu, press the leftmost
◄
Function key. To navigate the topline menu, use either the right
►
or left
◄
function keys to scroll between the main menu choices.
The option that is currently selected is highlighted in yellow. Each main menu has an associated submenu and is further
described.


