background image

Planar User’s Manual 


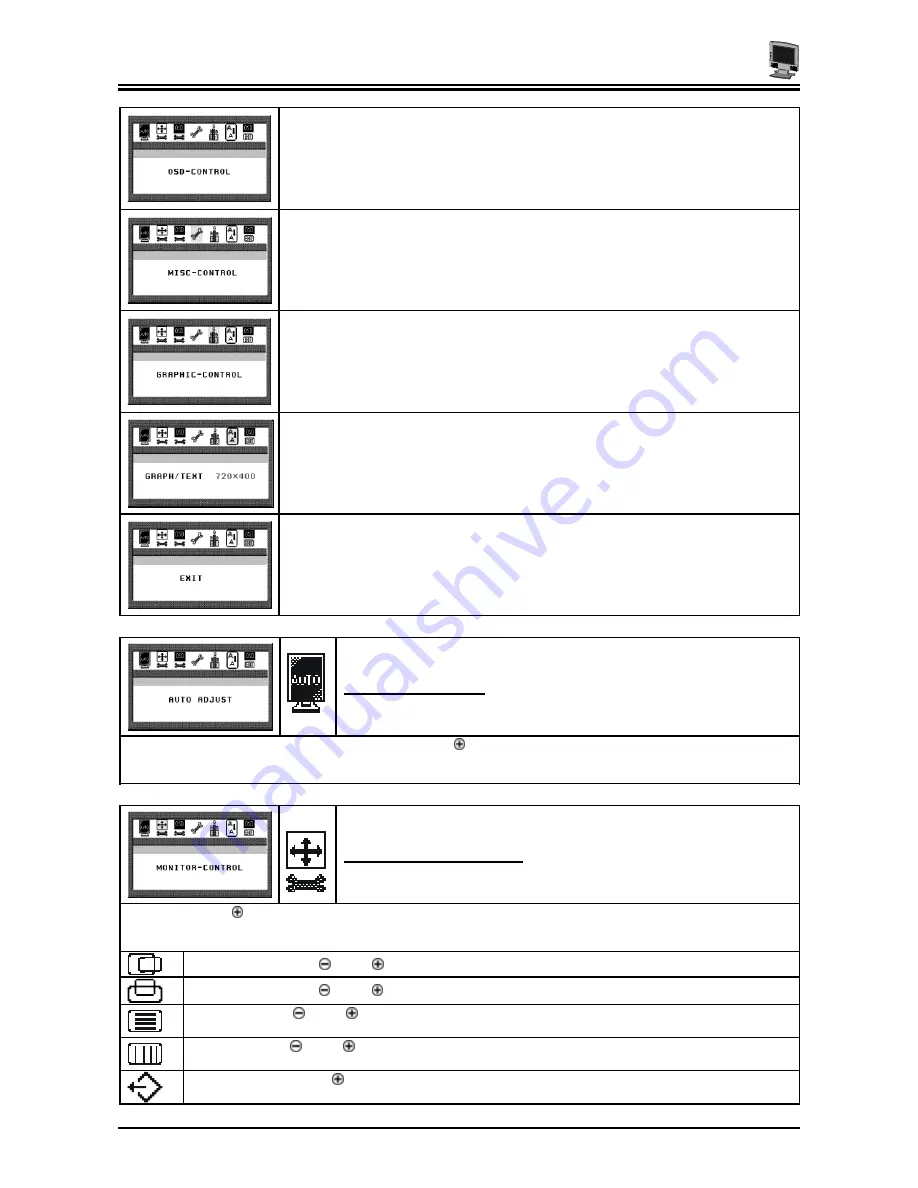
The OSD-Control option allows you to adjust the position and setting of the monitor’s On Screen 
Display. 


The MISC-Control option allows you to select the desired text language of the OSD, adjust the 
monitor speaker volume, and to display the current video information being sent to the monitor 
from your video card. 


The Graphic-Control option allows you to adjust the display contrast, brightness, sharpness, and 
color settings. 


The Graph/Tex option allows you to switch DOS text resolution from 640x400 and 720x400.  This 
function has no effect within graphic operating systems such as MS Windows™. 


The OSD Exit option closes the On Screen Display. 


Auto Adjust Procedure 

The Auto Adjust procedure is activated by pressing the Adjust   key while the Auto Adjust topline menu is selected.  The Auto 
Adjust procedure takes approximately 2 seconds to complete.  Once finished, the OSD menu will disappear after a short time-out 
period.


The Monitor- Control Option 

Pressing the Adjust   key on the monitor activates the Monitor-Control submenu.  Use the 

FUNCTION 


select buttons to 

scroll between the submenu items.  You should only use this menu item if the results of the Auto Adjust function are not satisfac-
tory. 


H-Position: 

Press the   Adjust   buttons to horizontally move the display image to the desired position. 


V-Position: 

Press the   Adjust   buttons to vertically move the display image to the desired position. 


Phase:

 Press the   Adjust   buttons to fine-tune the displayed image.  An improper phase adjustment will 

result in pixel jitter or display noise. 


Clock:

 Press the   Adjust   buttons to stabilize the display clock timing.  An improper clock setting will 

result in wide vertical bands on the display. 


Reset: 

 Press the Adjust   button to reset the Monitor-Control submenu values to the factory default val-

ues. 

Summary of Contents for PT1503Z

Page 1: ...1 866 PLANAR 1 customerservice planar com PT1503Z Manual...

Page 2: ......

Page 3: ...stalled and used in accor dance with the instructions may cause harmful inerference to radio communications However there is no guarantee that interference will not occur in a particular installation...

Page 4: ...New Planar LCD Monitor near a window Exposing the Monitor to rain water moisture or sunlight can severely damage it 3 Do not place anything on top of the Monitor to PC signal cord Make sure the cord...

Page 5: ...nitor Rear View 2 Adjusting the Viewing Angle 3 Connecting AC Power 3 Connecting Video 4 Connecting the Stereo Speakers optional 4 CHAPTER 2 7 Your New Planar LCD Monitor s Display Controls 7 Adjustin...

Page 6: ......

Page 7: ...a stable level and clean surface near a wall outlet Even though your New Planar LCD Monitor uses very little power you should put it in a location that allows sufficient airflow to ensure that your N...

Page 8: ...ton allows you to apply settings and enter submenus in the OSD This button also serves as an Ad justment Control button 4 Power ON OFF 5 Power On Indicator This LED indicator stays lit when the power...

Page 9: ...e To install the Optional Touch Screen driver please contact your local distributor Adjusting the Viewing Angle Your LCD Monitor is designed to allow you to adjust it to a comfortable viewing angle Th...

Page 10: ...rt 4 Make sure the signal cable heads are securely connected to the VGA ports of your PC and Monitor Tighten the connecting screws to ensure a secure connection 5 Turn on your computer and LCD Monitor...

Page 11: ...Chapter 1 5 3 You can adjust the sound volume of the stereo speakers by using the speaker volume control function on the OSD On Screen Display...

Page 12: ...t at the back of the LCD Monitor 2 Connect the 9 pin RS232 connector end of the PS 2 to RS232 cable provided with the op tional touch screen package to the 9 pin RS232 serial port at the back of your...

Page 13: ...unction key To navigate the topline menu use the down arrow key to scroll between the main menu choices The option that is currently selected is highlighted in yellow Each main menu has an associated...

Page 14: ...The Auto Adjust procedure takes approximately 2 seconds to complete Once finished the OSD menu will disappear after a short time out period The Monitor Control Option Pressing the Adjust key on the mo...

Page 15: ...and monitor firmware version Exit Press the Adjust button to exit the Misc Control submenu Graphic Control Option Pressing the Adjust button on the monitor activates the Graphic Control submenu Use th...

Page 16: ...Option Pressing the Adjust button on the monitor toggles the DOS resolution between 640x400 and 720x400 OSD Exit Pressing the Adjust button on the monitor will exit the OSD menu The OSD menu will als...

Page 17: ...15 diagonal Response Time ms Rise Fall 40 ms typical Contrast Ratio 350 1 typical Brightness 250 cd m 2 typical Viewing Angle Horizontal 60 60 L R Vertical 45 60 U D Pixel Pitch mm 0 297 x 0 297 Displ...

Page 18: ...8 59 94 31 47 9 VESA 640x480 31 50 72 81 37 86 10 VESA 640x480 31 50 75 00 37 50 11 VESA 800x600 36 00 56 25 35 16 12 SVGA 800x600 40 00 60 32 37 88 13 VESA 800x600 50 00 72 19 48 08 14 VESA 800x600 4...

Page 19: ...e number of lines increases as you press the button Now press the bottom or top Adjustment Control button until the lines disappear and you have a clear display PROBLEM There is no LCD Display If ther...

Reviews: