User manual
- HMI Series - 17
12.b
Create - load a project
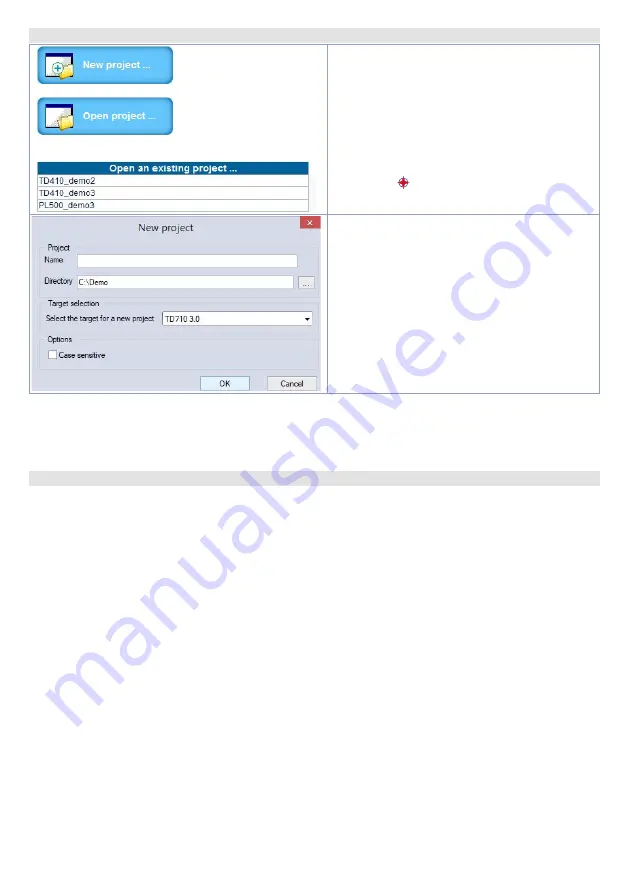
Open an exsisting project
:
• With LogicLab opened, click on
“Open
project”
or select one of the last projects
form the list.
• With LogicLab closed, enter on the project
folder and select (double click) the chosen
file (icon and extension “.plcprj”).
Create a new project:
Press
“New project”
.
Enter the name of the new project and select
the folder where the project files will be stored.
Finally, select the device to be programmed.
Attention
: selecting “respect capital/lowercase letters”, a variable which contains a capital letter
will be understood as different from another with the same name but with this letter lowercase. It
is recommended to keep this selection disabled, to avoid any confusion during the drafting of the
program code.
12.c
Connection to target
Here below please find the necessary requirements for the correct connection between target (device
to be programmed) and the development environment on PC (LogicLab).
Target requirements:
• device ON and started
• configured with static IP address compatible with the network where there is the PC to which it will
connect. By default, the IP address of the HMI is 192.168.0.100, for PL500 is 192.168.0.99, so the PC
must have the same network and class (in this case 192.168.0.XXX) but different physical address
(the last 3 digits of the IP address, with a number between 1 and 255, different from 100). If it is
necessary to modify the IP address of the terminal, refer to the TD Control Panel configuration,
section “LAN ETH1” on
.
• connection with net cable (direct or cross) directly to PC or through a net switch
• SoftPLC in execution (refer to TD Control Panel configuration, section
“PLC LOGICLAB”
on
PC requirements:
• IP address compatible with the network where it is located and with the IP address configured on
the target (see previous points)
• antivirus/firewall which allows the connection to network devices (normally already correctly
configured)
• LogicLab configured for the connection to the target to be programmed: menu
“On Line”
>
“Select
communication”
, on the window that opens press
“Properties”
and than enter the target IP on
“IP
Address”
, keeping all the rest unaltered. In case of very slow networks or of a network configuration
with different switches, it is possibile to increase the
“Timeout”
value (expressed in mS).
Summary of Contents for HMI series
Page 2: ......
Page 23: ...User manual HMI Series 23...
Page 42: ...42 HMI Series Manuale d uso Note Aggiornamenti...
Page 43: ......


