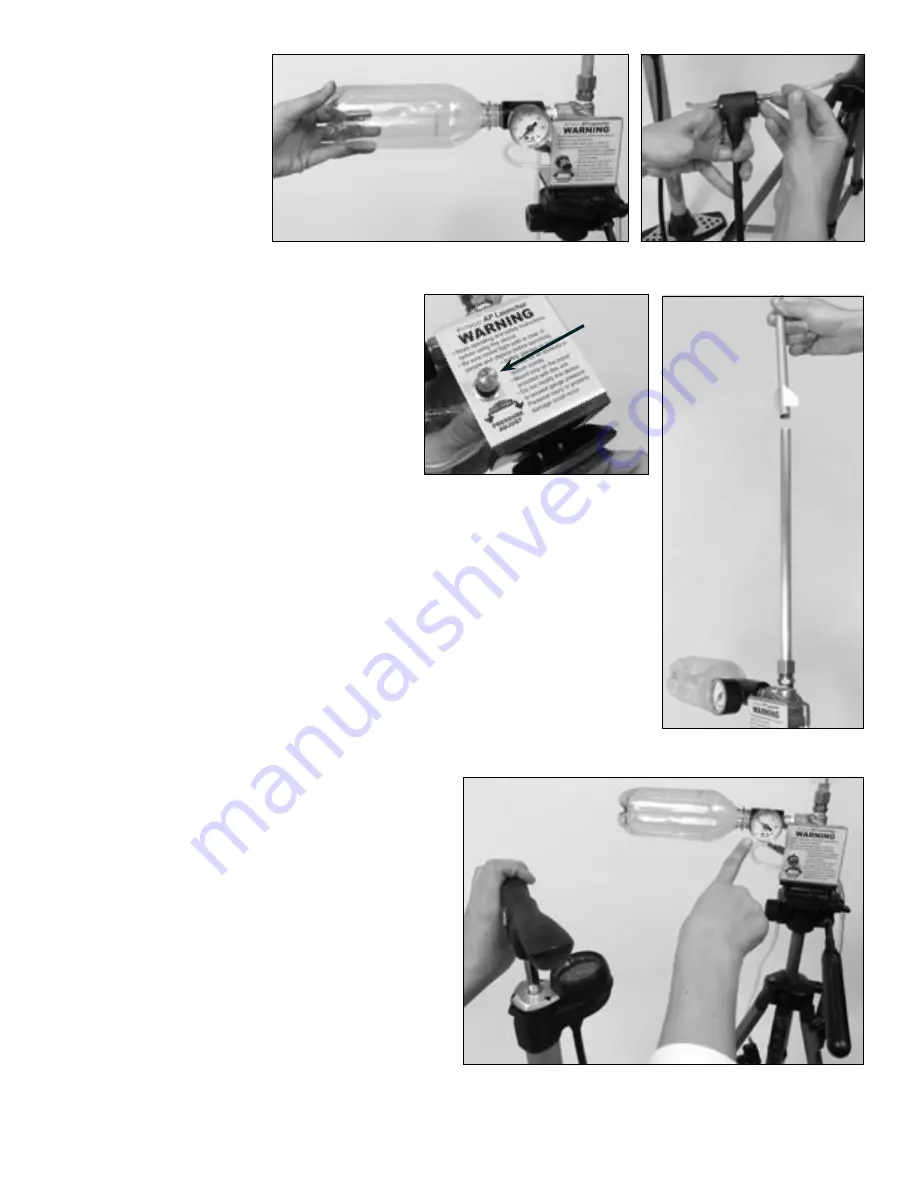
5. Screw the plastic bottle
onto the left side of the
launch mechanism where
the valve comes out of
the regulator (Figure 4).
6. Attach the tire pump
to the end of the hose
hanging from the back of
the mechanism (Figure
5). You are now ready to
launch.
Operating the Launcher
Caution:
Anyone near the launcher or in the
flight path of the rocket should wear safety
glasses or goggles. See the Safety Rules on the
following page.
1. If you wish to set the pressure regulator so it
cannot use the full 20 pounds per square inch
(psi), do so at this time. Simply turn the regulator’s metal knob (Figure 6) left to
reduce the maximum psi. Turn it back to the right to increase the maximum psi.
Tip:
To set a maximum psi lower than 20, turn the regulator knob left enough
times that depressing the tire pump doesn’t register a reading on the regulator’s
gauge (be sure not to turn the knob so many times that it falls out). Then, turn-
ing the knob to the right one turn at a time, depress the pump after each turn
and watch the gauge. Do this until you reach the desired maximum reading.
2. Place the rocket on the end of the launcher’s metal tube (Figure 7).
3. Depress the tire pump – be sure to watch the reg-
ulator’s gauge so you get the right amount of air
pressure (Figure 8).
Caution:
Be careful to use the correct amount of
pressure for the launch location. If you are launch-
ing in a gym, we do not recommend more than 5
psi. A higher psi is appropriate for outdoor areas
with plenty of clear space around the launch site,
such as a sports field, empty parking lot, or empty
playground. The launch area should be clear of
trees, buildings, and onlookers.
Figure 5
Figure 4
Regulator
knob
Figure 6
Figure 7
Figure 8
AP Launcher User Guide 33456 V0108


