background image

Information for users on collection and disposal of old equipment and used batteries

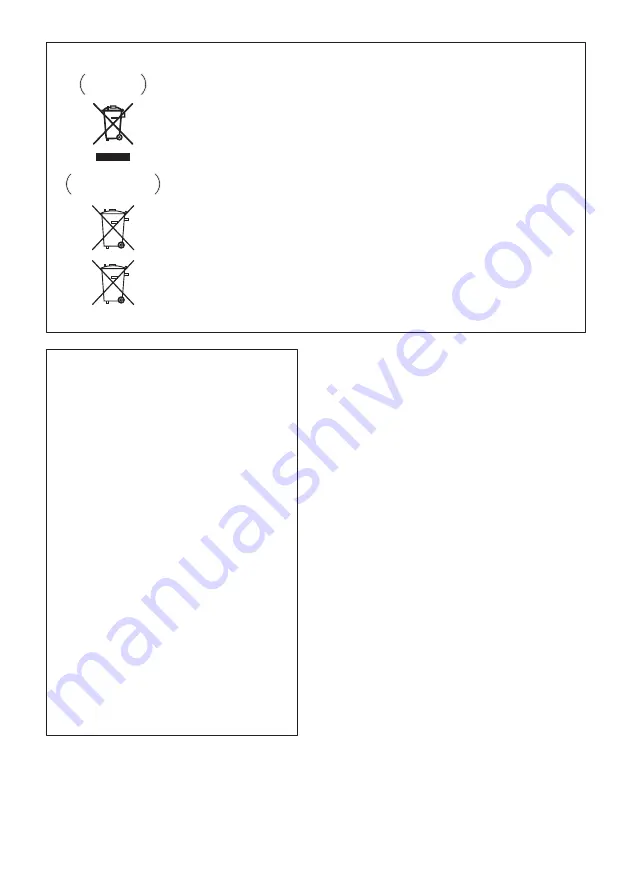
These symbols on the products, packaging, and/or accompanying documents mean 
that used electrical and electronic products and batteries should not be mixed with 
general household waste.

For proper treatment, recovery and recycling of old products and used batteries, 
please take them to applicable collection points in accordance with your national 
legislation.

By disposing of these products and batteries correctly, you will help to save valuable 
resources and prevent any potential negative effects on human health and the 
environment which could otherwise arise from inappropriate waste handling.

For more information about collection and recycling of old products and batteries, 
please contact your local municipality, your waste disposal service or the point of sale 
where you purchased the items.

These symbols are only valid in the European Union.

For countries outside the European Union:

If you wish to discard these items, please contact your local authorities or dealer and 
ask for the correct method of disposal.

K058a_A1_En

Symbol examples 

for batteries

Symbol for 

equipment

Pb

AC adapter caution

•  Make sure to grasp the body of the AC adapter 

when removing it from the power outlet. If you pull 
the power cord, it may become damaged which 
could lead to fire and/or electrocution.

•  Do not attempt to plug in or remove the AC 

adapter with wet hands. This may result in 
electrocution.

•  Insert the prongs of the AC adapter all the way into 

the power outlet. If the connection is incomplete, 
heat may be generated which could lead to fire. 
Furthermore, contact with the connected prongs 
of the adapter may result in electrocution.

•  Do not insert the AC adapter into a power outlet 

where the connection remains loose despite 
inserting the prongs all the way into the outlet. 
Heat may be generated which could lead to fire. 
Consult with the retailer or an electrician 
regarding replacement of the power outlet.

•  Do not place the unit, a piece of furniture, etc., on 

the power cord, or pinch the cord. Never make a 
knot in the cord or tie it with other cords. The 
power cords should be routed such that they are 
not likely to be stepped on. A damaged AC adapter 
and power cord can cause a fire or give you an 
electrical shock. Check the AC adapter and the 
power cord once in a while. When you find it 
damaged, ask your nearest PIONEER authorized 
service center or your dealer for a replacement.

Radio wave caution

This unit uses a 2.4 GHz radio wave frequency, which is 
a band used by other wireless systems (Microwave 
ovens and Cordless phones, etc.). In this event noise 
appears in your television image, there is the possibility 
this unit (including products supported by this unit) is 
causing signal interference with the antenna input 
connector of your television, video, satellite tuner, etc. In 
this event, increase the distance between the antenna 
input connector and this unit (including products 
supported by this unit).
•  Pioneer is not responsible for any malfunction of the 

compatible Pioneer product due to communication 
error/malfunctions associated with your network 
connection and/or your connected equipment. Please 
contact your Internet service provider or network 
device manufacturer.

•  A separate contract with/payment to an Internet 

service provider is required to use the Internet.

POWER-CORD CAUTION

Handle the power cord by the plug. Do not pull out the 
plug by tugging the cord and never touch the power 
cord when your hands are wet as this could cause a 
short circuit or electric shock. Do not place the unit, a 
piece of furniture, etc., on the power cord, or pinch the 
cord. Never make a knot in the cord or tie it with other 
cords. The power cords should be routed such that they 
are not likely to be stepped on. A damaged power cord 
can cause a fire or give you an electrical shock. Check 
the power cord once in a while. When you find it 
damaged, ask your nearest PIONEER authorized service 
center or your dealer for a replacement.

S002*_A1_En

Summary of Contents for X-SMC11-k

Page 1: ...X SMC22 S X SMC11 S Slim Micro System Operating Instructions Discover the benefits of registering your product online at http www pioneer co uk or http www pioneer eu ...

Page 2: ...unit you will need to unplug it from the AC outlet to shut down all power Therefore make sure the unit has been installed so that the power cord can be easily unplugged from the AC outlet in case of an accident To avoid fire hazard the power cord should also be unplugged from the AC outlet when left unused for a long period of time for example when on vacation D3 4 2 2 2a _A1_En CAUTION This produ...

Page 3: ...ult with the retailer or an electrician regarding replacement of the power outlet Do not place the unit a piece of furniture etc on the power cord or pinch the cord Never make a knot in the cord or tie it with other cords The power cords should be routed such that they are not likely to be stepped on A damaged AC adapter and power cord can cause a fire or give you an electrical shock Check the AC ...

Page 4: ...o play 20 Switch the display contents 20 07 USB playback Playing USB storage devices 21 Repeat play 21 Random play 21 Specify the folder to play 22 Switch the display contents 22 Playing in the desired order Programmed Play 22 08 Using the tuner Listening to the radio broadcasts 23 Tuning 23 Saving station presets 23 To recall a memorized station 24 To scan the preset stations 24 To erase entire p...

Page 5: ...by the polarity marks and Do not heat batteries disassemble them or throw them into flames or water Batteries may have different voltages even if they are the same size and shape Do not use different types of batteries together To prevent leakage of battery fluid remove the batteries if you do not plan to use the remote control for a long period of time 1 month or more If the fluid should leak wip...

Page 6: ...and 22 MENU Use to access the menu MEMORY PROGRAM Use to memory or program the MP3 WMA disc page 19 6 TUNE ENTER Use to select switch system settings and modes and to confirm actions Use TUNE can be used to find radio frequencies page 23 7 PRESET Use to select preset radio stations page 23 8 MUTE Mutes unmutes the sound page 12 9 Playback control buttons Use to control each function after you have...

Page 7: ... the repeat play setting from a CD iPod or USB pages 18 and 21 17 Volume control buttons Use to set the listening volume page 12 18 DIMMER Dims or brightens the display The brightness can be controlled in four steps page 12 Using the remote control The remote has a range of about 7 m at an angle of about 30º from the remote sensor Keep in mind the following when using the remote control Make sure ...

Page 8: ...CONNECT X SMC22 The unit flashes during the pairing procedure The unit will stop flashing and stay lit once the pairing has been successful page 28 SLEEP X SMC11 Will light up when the SLEEP timer is set up 5 TUNE Will light up when it is receiving a station 6 Main display 7 Speaker 8 iPod iPhone dock To connect the iPod iPhone press the PUSH OPEN panel page 15 POWER ON TIMER TUNE PUSH OPEN X SMC2...

Page 9: ...current playback Stop playback or resume playback from the point where it was paused 8 VOLUME Use to set the listening volume page 12 9 USB terminal Use to connect your USB mass storage device or Apple iPod iPhone iPad as an audio source pages 16 and 21 10 Headphone socket Use to connect headphones When the headphones are connected there is no sound output from the speakers page 14 11 AUDIO IN soc...

Page 10: ...pplied to connect an external FM antenna Plugging in After you ve finished making all connections plug the unit into an AC outlet 1 Plug the supplied AC adapter into the DC IN socket on the side of the unit 2 Plug the supplied power cord into the AC adapter then plug the other end into an AC outlet CAUTION Do not use any power cord other than the one supplied with this unit Do not use the supplied...

Page 11: ... off the wall first When connections are completed connect the power cord to the AC outlet while hanging the unit on the wall 1 Screw the wall hanging screws into the wall putting them the specified attachment measurement 154 mm apart See Dimensions Rear on page 32 2 Insert the wall hanging screws into the lock holes Note Do not take your hands off the unit as the unit is still not attached and ma...

Page 12: ... change to different mode Press the INPUT repeatedly to select desired function X SMC22 X SMC11 Display brightness control Press DIMMER to dims the display brightness The brightness can be controlled in four steps Volume auto setting If you turn off and on the main unit with the volume set to 31 or higher the volume starts at 30 Volume control Press the VOLUME on the unit or press VOLUME on the re...

Page 13: ... change the existing timer setting or to set a new timer 1 Press STANDBY ON to turn the power on 2 Press TIMER 3 Press to select ONCE or DAILY then press ENTER ONCE Works once only at a preset time DAILY Works at the preset time on a preset day 4 Press to select TIMER SET then press ENTER 5 Press to select the timer playback source then press ENTER CD FM USB IPOD IPOD BT AUDIO X SMC22 and AUDIO IN...

Page 14: ...e start and end time Using the sleep timer The sleep timer switches off the unit after a specified time so you can fall asleep without worrying about it 1 Press SLEEP repeatedly to select a switch off time Choose between 10 min 20 min 30 min 60 min 90 min 120 min 150 min 180 min or OFF The newly set value displays for 3 seconds and then the setting is completed Note The sleep timer can be set by p...

Page 15: ...ecommend switching the equalizer off before connecting Pioneer cannot under any circumstances accept responsibility for any direct or indirect loss arising from any inconvenience or loss of recorded material resulting from iPod iPhone iPad failure For detailed instructions on using the iPod iPhone iPad please refer to the manual supplied with the iPod iPhone iPad This system has been developed and...

Page 16: ... connected to this unit and you wish to operate the iPod iPhone iPad directly be sure to steady the iPod iPhone iPad with the other hand to prevent malfunctions due to faulty contacts Note For detailed instructions on using the iPod iPhone iPad please refer to the manual supplied with the iPod iPhone iPad iPod iPhone iPad recharging occurs whenever an iPod iPhone iPad is connected to this unit Thi...

Page 17: ...nit will stop automatically CAUTION Do not insert two or more discs into the slot at once Do not play discs of special shapes heart octagon etc It may cause malfunctions If the disc does not load smoothly do not attempt to force it Remove it from the slot and try inserting it again Attempting to force a disc causes damage or malfunction Do not touch the recording surface of the disc since the disc...

Page 18: ...Press REPEAT repeatedly until RPT OFF appears Press ENTER Note After performing repeat play be sure to press Otherwise the disc will play continuously During repeat play random play is not possible When random play is set up during repeat play the repeat play will be canceled Random play The tracks on the disc can be played in random order automatically To random play all tracks Press RANDOM repea...

Page 19: ... play will be canceled About folder playback order If MP3 WMA files are recorded in several folders a folder number will be set to each folder automatically These folders can be selected by the FOLDER on the remote control If there is no supported file formats inside the selected folder the folder is skipped and the next folder will be selected Example How the folder numbers are assigned if MP3 WM...

Page 20: ...splay alphanumeric characters Non alphanumeric character are displayed as Note Copyright protected WMA files or Unsupported files cannot be played back In these case the files will be skipped automatically There may be cases where no information can be displayed Displaying title artist and album name is only supported for MP3 files STANDBY ON CD USB TUNER TIMER DISPLAY FOLDER TUNE 1 2 3 4 5 6 7 8 ...

Page 21: ...SB storage device is not playing and no operations have been performed for more than 20 minutes the unit will automatically power off Auto power off can be switched to ON OFF page 35 Repeat play Repeat play can play one track all tracks or a programmed sequence continuously To repeat one track Press REPEAT repeatedly until RPT ONE appears Press ENTER To repeat all tracks Press REPEAT repeatedly un...

Page 22: ...rt from the first song of the selected folder Even if it is stopped it is possible to press to select a folder Switch the display contents The unit can display the information recorded in the USB storage device For details see Switch the display contents on page 20 Playing in the desired order Programmed Play The unit can play folders stored on a USB storage device in the desired order For details...

Page 23: ...nge the tuner from stereo to mono and usually improve the reception Saving station presets If you often listen to a particular radio station it s convenient to have the unit store the frequency for easy recall whenever you want to listen to that station Preset tuning This saves the effort of manually tuning in each time This unit can memorize up to 30 stations 1 Tune to a station you want to memor...

Page 24: ...RDS PTY again After the selected program type has been lit for 2 seconds SEARCH will appear and the search operation will start Note If the display has stopped flashing start again from step 2 If the unit finds a desired program type the corresponding channel number will be lit for about 8 seconds and then the station name will be displayed If you want to listen to the same program type of another...

Page 25: ...o redo the ASPM operation erase the preset memory If no station have been stored in memory END will appear for about 4 seconds If the RDS signals are very weak station names may not be stored in memory The same station name can be stored in different channels In a certain area or during certain time periods the station names may temporarily be different Notes for RDS operation If any of the follow...

Page 26: ...iPod iPhone Dock and USB terminal Side 1 Switch input by pressing the INPUT on the main unit or the AUDIO IN on the remote control When INPUT is selected AUDIO IN will be displayed on the main display Note If the AUDIO IN mini plug jack is connected to auxiliary phones jack the volume of the unit will be adjusted by the volume on the playback component If the sound is distorted after you lower the...

Page 27: ...e or when the pairing data on the device has been erased for any reason Pairing is a step required to allow communication using Bluetooth wireless technology to be carried out Pairing is only performed the first time that you use the unit and the Bluetooth capable device together In order to allow communication using Bluetooth wireless technology to take place pairing must be performed on both the...

Page 28: ...h capable device exists for the unit during BT STANDBY the unit can receive a connection request directly from the connection history The unit will start using the BT AUDIO function and connect with a Bluetooth capable device Even devices that have already been paired with this unit will not connect during BT STANDBY in the following cases In such cases delete pairing history from the Bluetooth wi...

Page 29: ...place When the microwave is not in use there will be no radio wave interference Radio wave reflections The radio waves received by this unit include the radio wave coming directly from the device equipped with Bluetooth wireless technology direct wave and waves coming from various directions due to reflections by walls furniture and building reflected waves The reflected waves due to obstacles and...

Page 30: ... away Operate within 7 m 30º of the remote sensor on the front panel page 7 Is the remote control sensor exposed to direct sunlight or strong artificial light from a fluorescent bulb etc The remote control signals may not be received properly if the remote control sensor is exposed to direct sunlight or strong artificial light from a fluorescent bulb etc Are the batteries dead Replace the batterie...

Page 31: ...e way in Is the USB storage device connected via a USB hub This unit does not support USB hubs Connect the USB storage device directly Is the USB storage device supported by this unit This unit only supports USB mass storage class devices This unit supports portable flash memory and digital audio playback devices Only the FAT16 and FAT32 file systems are supported Other file systems exFAT NTFS HFS...

Page 32: ...Press INPUT to switch to the other mode then switch again to the USB mode Problem Check Remedy Problem Remedy Can t operate the iPod iPhone iPad by the remote control Make sure the iPod iPhone iPad is connected correctly refer to Connecting your iPod iPhone on page 15 Can t operate the iPod iPhone iPad Make sure the iPod iPhone iPad is connected correctly refer to Connecting your iPod iPhone on pa...

Page 33: ...lossless encoding Cautions on use When moving this unit When moving the unit be sure to first check that there is no disc loaded and disconnect the iPod iPhone iPad Then press STANDBY ON wait for STAND BY disappears on main display to turn off then unplug the power cord Damage may occur if the unit is transported or moved with a disc inserted or when another device is connected to the iPod iPhone ...

Page 34: ...oth wring out thoroughly wipe off the dirt then wipe again with a soft dry cloth Alcohol thinner benzene insecticides etc could cause the print or paint to peel off Also leaving rubber or vinyl products in contact with this unit for long periods of time could mar the cabinet When using chemical impregnated wipes etc read the cautions included with the wipes carefully Cleaning the lens This unit s ...

Page 35: ... iPod iPod nano and iPod touch are trademarks of Apple Inc registered in the U S and other countries Lightning is a trademark of Apple Inc About apt X 2012 CSR plc and its group companies The aptX mark and the aptX logo are trade marks of CSR plc or one of its group companies and may be registered in one or more jurisdictions Auto power off setting Long press the on the unit for 3 seconds to switc...

Page 36: ...ual transmission distances supported may differ depending on surrounding conditions Miscellaneous iPod iPhone dock 5 V 1 A USB terminal 5 V 2 1 A Power source AC 100 V to 240 V 50 Hz 60 Hz Power consumption Power on 36 W Power stand by 0 5 W or less Power stand by BT STANDBY ON 0 5 W or less X SMC22 only Dimensions 520 mm W x 218 mm H x 137 mm D Weight without package 3 9 kg Speaker Type Passive r...

Page 37: ...ntario L3R 2Z5 Canada TEL 1 877 283 5901 905 479 4411 PIONEER EUROPE NV Haven 1087 Keetberglaan 1 B 9120 Melsele Belgium TEL 03 570 05 11 PIONEER ELECTRONICS ASIACENTRE PTE LTD 253 Alexandra Road 04 01 Singapore 159936 TEL 65 6472 7555 PIONEER ELECTRONICS AUSTRALIA PTY LTD 5 Arco Lane Heatherton Victoria 3202 Australia TEL 03 9586 6300 PIONEER ELECTRONICS DE MEXICO S A DE C V Blvd Manuel Avila Cam...

Reviews: