background image

Other Settings

11

67

En

7

When you’re finished, press RETURN.

You will return to the System Setup menu.

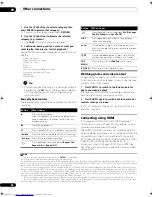
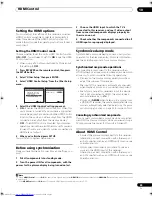
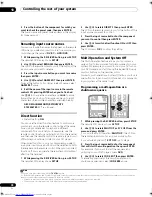
Input function default and possible settings

The terminals on the rear of the receiver generally 
correspond to the name of one of the input source 
functions. If you have connected components to this 
receiver differently from (or in addition to) the defaults 
below, see 

The Input Setup menu

 above to tell the receiver 

how you’ve connected up. The dots (

) indicate possible 

assignments.

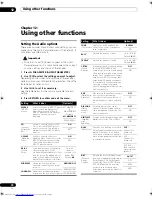
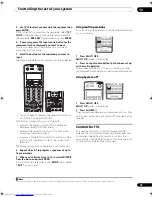
The Other Setup menu

The Other Setup menu is where you can make 
customized settings to reflect how you are using the 
receiver.

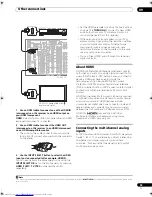
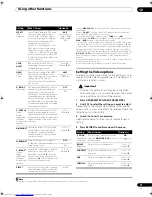
1

Switch on the receiver and your TV.

Use the 

 RECEIVER

 button to switch on.

2

Press RECEIVER on the remote control, then press 

the SETUP button.

An on-screen display (OSD) appears on your TV. Use the 

///

 buttons and 

ENTER

 to navigate through the 

screens and select menu items. Press 

RETURN

 to 

confirm and exit the current menu.

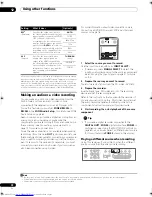
3

Select ‘Other Setup’ then press ENTER. 

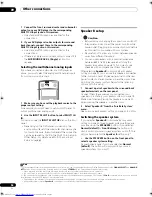
4

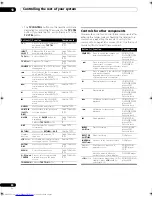
Select the setting you want to adjust.

If you are doing this for the first time, you may want to 
adjust these settings in order:

Multi Ch In Setup 

– Specifies the optional settings 

for a multi-channel input.

ZONE Audio Setup 

– Specify your volume setting for 

a MULTI-ZONE setup (see 

ZONE Audio Setup

 below).

SR+ Setup

 – Specify how you want to control your 

Pioneer plasma display (see 

SR+ Setup for Pioneer 

plasma displays

 below).

HDMI Control Setup

 – Synchronizes this receiver 

with your Pioneer component supporting HDMI 
Control (see 

Setting the HDMI Control mode

 on 

page 65).

OSD Adjustment

 – Adjust the position of the on-

screen display on your TV (see 

OSD Adjustment


below).

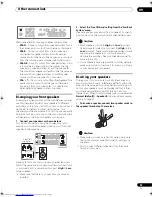
5

Make the adjustments necessary for each setting, 

pressing RETURN to confirm after each screen.

Input 
source

Input Terminals

Digital

HDMI

Component S-Video

DVD/LD

COAX 1

a

a. With HDMI Control set to ON, assignments cannot be made (see 

HDMI 

Control

 on page 64).

IN 1

IN 1

BD

OPT 2

a

IN 2

IN 2

TV/SAT

OPT 1

a

DVR/VCR 1

OPT 3

a

(Fixed)

DVR/VCR 2

a

(Fixed)

VIDEO/
GAME 1

a

IN 3

VIDEO/
GAME 2

(Fixed)

a

(Fixed)

HDMI 1

(

HDMI-1

)

HDMI 2

(

HDMI-2

)

HDMI 3

(

HDMI-3

)

HDMI 4

(VSX-LX70)

(

HDMI-4

)

HOME MEDIA 
GALLERY

(VSX-LX70)

USB

(

VSX-LX60

)

CD

COAX 2

CD-R/TAPE/
MD

OPT 4

TUNER

PHONO

MULTI CH IN

iPod

RECEIVER

SOURCE

SYSTEM OFF

INPUT

SELECT

DVD

TV

BD

TV CTRL

DVR1

i Pod

TUNER

RECEIVER

CD

DVR2

HOME MEDIA

GALLERY

CD-R

ZONE2/3

HDMI

CLEAR
+10

DISC

CLASS

D.ACCESS

ENTER

TV CONTROL

VOL

TUNE

TUNE

ST

ST

TV CH

INPUT

SELECT

TV  VOL

ENTER

A  PARAMETER

TOP  MENU  

V  PARAMETER

MENU   T.EDIT

BAND

PROGRAM 

GUIDE

RETURN

RETURN

SETUP

SETUP

PTY SEARCH

CH

LEVEL

1 .  Au t o   M C AC C
2 .  S u r r   B a ck   S y s t e m
3 .  M a nu a l   M C AC C
4 .  F U L L   BA N D   P H A S E   C T R L
5 .  D a t a   M a n ag e m e n t
6 .  M a nu a l   S P   S e t u p
7 .  I n p u t   S e t u p

8 .  O t h e r   S e t u p

  : E x i t  

S y s t e m   S e t u p   M E N U

DV D / L D

- 5 5 . 0 dB

: R e t u r n    

a .  M u l t i   C h   I n   S e t u p

b .  Z O N E   Au d i o   S e t u p
c .  S R +   S e t u p
d .  H D M I   C o n t ro l   S e t u p
e .  O S D   A d j u s t m e n t

8 .  O t h e r   S e t u p

DV D / L D

- 5 5 . 0 dB

VSX_LX60LX70.book  Page 67  Wednesday, June 6, 2007  3:13 PM

Summary of Contents for VSX-LX60

Page 1: ...Operating Instructions AUDIO VIDEO MULTI CHANNEL RECEIVER ...

Page 2: ...at the power supply voltage of the area where this unit will be used meets the required voltage e g 230 V or 120 V written on the rear panel D3 4 2 1 4_A_En Before plugging in for the first time read the following section carefully Replacement and mounting of an AC plug on the power supply cord of this unit should be performed only by qualified service personnel D3 4 2 1 2 2_B_En IMPORTANT THE MOU...

Page 3: ...n Operating Environment Operating environment temperature and humidity 5 ºC to 35 ºC 41 ºF to 95 ºF less than 85 RH cooling vents not blocked Do not install this unit in a poorly ventilated area or in locations exposed to high humidity or direct sunlight or strong artificial light D3 4 2 1 7c_A_En If you want to dispose this product do not mix it with general household waste There is a separate co...

Page 4: ...back 28 Listening in surround sound 28 Standard surround sound 28 Using the Home THX modes 29 Using the Advanced surround effects 29 Listening in stereo 30 Using Front Stage Surround Advance 30 Using Stream Direct 30 Selecting MCACC presets 31 Choosing the input signal 31 Using surround back channel processing 31 Using the Virtual Surround Back mode 32 Using the genre synchronizing function 33 06 ...

Page 5: ...ctions Setting the Audio options 70 Setting the Video options 71 Making an audio or a video recording 72 Playing a different source when recording 72 Reducing the level of an analog signal 73 Using the sleep timer 73 Dimming the display 73 Switching the speaker impedance 73 Checking your system settings 74 Resetting the system 74 Default system settings 74 13 Controlling the rest of your system Se...

Page 6: ...ld areas in places where there is vibration or other movement in places that are very dusty in places that have hot fumes or oils such as a kitchen Loading the batteries Caution Incorrect use of batteries may result in such hazards as leakage and bursting Observe the following precautions Never use new and old batteries together Insert the plus and minus sides of the batteries properly according t...

Page 7: ...s as shown below for the best surround sound effect Also see Placing the speakers on page 20 for more on this 3 Plug in the receiver and switch it on followed by your DVD player your subwoofer and the TV Plug the power cable into the AC outlet and switch on the receiver 1 Make sure you ve set the video input on your TV to this receiver Check the manual that came with the TV if you don t know how t...

Page 8: ...s present in your setup Try to be as quiet as possible while it s doing this 5 If no operations are performed for 10 seconds while the speaker configuration check screen is being displayed the Auto MCACC Setup will resume automatically In this case you don t need to select OK and press ENTER in step 6 RECEIVER SOURCE SYSTEM OFF INPUT SELECT DVD TV BD TVCTRL DVR1 iPod TUNER RECEIVER CD DVR2 HOMEMED...

Page 9: ... the operation of the microphone If this seems to be happening switch off the TV when doing the Auto MCACC Setup Playing a source Here are the basic instructions for playing a source such as a DVD disc with your home theater system 1 Switch on your system components and receiver Start by switching on the playback component for example a DVD player your TV4 and subwoofer if you have one then the re...

Page 10: ...es Press PHASE PHASE CONTROL to select PHASE CONTROL The PHASE CONTROL indicator on the front panel lights Note 1 You may need to check the digital audio output settings on your DVD player or digital satellite receiver It should be set to output Dolby Digital DTS and 88 2 kHz 96 kHz PCM 2 channel audio and if there is an MPEG audio option set this to convert the MPEG audio to PCM Depending on your...

Page 11: ...eproduced that you can even hear the lip movement of the singer Speech heard with no loss of clarity Surround sound with excellent integration Press PHASE PHASE CONTROL to select FULLBAND PHASE 3 Both the Phase Control and Full Band Phase Control functions are switched on The FULL BAND PHASE CTRL indicator lights on the front panel display Note 1 To calibrate and analyze the frequency phase charac...

Page 12: ...ou can control all your equipment from a single IR remote sensor See Operating other Pioneer components with this unit s sensor on page 81 7 Component video connections x4 Use the inputs to connect any video source that has component video output such as a DVD recorder Use the output for connection to a monitor or TV See Using the component video jacks on page 16 8 AM and FM antenna terminals Use ...

Page 13: ...switches on and off with the receiver See AC outlet on page 22 When making cable connections To avoid hum do not lay connected cables over the top of the receiver When connecting optical cables be careful when inserting the plug not to damage the shutter protecting the optical socket When storing optical cable coil loosely The cable may be damaged if bent around sharp corners About the video conve...

Page 14: ...N IN IN Y PB PR Y PB PR Y PB PR Y PB PR DIGITAL COMPONENT VIDEO ASSIGNABLE ASSIGN ABLE OUT IN IN OUT ANTENNA MULTI ZONE SOURCE IN 1 IN 2 1 12V TR ZONE2 ZONE2 ZONE2 MAIN DC OUT 12V TOTAL 50 mA OUT TV SAT BD BD VIDEO GAME 1 DVD LD 1 IN 2 DVR VCR 1 IN 3 DVD LD IN 1 CD IN 2 IN 2 IN OUT 1 IN 1 IN 2 IN 3 IN 4 R L HDMI MULTI ZONE SOURCE MULTI ZONE SOURCE REC SEL IR IN 3 CD R IN 4 4 1 DVD LD BD IN 1 IN 2 ...

Page 15: ...e an optical cable for the connection Note 1 If your Blu ray disc player only has an coaxial digital output you can connect it to one of the coaxial inputs on this receiver using an coaxial cable When you set up the receiver you ll need to tell the receiver which input you connected the player to see The System Setup menu on page 39 2 See The Input Setup menu on page 66 to assign the S VIDEO 2 inp...

Page 16: ... PR Y PB PR Y PB PR Y PB PR DIGITAL COMPONENT VIDEO ASSIGNABLE ASSIGN ABLE OUT IN IN OUT ANTENNA MULTI ZONE SOURCE IN 1 IN 2 1 12V TRIGGER 2 ZONE2 ZONE2 ZONE2 MAIN DC OUT 12V TOTAL 50 mA MAX OUT TV SAT BD BD VIDEO GAME 1 DVD LD 1 IN 2 DVR VCR 1 IN 3 DVD LD IN 1 CD IN 2 IN 2 IN OUT 1 IN 1 IN 2 IN 3 IN 4 R L HDMI MULTI ZONE SOURCE MULTI ZONE SOURCE REC SEL IR IN 3 CD R IN 4 4 1 DVD LD BD IN 1 IN 2 I...

Page 17: ...VD LD BD TV SAT VIDEO GAME 1 OUT DVR VCR 1 DVR VCR 2 OUT IN IN IN IN IN SUBW CENTE SUR ROUND SURROUND BACK CONTROL OUT PHONO IN IN IN IN Y PB PR Y PB PR Y PB PR Y PB PR DIGITAL COMPONENT VIDEO ASSIGNABLE ASSIGN ABLE OUT IN IN OUT ANTENNA MULTI ZONE SOURCE IN 1 IN 2 1 12V TRIGGER 2 ZONE2 ZONE2 ZONE2 MAIN DC OUT 12V TOTAL 50 mA MAX OUT TV SAT BD BD VIDEO GAME 1 DVD LD 1 IN 2 DVR VCR 1 IN 3 DVD LD IN...

Page 18: ...puts AUDIO L R and an optical digital audio input DIGITAL You can use these connections for any kind of audio video component but they are especially convenient for portable equipment such as camcorders video games and portable audio video equipment Push down on the lower portion of the front panel door to access the front video connections Select these inputs using INPUT SELECT remote or the INPU...

Page 19: ...use the power to cut off as a safety measure AC IN SWITCHED 100 W 0 4 A MAX AC OUTLET A OUT1 ZONE3 OUT2 FM UNBAL 75 Ω AM LOOP MONI TOR OUT MONI TOR OUT OUT CD CD R TAPE MD DVD LD BD TV SAT VIDEO GAME 1 OUT DVR VCR 1 DVR VCR 2 OUT IN IN IN IN IN IN SUBW CENTER FRONT SPEAKERS RS 232C SUR ROUND SURROUND BACK CONTROL SUBW FRONT CENTER SUR ROUND FRONT R L R L R L Single CENTER SURROUND SURROUND BACK Si...

Page 20: ...le interference such as discoloration of the picture when the TV is switched on If you do not have magnetically shielded speakers and notice discoloration of the TV picture move the speakers farther away from the TV If you re using a center speaker place the front speakers at a wider angle If not place them at a narrower angle Place the center speaker above or below the TV so that the sound of the...

Page 21: ...fix the AM antenna to a wall fig C Before fixing make sure that the reception is satisfactory 2 Pull off the protective shields of both AM antenna wires 3 Press the AM LOOP antenna terminal tabs to open and insert one wire into each terminal 4 Release the tabs to secure the AM antenna wires 5 Place the AM antenna on a flat surface and point in the direction giving the best reception Avoid placing ...

Page 22: ...e you an electric shock Check the power cord once in a while If you find it damaged ask your nearest Pioneer authorized independent service company for a replacement Do not use any power cord other than the one supplied with this unit Do not use the supplied power cord for any purpose other than that described below The receiver should be disconnected by removing the mains plug from the wall socke...

Page 23: ...he MCACC presets page 31 is selected 1 Digital Precision Processing indicator Lights to indicate digital processing for example it disappears when Pure Direct page 30 is on or when listening through the multichannel analog inputs VSX LX70 MASTER VOLUME STANDBY ON INPUT SELECTOR PHASE CONTROL PHASE CONTROL AUTO SURR STREAM DIRECT MCACC POSITION ADVANCED MCACC DIGITAL VIDEO SCALER HDMI DIGITAL PRECI...

Page 24: ... controls when recording a source see Making an audio or a video recording on page 72 16 SIGNAL SELECT Use to select an input signal page 31 17 SBch PROCESSING Selects the surround back channel mode page 31 or virtual surround back mode page 32 18 STEREO F S SURR Switches between the stereo playback mode page 30 and the Front Stage Surround Advance mode page 30 19 PHONES jack Use to connect headph...

Page 25: ...mode is set using the MPX button 11 EON RDS indicators EON Lights when the EON mode is set flashes during EON reception The indicator lights when the current station carries the EON service page 38 RDS Lights when an RDS broadcast is received page 37 12 SOUND Lights when any of the Midnight Loudness or tone controls feature is selected page 70 13 Master volume level Shows the overall volume level ...

Page 26: ...ropriate Advanced Surround mode for the genre of the source currently being played back this feature is available only when a Pioneer DVD recorder supporting HDMI Control is connected to this receiver via HDMI page 33 CH LEVEL Press repeatedly to select a channel then use to adjust the level page 51 Press TUNER first to access D ACCESS After pressing you can access a radio station directly using t...

Page 27: ... off other components connected to the receiver see page 76 for more on this 13 Character display LCD This display shows information when transmitting control signals The following commands are shown when you re setting the remote to control other components see Controlling the rest of your system on page 76 SETUP Indicates the setup mode from which you choose the options below PRESET See Selectin...

Page 28: ...mes 2 PRO LOGIC 4 1 channel surround sound sound from the surround speakers is mono Neo 6 CINEMA 6 1 channel sound especially suited to movie sources Neo 6 MUSIC 6 1 channel sound especially suited to music sources7 Neural THX Up to 7 1 channel sound especially suited to music sources8 With multichannel sources if you have connected surround back speaker s and have selected SBch ON you can select ...

Page 29: ...st Advanced Surround modes are designed to be used with film soundtracks but some modes are also suited for music sources Try different settings with various soundtracks to see which you like Press ADV SURR ADVANCED SURROUND repeatedly to select a listening mode 2 ACTION Designed for action movies with dynamic soundtracks DRAMA Designed for movies with lots of dialog SCI FI Designed for science fi...

Page 30: ...sary signal processing is bypassed and you re left with the pure analog or digital sound source see Stream direct with different input signal formats on page 95 1 While listening to a source press S DIRECT AUTO SURR STREAM DIRECT to select the mode you want Check the digital format indicators in the front panel display to see how the source is being processed AUTO SURROUND See Auto playback on pag...

Page 31: ...und back speaker s Press SBch SBch PROCESSING repeatedly to cycle the surround back channel options Each press cycles through the options as follows SBch ON 6 1 or 7 1 decoding is always used for example a surround back channel will be generated for 5 1 encoded material SBch AUTO Automatically switches to 6 1 or 7 1 decoding for 6 1 encoded sources for example Dolby Digital EX or DTS ES SBch OFF M...

Page 32: ...al Surround Back mode if the surround speakers are on and the Surr Back setting is set to NO in the Speaker Setting on page 50 The Virtual Surround Back mode cannot be applied to sources that do not have surround channel information Type of source SBch Processing Virtual SB mode Standard THX Advanced surround Multichannel sources Stereo sources 2 Pro Logic IIx 2 Pro Logic Neo 6 Dolby Digital EX DT...

Page 33: ...o a genre is being played back The most appropriate Advanced Surround mode for the source being played back is automatically selected Note 1 This feature is available only when the source being played back is assigned to a genre When the source has no genre assigned to NO GENRE appears showing that this feature is not available Make sure that HDMI Control is set to ON When OFF is selected CANNOT S...

Page 34: ...ta that may occur when connected to this receiver With large amounts of data it may take longer for the receiver to read the contents of a USB device 3 Make sure the receiver is in standby when disconnecting the USB device 4 If the file selected cannot be played back this receiver automatically skips to the next file playable When the file currently being played back has no title assigned to it th...

Page 35: ...orates MPEG 2 AAC forming the basis of the MPEG 4 audio compression technology The file format and extension used depend on the application used to encode the AAC file This unit plays back AAC files encoded by iTunes bearing the extension m4a DRM protected files will not play and files encoded with some versions of iTunes may not play Apple and iTunes are trademarks of Apple Inc registered in the ...

Page 36: ...button to select the tuner 2 Use the BAND button to change the band FM or AM if necessary Each press switches the band between FM and AM 3 Press D ACCESS Direct Access 4 Use the number buttons to enter the frequency of the radio station For example to tune to 106 00 FM press 1 0 6 0 0 If you make a mistake halfway through press D ACCESS twice to cancel the frequency and start over Saving station p...

Page 37: ...eset you want You can also use the number buttons on the remote control to recall the station preset An introduction to RDS Radio Data System RDS is a system used by most FM radio stations to provide listeners with various kinds of information the name of the station and the kind of show they re broadcasting for example One feature of RDS is that you can search by type of program For example you c...

Page 38: ...atedly to switch between EON TA Traffic Announcement Sets the tuner to pick up traffic information when it is broadcast EON NEWS Sets the tuner to pick up news when it is broadcast When set to TA or NEWS the EON indicator in the display lights it flashes when receiving an EON broadcast 5 The indicator in the display lights when the current station carries the EON service 6 Note 1 RDS is only possi...

Page 39: ...onnected to the digital HDMI component video and S video inputs see The Input Setup menu on page 66 Other Setup Makes customized settings to reflect how you are using the receiver see The Other Setup menu on page 67 Automatic MCACC Expert If your setup requires more detailed settings than those provided in Automatically setting up for surround sound MCACC Full Band Phase Control on page 8 you can ...

Page 40: ...ions press RETURN to go back to the Auto MCACC main setup Note 1 Except in cases where you are only adjusting one parameter i e channel level from the CUSTOM setup screen step 2 2 If you are planning on bi amping your front speakers or setting up a separate speaker system in another room read through Surround back speaker setting on page 42 and make sure to connect your speakers as necessary befor...

Page 41: ...e the setting and number for surround back and continue 7 Make sure OK is selected then press ENTER A progress report is displayed on screen while the receiver outputs more test tones to determine the optimum receiver settings for channel level speaker distance and Acoustic Calibration EQ Again try to be as quiet as possible while this is happening It may take 3 to 7 minutes If you selected a Stan...

Page 42: ... back speakers in your main speaker system A setup Speaker B Select to use the surround back B speaker terminals to listen to stereo playback in another room see Speaker B setup on page 56 Front Bi Amp Select this setting if you re bi amping your front speakers see Bi amping your front speakers on page 57 ZONE 2 Select to use the surround back B speaker terminals for an independent system in anoth...

Page 43: ...Q Professional on page 45 Fine Channel Level Default setting 0 0dB all channels You can achieve better surround sound by properly adjusting the overall balance of your speaker system The following setting can help you make detailed adjustments that you may not achieve using the Manual speaker setup on page 50 1 Select Fine Ch Level from the Manual MCACC setup menu The volume increases to the 0 0 d...

Page 44: ...from the Manual MCACC setup menu 2 Select ON if it is not already selected then adjust the parameters for the Standing Wave Control Filter Ch Select the channel to which you will apply the filter s Main all except center channel and subwoofer Center or SW subwoofer TRIM only available when the filter channel above is SW Adjust the subwoofer channel level to compensate for the difference in output ...

Page 45: ...utput of the frequency response of your room 2 How to use Acoustic Calibration EQ Professional If you find that lower frequencies seem overly reverberant in your listening room i e it sounds boomy or that different channels seem to exhibit different reverb characteristics select EQ Pro S Wave or ALL for the Custom Menu setting in Automatic MCACC Expert on page 39 to calibrate the room automaticall...

Page 46: ...ngs may provide a more detailed sound experience with your speaker system It is best to try and see what works best for your particular room Note that changing the room for example moving furniture or paintings will affect the calibration results In such cases you should recalibrate your system Using Acoustic Calibration EQ Professional 1 Select EQ Professional then press ENTER 2 Select an option ...

Page 47: ... 4kHz 8kHz and 16kHz Select the setting from the following time periods in milliseconds 0 20ms 10 30ms 20 40ms 30 50ms 40 60ms 50 70ms and 60 80ms This setting will be applied to all channels during calibration When you re finished select START It will take about 2 to 4 minutes for the calibration to finish After the Acoustic Calibration Equalization is set you are given the option to check the se...

Page 48: ...any MCACC presets that you don t want see Clearing MCACC presets below Output PC See Connecting a PC for Advanced MCACC output on page 63 for more on this Checking MCACC preset data After you have completed Automatically setting up for surround sound MCACC Full Band Phase Control on page 8 or Automatic MCACC Expert on page 39 you can check your calibrated settings using the on screen display Note ...

Page 49: ...leted shows in the OSD to confirm the MCACC preset has been copied then you automatically return to the Data Management setup menu Clearing MCACC presets If you are no longer using one of the MCACC presets stored in memory you can choose to clear the calibration settings of that preset 1 Select MCACC Memory Clear from the Data Management setup menu 2 Select the MCACC preset you want to clear Make ...

Page 50: ...ect a subwoofer Select SMALL to send the bass frequencies to the subwoofer Center Select LARGE if your center speaker reproduces bass frequencies effectively or select SMALL to send bass frequencies to the other speakers or subwoofer If you didn t connect a center speaker choose NO the center channel is sent to the front speakers Surround Select LARGE if your surround speakers reproduce bass frequ...

Page 51: ...you need to specify the distance of your speakers from the listening position The receiver can then add the proper delay needed for effective surround sound Note 1 If you have a subwoofer and like lots of bass it may seem logical to select LARGE for your front speakers and PLUS for the subwoofer This may not however yield the best bass results Depending on the speaker placement of your room you ma...

Page 52: ... 29 with the Advanced Speaker Array ASA system see About THX on page 90 it is required that you make the setting See Placing the speakers on page 20 for more on THX speaker placement 2 1 Select THX Audio Setting from the Manual SP Setup menu 2 Specify the distance of your surround back speakers from each other 0 0 3m Surround speakers within 30 cm apart best for THX surround sound 0 3 1 2m Surroun...

Page 53: ...ector port iPod mini iPod nano and iPod Photo portable device third generation and above However compatibility may vary depending on the software version of your iPod This receiver does not support software versions prior to iPod updater 2004 10 20 plesae use the latest iPod software versions later than the iPod updater 2004 10 20 For supported versions consult your local Pioneer dealer AM LOOP CD...

Page 54: ...hing other than a song is selected all the songs that fall into that category will play Press to stop playback Pauses playback or restarts playback when paused Press and hold during playback to start scanning Press to skip to previous next song Press repeatedly to switch between Repeat One Repeat All and Repeat Off Press repeatedly to switch between Shuffle Songs Shuffle Albums and Shuffle Off DIS...

Page 55: ...on HDCP is used to protect digital content transmitted and received by DVI compliant displays HDMI has the capability to support standard enhanced or high definition video plus standard to multi channel surround sound audio HDMI features include uncompressed digital video one connector instead of several cables and connectors and communication between the AV source and AV devices such as DTVs HDMI...

Page 56: ...ack B speaker terminals on the rear panel to listen to stereo playback in another room See Switching the speaker system below for the listening options with this setup 1 Connect a pair of speakers to the surround back speaker terminals on the rear panel Connect them the same way you connected your speakers in Installing your speaker system on page 19 Make sure to review Placing the speakers on pag...

Page 57: ...k is powering which part High or Low of the speaker Make sure that the connections are properly inserted 2 Select the Front Bi Amp setting from the Surr Back System menu See Surround back speaker setting on page 42 to specify how you re using the surround back speaker terminals Caution Most speakers with both High and Low terminals have two metal plates that connect the High to the Low terminals T...

Page 58: ...el amplifier INPUT L R ANALOG Surround channel amplifier INPUT L R ANALOG Surround back channel amplifier INPUT ANALOG Powered subwoofer INPUT ANALOG Center channel amplifier mono Note 1 You can t use sound controls such as the tone controls or Midnight listening or any surround modes with a separate amplifier in the sub zone You can however use the features available with your sub zone amplifier ...

Page 59: ...4 1 R L R R R VIDEO AUDIO AU S VIDEO OPTICAL COAXIAL LAN 10 100 ASSIGN ABLE 2 1 Sub zone Main zone FM UNBAL 75 Ω AM LOOP MONI TOR OUT MONI TOR OUT OUT CD CD R TAPE MD DVD LD BD IN IN CONTROL OUT IN IN OUT IN IN OUT MULTI ZONE SOURCE 1 IN 2 ZONE2 ZONE2 ZONE2 MAIN IN OUT 1 R L SOURCE IR DVD LD BD ASSIGN ABLE IN 1 IN 2 2 1 Note 1 Only one sub zone is possible if you connect the OUT1 ZONE3 digital out...

Page 60: ... this receiver 7 Note 1 When you use ZONE 2 you must set ZONE 2 RECSEL Setting in the ZONE Audio Setup menu to ZONE 2 page 68 2 Note that when recording this also selects the RECOUT input source See Making an audio or a video recording on page 72 for more on this 3 If the receiver is in standby the display is dimmed and ZONE and your selected sub zone s continue to show in the display TUNE TUNE PH...

Page 61: ... 2 OUT IN IN IN IN IN IN SUBW CENTER FRONT SPEAKERS RS 232C SUR ROUND SURROUND BACK CONTROL SUBW FRONT CENTER SUR ROUND FRONT R L Single SUR ROUND BACK OUT PHONO IN IN IN IN Y PB PR Y PB PR Y PB PR Y PB PR DIGITAL COMPONENT VIDEO ASSIGNABLE ASSIGN ABLE OUT IN IN OUT ANTENNA iPod MULTI CH IN MULTI ZONE SOURCE PRE OUT IN 1 IN 2 1 12V TRIGGER 2 ZONE2 ZONE2 ZONE2 MAIN DC OUT 12V TOTAL 50 mA MAX OUT TV...

Page 62: ...play of listening mode Automatic video input switching on the plasma display Automatic volume muting on the plasma display See also SR Setup for Pioneer plasma displays on page 68 for more on setting up the receiver Important The SR features do not work when any of the iPod HOME MEDIA GALLERY VSX LX70 only or USB VSX LX60 function is selected 1 Make sure that the plasma display and this receiver a...

Page 63: ...er port settings System must have internet access Connect your computer to the RS 232C jack on the rear panel of the receiver Make sure that the receiver and all connected components are switched off and disconnected from the power outlet when you do this 1 Use a commercially available cable to connect the RS 232C jack on your computer to the 9 pin RS 232C jack on this receiver See the documentati...

Page 64: ...connect the power cords to the wall socket After connecting this receiver to an AC outlet a 15 second initialization process begins You cannot carry out any operations during initialization The HDMI indicator on the display unit blinks during initialization and you can turn this receiver on once it has stopped blinking To get the most out of this function we recommend that you connect your HDMI co...

Page 65: ...e Synchronized amp mode begins once you carry out an operation for the plasma display For more information see the operating manual of your plasma display Synchronized amp mode operations By connecting a component to this receiver with an HDMI cable you can use synchronized amp mode which allows you to synchronize the following operations Displays on the plasma display when you mute or adjust the ...

Page 66: ...p has three optional settings Input Name You can choose to rename the input function for easier identification Select Rename to do so or Default to return to the system default 12V Trigger 1 2 After connecting a component to one of the 12 volt triggers see Switching components on and off using the 12 volt trigger on page 61 select MAIN ZONE 2 ZONE 3 or OFF for the corresponding trigger setting to ...

Page 67: ...l your Pioneer plasma display see SR Setup for Pioneer plasma displays below HDMI Control Setup Synchronizes this receiver with your Pioneer component supporting HDMI Control see Setting the HDMI Control mode on page 65 OSD Adjustment Adjust the position of the on screen display on your TV see OSD Adjustment below 5 Make the adjustments necessary for each setting pressing RETURN to confirm after e...

Page 68: ...er s controls to adjust the volume Fixed Use this setting if you ve connected a fully integrated amplifier such as another Pioneer VSX receiver in the sub room and want to use that receiver s volume controls This setting is not available if the surround back system setting is set to ZONE 2 With the Fixed setting the source is sent from this receiver at maximum volume so make sure the volume is qui...

Page 69: ...video input 2 on the plasma display The Monitor Out Connect should be set to the input that you ve used to connect this receiver to your plasma display 4 When you re finished press RETURN You will return to the Other Setup menu OSD Adjustment Use this feature to adjust your TV display if it seems difficult to see all the instructions on the screen 1 Select OSD Adjustment from the Other Setup menu ...

Page 70: ...0 MIDNIGHT Allows you to hear effective surround sound of movies at low volumes MID LDN OFF MIDNIGHT ON LOUDNESS Used to get good bass and treble from music sources at low volumes LOUDNESS ON TONE Tone Control Applies the treble and bass tone controls to a source or bypasses them completely BYPASS ON BASSc Adjusts the amount of bass 6 to 6 dB Default 0 dB TREBLEc Adjusts the amount of treble 6 to ...

Page 71: ... 0 to 7 Default 3 DIMENSIONg Adjusts the depth of the surround sound balance from front to back making the sound more distant minus settings or more forward positive settings 3 to 3 Default 0 PANORAMAg Extends the front stereo image to include the surround speakers for a wraparound effect OFF ON C IMAGEh Center Image Applicable only when usingacenter speaker Adjusts the center image to create a wi...

Page 72: ... switched on see Using the MULTI ZONE controls on page 60 you can also select a different input source for this output while ZONE 3 shows in the display Playing a different source when recording Using this receiver it s possible to listen to a different analog source than the one you re recording RESa Resolution Specifies the output resolution of the video signal when analog video input signals ar...

Page 73: ...maining sleep time at any time by pressing SLEEP once Pressing repeatedly will cycle through the sleep options again 4 Dimming the display You can choose between four brightness levels for the front panel display Note that when selecting sources the display automatically brightens for a few seconds Press DIMMER repeatedly to change the brightness of the front panel display Switching the speaker im...

Page 74: ...n reset to the factory default settings Note that all settings will be saved even if the receiver is unplugged Default system settings Note 1 If the Pure Direct mode is switched on some settings above will show OFF even though they are on Input source Surround Back Processing MCACC preset ZONE 2 REC SEL ZONE 3 HDMI Control SHIFT STATUS STATUS MCACC S DIRECT MULTI OPE SIGNAL SEL T DISP SBch STEREO ...

Page 75: ...istening Mode 2 ch AUTO SURROUND Listening Mode x ch AUTO SURROUND Listening Mode HP STEREO See also Setting the Audio options on page 70 for other default DSP settings MCACC Channel level M1 M6 0 dB Speaker Distance M1 M6 3 00 m Standing Wave M1 M6 Standing Wave On Off ON ATT 0 dB SWch Wide Trim 0 0 EQ Data M1 M6 All channels bands 0 dB EQ Wide Trim M1 M6 0 0 dB Setting Default ...

Page 76: ... seem to work select the next code from the list if there is one If you can t find or properly enter a preset code you can still teach the remote individual commands from another remote control see Programming signals from other remote controls below 7 If your component is controlled successfully press ENTER to confirm The remote LCD display shows OK Programming signals from other remote controls ...

Page 77: ...erased 5 Repeat step 4 to erase other buttons 6 Press and hold the RECEIVER button for a couple of seconds when you re done Resetting the remote control presets This will erase all preset remote control preset codes and programmed buttons 1 While pressing the RECEIVER button press SETUP The remote LCD display shows SETUP 2 Use to select RESET then press ENTER RESET flashes in the LCD display 3 Pre...

Page 78: ...urce you want to control 3 Press the input source button for the component you want to control then press ENTER 4 Use to switch direct function ON or OFF then press ENTER The LCD shows OK to confirm the setting Multi Operation and System Off The Multi Operation feature allows you to program a series of up to 5 commands for the components in your system For example you could turn on your TV turn on...

Page 79: ...as been set up with a multi operation The receiver switches on if it was in standby and the programmed multi operation is performed automatically Using System off 1 Press MULTI OPE MULTI OP flashes in the display 2 Press SOURCE The command sequence you programmed will run then all Pioneer components will switch off1 followed by this receiver Controls for TVs This remote control can control compone...

Page 80: ...mation Cable TV TV RETURN Use to select RETURN or EXIT Satellite TV TV Number buttons Use to select a specific TV channel Cable TV Satellite TV TV 10 button Use to add a decimal point when selecting a specific TV channel Satellite TV TV ENTER DISC Use to enter a channel Cable TV Satellite TV TV MENU Select the menu screen Cable TV Satellite TV TV ENTER Press to select or adjust and navigate items ...

Page 81: ... DVD DVR player AUDIO Changes the audio language or channel DVD BD DVR player SUBTITLE SHIFT DISP Displays changes the subtitles on multilingual DVDs DVD BD DVR player SHIFT AUDIO Switches to the VCR controls when using a VCR DVD HDD recorder VCR DVD DVR player DISP Press to display information DVD BD DVR player HDD SHIFT CH Switches to the hard disk controls when using a DVD HDD recorder DVR play...

Page 82: ...e 42 Switch on the digital safety feature While holding down the SETUP button on the front panel press STANDBY ON to set this receiver to the standby mode Use to select D SAFETY and then use to select D SAFETY 1 or D SAFETY 2 select D SAFETY OFF to deactivate this feature If the power switches off even with D SAFETY 2 switched on turn down the volume With D SAFETY 1 or D SAFETY 2 on some features ...

Page 83: ... switched on and the volume turned up If your subwoofer has a sleep function make sure it is switched off Make sure that the Subwoofer setting is YES or PLUS see Speaker Setting on page 50 The crossover frequency may be set too low try setting it higher to match the characteristics of your other speakers see Speaker Setting on page 50 If there is very little low frequency information in the source...

Page 84: ...bwoofer output is very low To route more signal to the subwoofer set it to PLUS or set the front speakers to SMALL see Speaker Setting on page 50 Everything seems to be set up correctly but the playback sound is odd The speakers may be out of phase Check that the positive negative speaker terminals on the receiver are matched with the corresponding terminals on the speakers see Connecting the spea...

Page 85: ...ple or the video quality may just be poor with some video game units for example The picture quality may also depend on the settings etc of your display device Switch off the video converter and reconnect the source and display device using the same type of connection component S video or composite then start playback again Symptom Remedy The Auto MCACC Setup continually shows an error The ambient...

Page 86: ...lby DTS software These indicators do dot light if playback is paused Check the playback especially the digital output settings of the source component When playing a DVD Audio disc the DVD player display shows 96 kHz However the receiver s display does not This is not a malfunction 96 kHz audio from DVD Audio discs is only output from the analog outputs of the DVD player This receiver cannot show ...

Page 87: ...t the manufacturer for support If video images do not appear on your TV or plasma display try adjusting the resolution DeepColor or other setting for your component If NOT SUPPORT appears in the receiver s display try adjusting the resolution DeepColor or other setting for your component While analog video signals are being output over HDMI use a separate connection for audio output When this rece...

Page 88: ...neer authorized service center or your dealer for servicing Can t play audio files The WMA or MPEG 4 AAC files were recorded using DRM digital rights management or the bit rate sampling rate is not compatible see Compressed audio compatibility on page 35 This is not a malfunction Symptom Cause Action Error I1 There is a problem with the signal path from the iPod to the receiver Switch off the rece...

Page 89: ...nd detail Dolby Digital Plus Dolby Digital Plus is the next generation audio technology for all high definition programming and media It combines the efficiency to meet future broadcast demands with the power and flexibility to realize the full audio potential expected in the upcoming high definition era Built on Dolby Digital the multi channel audio standard for DVD and HD broadcasts worldwide Do...

Page 90: ...serving audio quality DTS HD Master Audio adopts variable data transfer rates facilitating data transfer to the maximum rate of 24 5 Mbps in the Blu ray disc format 18 0 Mbps in the HD DVD format which by far exceeds that of a standard DVD These high data transfer rates enable lossless transmission of 96 kHz 24 bit 7 1 channel audio sources without deteriorating the quality of the original sound D...

Page 91: ...nology in the home This product may also engage the THX Surround EX mode during the playback of 5 1 channel material that is not Dolby Digital Surround EX encoded In such case the information delivered to the Surround Back channel will be program dependent and may or may not be very pleasing depending on the particular soundtrack and the tastes of the individual listener Advanced Speaker Array ASA...

Page 92: ...ueHD 176 4 kHz 192 kHz As above As above Dolby Digital Surround 2 Pro Logic llx MOVIE 2 Pro Logic llx MUSIC 2 Pro Logic llx GAME 2 PRO LOGICa Neo 6 CINEMA Neo 6 MUSIC 2 Pro Logic llx MOVIE THX 2 PRO LOGIC THXa Neo 6 CINEMA THX THX GAMES MODEb 2 Pro Logic llx MOVIE DTS Surround As above As above Neo 6 CINEMA SACD As above Stereo playback Other stereo sources 2 Pro Logic llx MOVIE 2 Pro Logic llx MU...

Page 93: ...gnal format Standard THX Auto Surround SBch Processing Input signal format Standard THX Auto Surround SBch Processing ON 7 1 channel decoding used for all sources Dolby Digital Plus Dolby TrueHD DTS HD DTS HD Master Audio WMA9 Pro 44 1 kHz 48 kHz PCM 6 1 7 1 channel Straight decoding THX CINEMA Straight decoding Dolby Digital Plus Dolby TrueHD except for 176 4 kHz 192 kHz 5 1 channel Dolby Digital...

Page 94: ... DTS HD Master Audio WMA9 Pro PCM 6 1 7 1 channel Straight decoding THX CINEMA Straight decoding Dolby TrueHD 176 4 kHz 192 kHz 5 1 channel Straight decoding Straight decoding Dolby Digital EX 6 1 channel flagged Dolby Digital EX 2 Pro Logic llx MOVIEa THX SURROUND EX Dolby Digital EX 2 Pro Logic llx MOVIEa DTS ESb 6 1 channel sources 6 1 channel flagged DTS ES Matrix Discrete DTS ES THX Matrix Di...

Page 95: ...A Other stereo sources Stereo playback Stereo playback Analog sources As above ANALOG DIRECT stereo PCM sources As above PCM DIRECT stereo DVD A sources As above PCM DIRECT stereo SACD sources As above SACD DIRECT stereo a a SACD DIRECT VSX LX70 or Straight decoding VSX LX60 Surround Back speaker s Input signal format DIRECT PURE DIRECT Connected Maximum 7 1 channel playback Dolby Digital EX 6 1 c...

Page 96: ... dB Frequency Response 5 Hz to 10 MHz Component Video Section Input Sensitivity Impedance 1 Vp p 75 Ω Output Level Impedance 1 Vp p 75 Ω Signal to Noise Ratio 65 dB Frequency Response 5 Hz to 100 MHz FM Tuner Section Frequency Range 87 5 MHz to 108 MHz Usable Sensitivity Mono 15 2 dBf IHF 1 6 µV 75 Ω 50 dB Quieting Sensitivity Mono 20 2 dBf Stereo 41 2 dBf Sensitivity DIN Mono 1 1 µV S N 26 dB Ste...

Page 97: ...ound effects The built in Dolby Pro Logic IIx and DTS Neo 6 decoders not only provide full surround sound decoding for Dolby Surround sources but will also generate convincing surround sound for any stereo source Also with the addition of a surround back speaker you can take advantage of the built in Dolby Digital EX and DTS ES decoders for six channel surround sound Furthermore Dolby Digital Plus...

Page 98: ...atural without staircasing or jaggies iPod Ready With the new iPod terminal you ll be up and running in no time now that this receiver s enhanced compatibility makes on screen control of your iPod an added possibility 1 With the cooperation of AIR Studios this receiver has been designated AIR Studios Monitor Reference ...

Page 99: ...lstate Parkway Markham Ontario L3R 0P2 Canada TEL 1 877 283 5901 905 479 4411 PIONEER EUROPE NV Haven 1087 Keetberglaan 1 B 9120 Melsele Belgium TEL 03 570 05 11 PIONEER ELECTRONICS ASIACENTRE PTE LTD 253 Alexandra Road 04 01 Singapore 159936 TEL 65 6472 7555 PIONEER ELECTRONICS AUSTRALIA PTY LTD 178 184 Boundary Road Braeside Victoria 3195 Australia TEL 03 9586 6300 PIONEER ELECTRONICS DE MEXICO ...

Reviews: