background image

Listening to your system

05

52

En

Using Hi-bit and Hi-sampling 

You can use both Hi-bit and Hi-sampling to create a wider 
dynamic range with digital sources like CDs or DVDs.

1

Press OPTION repeatedly to select HI-BIT or HI-

SAMPLING.

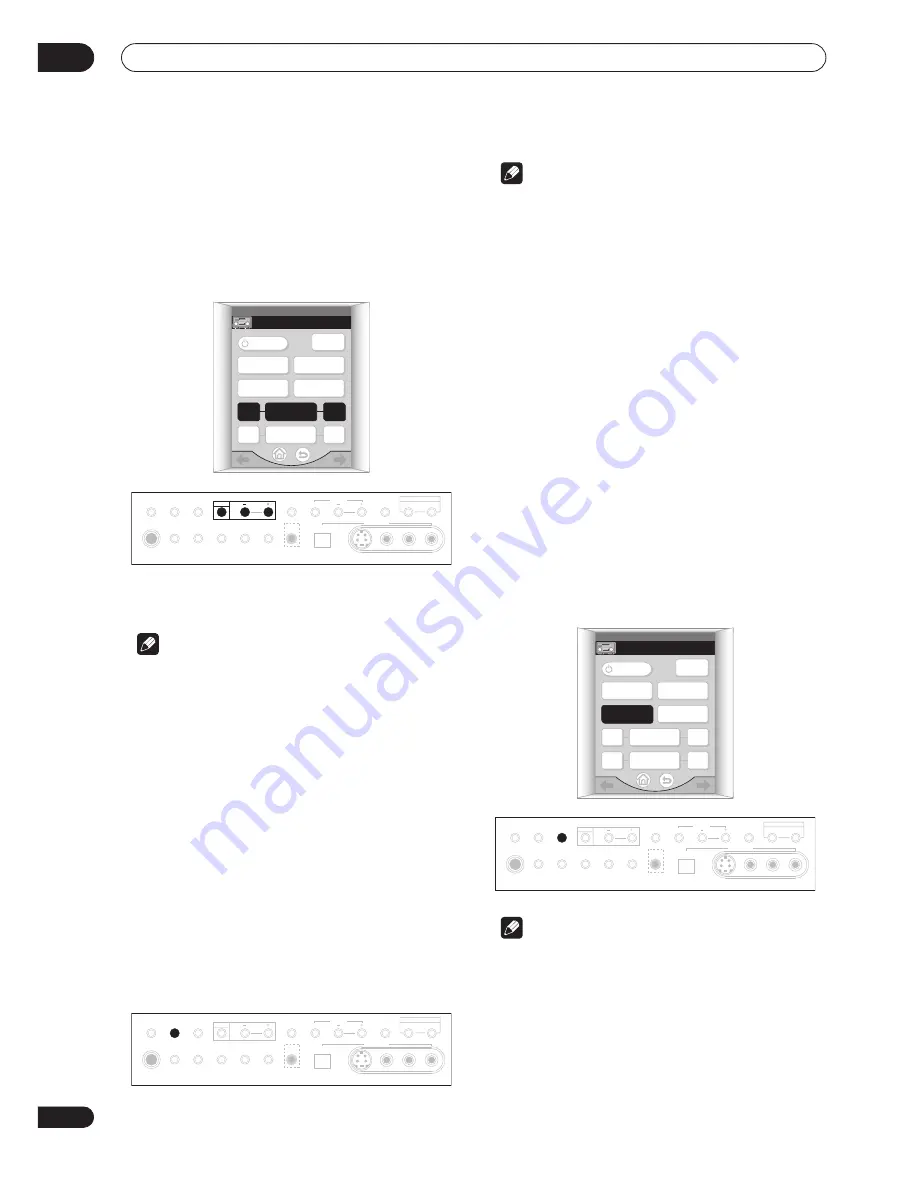
The remote control menu for this step is shown below 
(see note at the start of this chapter if you need help).

2

Use the (OPTION) +/– buttons to switch the 

selected mode on or off.

 Note

• Hi-bit and Hi-sampling may not work with Stream 

Direct or analog sources.

• You can’t use Hi-bit with SACD or sources over 

88.2kHz when using one of the digital inputs 
(including i.LINK).

Using Midnight and Loudness 
listening

• Default setting: 

Off

The Midnight listening feature allows you to hear 
effective surround sound of movies at low volume levels. 

The Loudness feature is useful for listening to music 
sources at low volumes. 

Press MIDNIGHT or LOUDNESS to switch the 

effect on or off.
LOUDNESS

 is only available when using the remote 

control. The remote menu for this step is shown below 
(see note at the start of this chapter if you need help).

 Note

• You can’t use the Midnight and Loudness modes at 

the same time. 

• You can’t use either of these modes when using the 

tone controls, or Stream Direct or the Home THX 
modes.

• Midnight and Loudness automatically adjust 

according to the volume at which you’re listening. 
However, the volume must be under -20dB for these 
features to take effect. 

Using the tone control

You can use the tone control to make customized 
settings for the bass and treble.

Switching the tone control on or off

• Default setting: 

BYPASS

You’ll need to switch the tone control on to adjust the 
bass and treble below.

Press TONE to switch the tone control on or off.

When the tone control is switched off, 

BYPASS

 shows in 

the display. The remote control menu for this step is 
shown below (see note at the start of this chapter if you 
need help).

 Note

• You can’t use the tone control with Stream Direct, 

Midnight, Loudness, or any of the Home THX modes.

RECEIVER 

2/4

RECEIVER

TV

CONT

MIDNIGHT

DIGITAL NR

TONE

LOUDNESS

OPTION

+

CH LEVEL

+

PHONES

SP SYSTEM

A/B

SIGNAL
SELECT

VIDEO

SELECT

TAPE2

MONITOR

STREAM 

DIRECT

SETUP

MIC

SB CH 

MODE

DIGITAL IN

S-VIDEO

VIDEO

VIDEO INPUT

AUDIO

L

R

MIDNIGHT

TONE

OPTION

DIGITAL NR

CLASS

STATION

MULTI ROOM & SOURCE

CONTROL

ON/OFF

TUNER

ACOUSTIC 

CAL.

PHONES

SP SYSTEM

A/B

SIGNAL
SELECT

VIDEO

SELECT

TAPE2

MONITOR

STREAM 

DIRECT

SETUP

MIC

SB CH 

MODE

DIGITAL IN

S-VIDEO

VIDEO

VIDEO INPUT

AUDIO

L

R

MIDNIGHT

TONE

OPTION

DIGITAL NR

CLASS

STATION

MULTI ROOM & SOURCE

CONTROL

ON/OFF

TUNER

ACOUSTIC 

CAL.

RECEIVER 

2/4

RECEIVER

TV

CONT

MIDNIGHT

DIGITAL NR

TONE

LOUDNESS

OPTION

+

CH LEVEL

+

PHONES

SP SYSTEM

A/B

SIGNAL
SELECT

VIDEO

SELECT

TAPE2

MONITOR

STREAM 

DIRECT

SETUP

MIC

SB CH 

MODE

DIGITAL IN

S-VIDEO

VIDEO

VIDEO INPUT

AUDIO

L

R

MIDNIGHT

TONE

OPTION

DIGITAL NR

CLASS

STATION

MULTI ROOM & SOURCE

CONTROL

ON/OFF

TUNER

ACOUSTIC 

CAL.

Summary of Contents for VSX-59TXi Elite

Page 1: ... your purchase will be on file for reference in the event of an insurance claim such as loss or theft Improve product development Your input helps us continue to design products that meet your needs Receive a free Pioneer newsletter Registered customers can opt in to receive a monthly newsletter Receive free tips updates and service bulletins on your new product ...

Page 2: ...its are designed to provide reasonable protection against harmful interference in a residential installation This equipment generates uses and can radiate radio frequency energy and if not installed and used in accordance with the instructions may cause harmful interference to radio communications However there is no guarantee that interference will not occur in a particular installation If this e...

Page 3: ...ntenna or cable system is grounded so as to provide some protection against voltage surges and built up static charges Article 810 of the National Electrical Code ANSI NFPA 70 provides information with regard to proper grounding of the mast and supporting structure grounding of the lead in wire to an antenna discharge unit size of grounding conductors location of antenna discharge unit connection ...

Page 4: ...ise This list of sound levels is included for your protection Decibel Level Example 30 Quiet library soft whispers 40 Living room refrigerator bedroom away from traffic 50 Light traffic normal conversation quiet office 60 Air conditioner at 20 feet sewing machine 70 Vacuum cleaner hair dryer noisy restaurant 80 Average city traffic garbage disposals alarm clock at two feet THE FOLLOWING NOISES CAN...

Page 5: ...ital EX DTS 96 24 and DTS ES Dolby Digital and DTS decoding brings theater sound right into your home with up to six channels of surround sound including a special LFE Low Frequency Effects channel for deep realistic sound effects With the addition of a surround back speaker you can take advantage of the built in Dolby Digital EX and DTS ES decoders for six channel surround sound Dolby Pro Logic I...

Page 6: ...out the AC outlet 29 03 Controls and displays Front panel 30 Display 32 Remote control 33 Basic remote control displays 33 Remote control displays for the tuner 35 Remote control displays for other components 36 04 Getting started Introduction to home theater 39 Automatically setting up for surround sound 39 Other problems when using the Auto Surround Setup 41 Checking the settings on your DVD or ...

Page 7: ...peaker setups using speaker system B ITU R 80 Bi amping your front speakers 81 Bi wiring your speakers 82 Adding a second set of surround speakers for Bi Surround 82 Using the pre outs 82 Connecting additional amplifiers 82 Connecting an external stereo pre amplifier 83 Multi room setup 83 Making multi room connections 83 Using the sub room controls 84 Using the i LINK interface 85 About i LINK 86...

Page 8: ...ther equipment heat will build up inside interfering with performance and or causing malfunctions Slot and openings in the cabinet are provided for ventilation and to protect the equipment from overheating To prevent fire hazard do not place anything on top of the unit make sure the openings are never blocked or covered with items such as newspapers table cloths and curtains and do not operate the...

Page 9: ... when not in use Caution Do not use AC adaptors other than the one supplied 1 Connect the AC adaptor to the recharger and plug it into an AC outlet 2 Place the remote control on the recharger aligning the indent on the bottom of the remote with the tabs on the recharger When the remote control is recharging you ll see the indicator appear in the upper right corner of the display Note If the remote...

Page 10: ...atures a clock that shows both 12 and 24 hour formats 1 Press CLOCK DISPLAY to select either AM PM or 24H display format Each press switches between the two settings The current display format is shown after CLOCK DISPLAY 2 Press CLOCK SETTING to set the date Use the and buttons to set the year month and day 3 Press NEXT to continue and set the time Use the and buttons to set the hour and minute 4...

Page 11: ...t timeout can t be longer than the LCD timeout setting 3 Press ENTER when you re finished You ll return to the remote setup menu Resetting the remote control Use this feature to reset the remote control settings to the factory defaults Important Doing this will erase any of your personalized settings 1 Press RESET TO DEFAULT 2 Confirm by pressing YES after reading each screen After the screen goes...

Page 12: ...ry cover 3 Use a pen or other sharp instrument to press the reset button located in the hole to the right above the battery After restarting the remote control the touch screen shows the Home menu Replacing the lithium ion batteries If you notice that the remote will no longer hold a charge you may need to replace the lithium ion battery cells Caution The lithium ion batteries may present a fire o...

Page 13: ...ell from the unit Do not pull the connector out by holding onto the attached wires Hold the connector firmly with your fingers or use a small screwdriver or other sharp tool to disconnect it 4 Connect the new battery cell Push the connector in until it is fully inserted Make sure you keep the wire out of the way and line up the cell properly so that the battery cover can be closed easily ...

Page 14: ...There s also a 2 RF IN jack for connection to an LD player with a 2 RF output All the inputs are freely assignable to input functions for maximum flexibility If a connected component does not correspond to the input function DVD LD etc see Assigning the digital inputs on page 90 to assign it properly 4 Stereo analog audio source inputs outputs Four sets of analog audio jacks for connection to audi...

Page 15: ...e remote input allows you to connect an external remote control sensor for use in a multi room setup for example See Multi room setup on page 83 for connection details 15 Component video inputs output The three component video inputs are freely assignable to any of the audio video input functions The component video output is for connection to a monitor or TV See Using the component video jacks on...

Page 16: ...tical inputs on this receiver using an optical cable When you set up the receiver you ll need to tell the receiver which input you connected the TV to see also Assigning the digital inputs on page 90 Note If your TV doesn t have a digital audio output omit step 3 above If you use different cord types for the TV and the source component overlay information doesn t appear PLAY PLAY AUDIO POWER AMP I...

Page 17: ...omposite or S video output on your DVD player to the DVD LD VIDEO or DVD LD S2 VIDEO input on this receiver Use a standard video cable or an S video cable for the connection If your player also has a component video output you can connect this too See Using the component video jacks on page 22 for more on this PLAY PLAY AUDIO POWER AMP IN PRE OUT AUDIO PHONO FRONT SUB W CENTER SUR ROUND BACK SUR R...

Page 18: ...on page 41 for more on this See also Selecting USB and multichannel analog input channels on page 49 PLAY PLAY AUDIO POWER AMP IN PRE OUT AUDIO PHONO FRONT SUB W CENTER SUR ROUND BACK SUR ROUND SUB W CENTER SUR ROUND CD R TAPE1 MD TAPE2 MONITOR CD IN IN IN OUT IN OUT FRONT CENTER SUR ROUND SUR ROUND BACK VIDEO AUDIO S2VIDEO SPEAKERS Single USB AUDIO S400 AUDIO OUT2 OUT1 CD R TAPE1 MD DVR VCR1 SAT ...

Page 19: ...inputs on page 90 Note If your satellite cable receiver doesn t have a digital audio output omit step 2 above PLAY PLAY AUDIO POWER AMP IN PRE OUT AUDIO PHONO FRONT SUB W CENTER SUR ROUND BACK SUR ROUND SUB W CENTER SUR ROUND CD R TAPE1 MD TAPE2 MONITOR CD IN IN IN OUT IN OUT FRONT CENTER SUR ROUND SUR ROUND BACK VIDEO AUDIO S2VIDEO SPEAKERS Single USB AUDIO S400 AUDIO OUT2 OUT1 CD R TAPE1 MD DVR ...

Page 20: ...tal inputs on page 90 The digital outputs from other recorders can be connected to any spare digital audio inputs on this receiver You can assign them when setting up the receiver see also Assigning the digital inputs on page 90 Note If your video component doesn t have a digital audio output omit step 3 above In order to record you must connect the analog audio cables the digital connection is fo...

Page 21: ...RF outputs from your LD player Use a coaxial cable designed for digital audio for the 2 RF connection You may need to assign the 2 RF digital input when setting up the receiver see also Assigning the digital inputs on page 90 PLAY PLAY AUDIO POWER AMP IN PRE OUT AUDIO PHONO FRONT SUB W CENTER SUR ROUND BACK SUR ROUND SUB W CENTER SUR ROUND CD R TAPE1 MD TAPE2 MONITOR CD IN IN IN OUT IN OUT FRONT C...

Page 22: ...e MONITOR VIDEO OUT jacks The only exception is component video input which is only output from the component video output Therefore if you want to connect any source using component video you must also connect your TV using component video If several video components are connected to the same input function the converter gives priority to component S video then composite in that order You can t s...

Page 23: ...to record some digital sources you must make analog connections as explained in Connecting analog audio sources below This unit has an on board WMA9 Pro decoder so it is possible to playback WMA9 Pro encoded audio using a coaxial or optical digital connection when connected to a WMA9 Pro compatible player However the connected PC DVD player set top box etc must be able to output WMA9 Pro format au...

Page 24: ...grounding wire secure it to the ground terminal on this receiver If your turntable has line level outputs no grounding wire connect them to the CD inputs instead PLAY PLAY AUDIO POWER AMP IN PRE OUT AUDIO PHONO FRONT SUB W CENTER SUR ROUND BACK SUR ROUND SUB W CENTER SUR ROUND CD R TAPE1 MD TAPE2 MONITOR CD IN IN IN OUT IN OUT FRONT CENTER SUR ROUND SUR ROUND BACK VIDEO AUDIO S2VIDEO SPEAKERS Sing...

Page 25: ...nt such as camcorders video games and portable audio video equipment Pull down the front cover where indicated to access the front panel inputs The illustration below shows example connections to a portable DVD player PHONES SPSYSTEM A B SIGNAL SELECT VIDEO SELECT TAPE2 MONITOR STREAM DIRECT SETUP MIC SBCH MODE DIGITALIN S VIDEO VIDEO VIDEOINPUT AUDIO L R MIDNIGHT TONE OPTION DIGITALNR CLASS STATI...

Page 26: ... take care to match these up with the terminals on the speakers themselves PLAY PLAY AUDIO POWER AMP IN PRE OUT AUDIO PHONO FRONT SUB W CENTER SUR ROUND BACK SUR ROUND SUB W CENTER SUR ROUND CD R TAPE1 MD TAPE2 MONITOR CD IN IN IN OUT IN OUT FRONT CENTER SUR ROUND SUR ROUND BACK VIDEO AUDIO S2VIDEO SPEAKERS Single USB AUDIO S400 AUDIO OUT2 OUT1 CD R TAPE1 MD DVR VCR1 SAT IN CD TV DVD DVD LD DVD LD...

Page 27: ...as using speaker system B page 80 bi surround page 80 bi amping page 81 and bi wiring page 82 Placing the speakers Where you put your speakers in the room has a big effect on the quality of the sound The following guidelines should help you to get the best sound from your system see also Optimizing your speaker setup on page 97 The subwoofer can be placed on the floor Ideally the other speakers sh...

Page 28: ... the FM wire antenna to the FM UNBAL 75Ω in the same way as the AM antenna For best results extend the FM antenna fully and fix to a wall or door frame Don t drape loosely or leave coiled up Connecting external antennas To improve FM reception connect an external FM antenna to the FM UNBAL 75Ω VSX 59TXi PLAY PLAY AUDIO POWER AMP IN PRE OUT AUDIO PHONO FRONT SUB W CENTER SUR ROUND BACK SUR ROUND SU...

Page 29: ...hould be routed so that they are not likely to be stepped on A damaged power cord can cause a fire or give you an electric shock Check the power cord once in a while If you find it damaged ask your nearest Pioneer authorized service center or your dealer for a replacement 1 Plug the supplied power cord into the AC IN socket on the back of the receiver 2 Plug the other end into a power outlet About...

Page 30: ... is on Acoustic Cal EQ is automatically set after the Auto Surround Setup has been completed 7 i LINK indicator page 85 Lights when an i LINK Audio equipped component is selected 8 MULTI ROOM indicator page 83 Shows whether the multi room function is active or not PHONES SPSYSTEM A B SIGNAL SELECT VIDEO SELECT TAPE2 MONITOR STREAM DIRECT SETUP MIC SBCH MODE DIGITALIN S VIDEO VIDEO VIDEOINPUT AUDIO...

Page 31: ... mode 20 MULTI ROOM SOURCE controls If you ve made multi room connections see Multi room setup on page 83 use these controls to control the sub room from the main room see Using the sub room controls on page 84 21 PHONES jack page 46 Use to connect headphones no sound will be heard through the speakers 22 SP SYSTEM A B page 82 Press repeatedly to select speaker system A B A B or off in that order ...

Page 32: ...y 6 Digital format indicators Lights when a Dolby Digital signal is detected Lights when a DTS signal is detected Lights when one of the Home THX modes is selected Lights during Surround EX matrix processing Lights when a decoding DTS ES audio Lights during DTS ES discrete processing Lights during DTS ES matrix processing Lights during Dolby Pro Logic II and Pro Logic IIx processing Lights during ...

Page 33: ...volume using the MASTER VOLUME control to restore the sound 12 Servicing terminal For use by Pioneer service technicians Basic remote control displays The remote control LCD touch screen has a number of displays from which you can control receiver functions as well as control operations for other components The basic menu screens are explained here Home menu screens There are three Home menu scree...

Page 34: ...and also to select the number of input channels for the USB and analog multichannel inputs 2 LISTENING MODE selector page 43 Use to select a listening mode 3 Press to return to the main Home menu see Home menu screens above 4 soft keys Press to go to the previous next receiver menu screen 5 STREAM DIRECT page 47 Press to select a Stream Direct mode 6 ACOUSTIC CAL page 48 Press to select an acousti...

Page 35: ...use the buttons on this screen in the sub room Remote control displays for the tuner The functions on these screens are used to control the tuner see also Using the tuner on page 54 1 STATION page 55 Press to select station presets 2 TUNING page 54 Use to select a listening mode 3 CLASS page 55 Press to switch between the three banks classes of station presets 4 BAND page 54 Press to switch betwee...

Page 36: ...ct the audio video input source 4 Press to return to the main Home menu see Home menu screens above 5 soft keys Press to go to the previous next TV control menu screen 6 SCREEN SIZE Use to select the screen size on your TV 7 CLR Press to clear an entry 8 CH ENTER Use to enter channel selections directly CH RETURN Press to return to the channel last selected 9 Press to go to the previous screen or ...

Page 37: ...ions from a DTV menu 18 SLEEP Press to set the TV sleep timer 19 FREEZE Press to freeze the picture when using a plasma display Operating menus for additional components The example below shows the DVD menu screen 1 DVD Press to switch DVD power on off 2 Playback buttons backward forward scan Press and hold for fast backward forward scanning play Press to start or resume playback backward forward ...

Page 38: ...menu screen 6 TV CONT Press to access the TV control menu see TV control menu screens above 7 Press to go to the receiver main menu see Receiver menu screens above 8 Number buttons Use to directly access tracks chapters and titles 9 SEARCH MODE Use to access the search mode to jump to a particular part of the disc 10 CLR Press to clear an entry 11 RETURN Press to return to a previous menu screen D...

Page 39: ...r room Make sure you do this before moving on to Playing a source on page 41 Important Make sure the microphone and speakers are not moved during the Auto Surround Setup Using the Auto Surround Setup will overwrite any existing speaker settings in the receiver After three minutes of inactivity during the Auto Surround Setup the OSD will go to sleep until a button is pressed Caution The test tones ...

Page 40: ...ess ENTER Use cursor up down to select the speaker then cursor left right to specify the size and number for surround back When you re finished go to the next step If you see an ERR message in the right side column there may be a problem with the speaker connection If selecting Retry above doesn t fix the problem turn off the power and check the speaker connections 9 Make sure OK Go Next is select...

Page 41: ... of the microphone If this seems to be happening switch off the TV when doing the Auto Surround Setup Checking the settings on your DVD or other player Before continuing you may want to check the digital audio output settings on your DVD player and digital satellite receiver Check that your DVD player satellite receiver is set to output Dolby Digital DTS and 88 2 96kHz PCM 2 channel audio If there...

Page 42: ...5 Use the MASTER VOLUME control front panel or remote to adjust the volume level Turn down the volume of your TV so that all the sound is coming from the speakers connected to this receiver Note If you need to manually switch the input signal type from digital to analog stereo or multichannel press SIGNAL SELECT on the front panel or from the remote control receiver menu see also Using other funct...

Page 43: ... LISTENING MODE SELECTOR dial instead of the remote control to select listening modes Simply turn the dial to cycle through the available options pressing forward to select a mode While listening to a source press STANDARD for surround sound playback With multichannel sources such as DVDs and digital satellite broadcasts the 2 DIGITAL or DTS indicator on the front panel lights depending on the sou...

Page 44: ... settings PANORAMA Creates more spacious surround sound 2 Use the OPTION buttons to adjust the setting Center Width is adjustable between 0 and 7 default 3 Dimension between 3 and 3 default 0 Panorama is On or Off default Off 3 Press OPTION again to adjust other settings Note If the SB CH MODE is switched to OFF 2 Pro Logic IIx above becomes 2 Pro Logic II 5 1 channel sound however the above setti...

Page 45: ...d Surround mode you can set the effect level independently 1 With one of the Advanced surround modes active press OPTION repeatedly until EFFECT shows in the front panel display The remote control menu for this step is shown below see note at the start of this chapter if you need help 2 Use the OPTION buttons to adjust the effect level The effect level can be adjusted from 10 min to 90 max Using t...

Page 46: ...ng in stereo You can hear any source through just the front left and right speakers and possibly your subwoofer depending on your speaker settings While listening to a source press STEREO for stereo playback STEREO shows in the front panel display Any active Advanced surround or Home THX mode is canceled Dolby Digital and DTS multichannel sources are downmixed to stereo Listening with headphones W...

Page 47: ...n the signal SD 2 2CH DIRECT Use this setting for stereo analog and digital sources All processing unnecessary for 2 channel signals is bypassed such as speaker distance and acoustic calibration EQ and you will hear the source through the shortest possible signal path All sound will be heard through the front left and right speakers only no subwoofer output is heard With multichannel sources playb...

Page 48: ... ANALOG Selects an analog signal Selects an i LINK signal DIGITAL Selects an optical or coaxial digital signal 2 RF Selects a 2 RF signal AUTO This is the default setting The receiver selects the first available signal in the following order 2 RF DIGITAL ANALOG Note If no digital inputs including the 2 RF input are assigned for the current source the input signal type will default to ANALOG When u...

Page 49: ... with digital connections If you have connected this receiver to an i LINK equipped component 176 4 192kHz 24 bit digital formats such as DVD A and SACDs are also supported You can listen to these formats without downsampling in one of three ways Switch the Stream Direct mode on See Using the Stream Direct mode on page 47 For the following options the 2 Pro Logic modes cannot be selected for DTS 9...

Page 50: ...u will only hear the surround back channel when you ve selected SP A as the speaker setting see Switching the speaker system on page 80 Changing the speaker system may automatically change this setting see notes below If the surround back speaker is set to NO in Speaker Systems on page 58 or you have selected SP A B as the speaker setting you can only use the virtual surround back effect see next ...

Page 51: ...elected Creating a center speaker effect If you don t have a center speaker connected the center speaker channel is mixed to your two front speakers However using the Real Phantom setting you can create a center speaker effect for an effective front surround effect 1 Press OPTION repeatedly to select R PHANTOM The remote control menu for this step is shown below see note at the start of this chapt...

Page 52: ...g However the volume must be under 20dB for these features to take effect Using the tone control You can use the tone control to make customized settings for the bass and treble Switching the tone control on or off Default setting BYPASS You ll need to switch the tone control on to adjust the bass and treble below Press TONE to switch the tone control on or off When the tone control is switched of...

Page 53: ... The remote control menu for this step is shown below see note at the start of this chapter if you need help 2 Use the OPTION buttons to change the setting CH1 Only channel 1 is played CH2 Only channel 2 is played CH1 CH2 Both channels are played through the front speakers Note On the CH1 and CH2 settings the sound comes only from the center speaker or from the front speakers if NO was selected fo...

Page 54: ...ss BAND to change the band FM or AM if necessary Each press switches the band between FM and AM 2 Tune to a station using the TUNING buttons Automatic tuning To search for stations in the currently selected band press and hold either of the TUNING buttons for about a second The receiver will start searching for the next station stopping when it has found one Repeat this step to search for other st...

Page 55: ...g station presets If you often listen to a particular radio station it s convenient to have the receiver store the frequency for easy recall whenever you want to listen to that station This saves the effort of manually tuning in each time The receiver can memorize up to 30 stations stored in three banks or classes A B and C of 10 stations each When memorizing FM frequencies the receiver also store...

Page 56: ... eight characters the possible characters are listed below ABCDEFGHIJKLMNOPQRSTUVWXYZ abcdefghijklmnopqrstuvwxyz 0123456789 Any time you want to exit the process press the TUNER EDIT button 5 Press ENTER when you re done 6 Repeat steps 2 5 to memorize up to 30 preset broadcast station names Tip To change a station name just enter the new name over the top of the old one To erase a station name ent...

Page 57: ... will go to sleep until a button is pressed With other screens the receiver automatically exits and no settings will be made Caution The test tones used in the Surround Setup are output at high volume the volume increases to 0db automatically 1 Switch on the receiver and your TV If headphones are connected to the receiver disconnect them 2 Using the remote control press RECEIVER on the touch scree...

Page 58: ...ecify how your speakers are configured Use cursor left right to cycle through the following options Normal Surround Select for normal home theater use Front Bi Amp Select this setting if you re bi amping your front speakers see Bi amping your front speakers on page 81 Bi Surround Select if you re using two sets of surround speakers see Adding a second set of surround speakers for Bi Surround on pa...

Page 59: ... Bi Amp in step 3 you can t adjust the surround back settings If you select SMALL for the front speakers the subwoofer will automatically be fixed to YES Also the center and surround speakers can t be set to LARGE if the front speakers are set to SMALL In this case all bass frequencies are sent to the subwoofer If the surround speakers are set to NO the surround back speakers will automatically be...

Page 60: ...el of each speaker as the test tone is emitted Note If you are using a Sound Pressure Level SPL meter take the readings from your main listening position and adjust the level of each speaker to 75 dB SPL C weighting slow reading The subwoofer test tone is output at low volumes You may need to adjust the level after testing with an actual soundtrack 4 If you selected Manual or Auto select Return th...

Page 61: ...c characteristics of your room and neutralizing the ambient characteristics that can color the original source material You can also make these settings manually to get a frequency balance that suits your tastes A more advanced setup is also available where you can make detailed settings according to your room s reverb characteristics see Professional Acoustic Calibration EQ on page 63 You should ...

Page 62: ... OSD then use cursor up down to raise or lower the channel level for the current speaker 5 When you re done press cursor down to select Return then press ENTER to finish Note If the message OVER appears on screen it means the frequency curve may result in distortion from the speaker Adjust the frequency curve accordingly Copying your Acoustic Calibration EQ settings If you want to manually adjust ...

Page 63: ...r so By analyzing the graph you should be able to see how your room is responding to certain frequencies Differences in channel level and speaker distance are taken into account automatically compensation is provided for comparison purposes but the frequency measurements are always shown without the equalization performed by this receiver Note that due to an effect known as group delay lower frequ...

Page 64: ...your system according to your custom setting 4 If you selected Auto Pro select Start and press ENTER Complete is displayed on screen after the acoustic calibration equalization is set Select Return to return to the professional acoustic calibration equalization menu 5 Select a manual setup option and press ENTER Reverb Measurement Use this to measure the reverb characteristics of your room for sep...

Page 65: ... between them You can switch between your connected speakers excluding the subwoofer and display the measurements for the following frequencies 63Hz 125 Hz 250Hz 500Hz 1kHz 2kHz 4kHz 8kHz and 16kHz Select the setting from the following time periods in milliseconds 0 20ms 10 30ms 20 40ms 30 50ms 40 60ms 50 70ms and 60 80ms This setting will be applied to all channels during calibration When you re ...

Page 66: ...Return then press ENTER to finish Note Since the principal is the same X Curve isn t applied when you re using any of the Home THX modes see Using the Home THX modes on page 45 Checking your surround settings You can check through the receiver settings screen by screen after you re finished using the Surround Setup 1 Select Check from the Surround Setup menu and press ENTER 2 Use the cursor left r...

Page 67: ...V DVD input for the TV source and TV CONT for the TV screen or monitor Recalling preset codes The following steps show you how to recall preset codes for each input source Use the remote control touch screen to do this 1 Make sure the component you want to control is switched on 2 Press PRESET RECALL on the remote setup menu 3 From the Select Function screen choose the input function which matches...

Page 68: ... list Your component doesn t have a standby mode and therefore won t switch on off There is something blocking the path between the remote control and the remote sensor of the component you re trying to control The preset code is unavailable for your component Press CANCEL to exit then try using the method described in Programming signals from other remote controls below to program the component i...

Page 69: ... used to select menu screens even in learning mode so therefore cannot be programmed The Learn and L buttons that appear on some component screens are unassigned buttons which can be used to learn new commands See Editing remote control button names on page 70 to change the name once you ve programmed a command You can program the remote control hard keys VOLUME and MUTE are only available with TV...

Page 70: ...f the remote control only This can be useful when you want to operate one component without interrupting playback of another 1 Press DIRECT FUNCTION on the remote setup menu 2 Choose the setting of an input by pressing the ON OFF button on the touch screen Each press switches between ON and OFF Use the cursor up down buttons to scroll through the component options 3 Press OK to confirm the setting...

Page 71: ...Press SPACE to add a space in the name Press CLEAR to delete characters one at a time Press small text only to go to the next line Use the cursor left right soft keys to go forward back a screen If you selected the graphic input method Use the icon buttons to select a graphic Press CLEAR to return to the original button appearance Press to go back without editing the button 6 Press OK when you ve ...

Page 72: ...tion when you select it as an input source For example press DVD LD if the multi operation is being used to switch on the DVD player connected to the DVD LD terminals If you are programming a shutdown system off sequence select RECEIVER from the end of the list Use the cursor up down buttons to scroll through the component options 3 Press Add to choose an operation in the sequence If this is the f...

Page 73: ...r on the remote touch screen To test the sequence before confirming it press Run To replace a command in the sequence select the command then press Replace Add the operation as shown in the steps above To add a new command above another command press the existing command before pressing Add To erase a command select the operation you want to erase and press Delete Commands will be stored regardles...

Page 74: ...ogether so that you can use just the remote sensor of one component When you use a remote control the control signal is passed along the chain to the appropriate component Note that if you use this feature make sure that you also have at least one set of analog audio jacks connected to another component for grounding purposes 1 Decide which component you want to use the remote sensor of When you w...

Page 75: ...ls Refer to the instructions that came with the recorder if you are unsure how to do this Most video recorders set the audio recording level automatically check the component s instruction manual if you re unsure 5 Start recording then start playback of the source component Note The receiver s volume tone bass treble Midnight Loudness and surround effects have no effect on the recorded signal Some...

Page 76: ...analog source you can t use sound delay when Stream Direct is on One second is equal to 30 frames of NTSC format video and 25 frames of PAL Watching video and audio sources independently You can listen to a sound source and select a different video source on your TV While listening to a source press VIDEO SELECT to select the video source you want to watch With the remote you may need to press on ...

Page 77: ...sources There are two ways to get 192kHz A D conversion 1 Switch the SD 1 NORMAL Stream Direct mode on See Using the Stream Direct mode on page 47 for more on this 2 Select the STEREO listening mode and switch off any other sound processing features These features include Midnight Loudness page 52 Digital Noise Reduction page 53 Dynamic Range Control page 94 Also make sure you also switch the mult...

Page 78: ...hown below use the cursor left right soft keys to go to the previous next menu screen These appear on both the OSD and the front panel display The front panel display shows each of the following settings for two seconds each Note If the Stream Direct mode is switched on some settings above will show OFF even though they are switched on 2 When you re finished press STATUS again to switch off the di...

Page 79: ...gnal select AUTO except multichannel inputs ANALOG and USB DIGITAL page 48 Surround Back Channel mode ON with surround back speaker s connected page 50 Virtual Surround Back mode OFF page 51 Hi bit Hi sampling OFF page 52 Midnight Loudness OFF page 52 Tone BYPASS page 52 Digital NR OFF page 53 Dual mono CH1 page 53 Speakers Systems Normal Surround page 58 Speaker B setting Second Zone page 58 Spea...

Page 80: ...minals except for the surround back pre outs which output the same signal as speaker B SP off No sound is output from the speakers The same sound is output from the pre out terminals as when selecting speaker system A above Note The subwoofer output depends on the settings you made in Speaker Systems on page 58 However if SP B is selected above no sound is heard from the subwoofer the LFE channel ...

Page 81: ...m the speakers Note Depending on the Stream Direct mode the surround channel signal s will be output from either the surround or surround back channel pre outs when SP B ITU R is selected Bi amping your front speakers Bi amping is when you connect the high frequency driver and low frequency driver of your speakers to different amplifiers in this case to both front and surround back terminals for b...

Page 82: ...allel not series which are fairly uncommon connection when bi wiring your speakers Don t connect different speakers from the same terminal in this way Adding a second set of surround speakers for Bi Surround If your listening area is quite long and you are seated far from the front speakers you may want to add an extra set of left and right surround speakers instead of your surround back speakers ...

Page 83: ...e amplifier speakers TV and an IR receiver such as the Pioneer MR 100 for your sub room 1 Connect the IR receiver sensor to the green MULTI ROOM SOURCE REMOTE IN jack on the rear of this receiver 2 Connect a separate amplifier and TV monitor to the MULTI ROOM SOURCE OUT jacks on the rear of this receiver You should have a pair of speakers attached to the sub room amplifier as shown in the illustra...

Page 84: ...ub room Tip Press MR S ON OFF to use the buttons on the Sub Room Control screen in the sub room Using the remote control in the main room 1 From the receiver menu screens on the remote control select the Sub Room Control screen If you re unsure how to do this see Receiver menu screens on page 34 2 Press MR S ON OFF to switch on the multi room feature You can also press the MULTI ROOM SOURCE ON OFF...

Page 85: ...he sub room controls Using the i LINK interface If you have a component with an i LINK connector you can connect it to this receiver using an i LINK cable Since the i LINK interface does not transmit video signals the video signal of i LINK connected compo nents must be connected with other cables see Connecting your equipment on page 14 for more on making video connections If you ve already hooke...

Page 86: ...gnals from each component is available to other components in the network With the addition of an i LINK repeater it s possible to connect up to 63 components i LINK connectors come in 4 pin and 6 pin configura tions This player uses the 4 pin connection but the two types can be mixed on a network This receiver is compatible with i LINK Audio A M protocol components such as DVD players Note that w...

Page 87: ...ur operating system through the speaker setup you ve connected to this receiver 1 Connect your computer s USB terminal to the USB terminal on the rear panel of this receiver 2 Switch on your computer and this receiver 3 If you re connecting for the first time wait for the USB driver installation to finish The installation may take a minute or two to complete Make sure you leave the USB cable conne...

Page 88: ...in your speaker settings Note that using hubs or extensions may cause connection problems Caution Make sure you don t switch off the computer or unplug the USB cable during playback To prevent noise being output don t use other software on your computer during playback Pioneer is not responsible for computer system damage software crashes or failures or any other possible computer problems due to ...

Page 89: ...provided with the application It will take about ten seconds for the transmission to complete then you will be able to analyze the output on your computer Since the data will be cleared from the receiver when you restart reverb measurement or turn off the receiver you might want to save the information on your PC after measurement 4 When you re finished select Return on the on screen display You l...

Page 90: ...r the digital inputs see above This setting tells the receiver what digital equipment is hooked up to which terminal so the buttons on the remote correspond to what you have hooked up 1 Select Digital In from the Input Assign menu and press ENTER 2 Select the number of the digital input to which you ve connected your digital component The numbers correspond with the numbers beside the inputs on th...

Page 91: ...for other input functions 1 Select i LINK Input from the Input Assign menu and press ENTER If no i LINK equipped components are connected i LINK Input cannot be selected 2 Select an i LINK equipped component When a number of i LINK equipped components are connected to your receiver the i LINK equipped component you are looking for might be listed on additional display screens i LINK is displayed a...

Page 92: ...rt Setup menu The settings in the Expert Setup menu are more advanced features of this receiver that you can use to make detailed adjustments when you re more familiar with the system You only need to make these settings once unless you change the placement of your current speaker system or add new speakers 1 Make sure your receiver and TV are both switched on 2 Using the remote control press RECE...

Page 93: ...nd DTS include ultra low bass tones Set the bass attenuator as needed to prevent the ultra low bass from distorting the sound 1 Select Bass Peak Level from the Expert Setup menu The current setting is displayed When is displayed no bass is output When OFF is displayed the attenuator is off bass output is not affected 2 Select a setup option Setting Start The volume is set to MIN dB a test tone pla...

Page 94: ...through them to find the function you want to rename 3 Edit the name as necessary and press ENTER Use the cursor up down hard keys to change the character and the cursor left right hard keys to move forward back a position The name can be up to ten characters the possible characters are listed below ABCDEFGHIJKLMNOPQRSTUVWXYZ abcdefghijklmnopqrstuvwxyz 0123456789 4 Select another name to edit or s...

Page 95: ...a power amplifier in the sub room this receiver is simply being used as a pre amp and you will be using this receiver s controls to adjust the volume FIXED Use this setting if you ve connected a fully integrated amplifier such as another Pioneer VSX receiver in the sub room and want to use that receiver s volume controls With the FIXED setting the source is sent from this receiver at maximum volum...

Page 96: ... subwoofer is THX Ultra2 certified or not If your subwoofer isn t THX Ultra2 certified but you still want to switch boundary gain compensation on select YES here but the effect might not work properly 3 Select either ON or OFF for the Boundary Gain Compensation setting 4 When you re finished select RETURN and press ENTER You will return to the THX Audio Setup menu Surround Back Speaker Position Fo...

Page 97: ...formed by the leading edge of the front left and right speakers It is best to angle the speakers towards the listening position The angle depends on the size of the room Use less of an angle for bigger rooms Surround and surround back speakers should be positioned a foot and a half to three feet 60 cm 90 cm higher than your ears and titled slight downward Make sure the speakers don t face each oth...

Page 98: ... The best speaker placement for DVD Audio and other multichannel music sources may be different than for regular DVD discs For these formats some sound studios use the setup shown in the diagram below as recommended by ITU R instead of the setups in Basic surround setup on page 97 Note If you connect an alternate set of surround speakers you can use speaker system B to provide additional surround ...

Page 99: ...ed to the speakers rated impedance is dangerously low Turn down the volume When its convenient go to Acoustic Calibration EQ on page 61 and lower the 63 Hz and 125 Hz equalizer levels using the manual setting Turning the digital safety feature on may allow you to turn up the volume a little more To switch between SAFETY 1 medium effect SAFETY 2 more effect and SAFETY OFF put the receiver into stan...

Page 100: ...er Systems on page 58 The surround and or center levels are turned down Check the levels in Channel Level on page 60 The surround and or center speakers are disconnected Check Installing your speaker system on page 26 to make sure the speakers are connected correctly The STEREO listening mode has been selected Choose a surround listening mode see Listening in surround sound on page 43 Speaker syst...

Page 101: ...mpatible with the source you re using or the player settings are incorrect Choose a compatible source or check the component s manual for the correct settings The digital output level has been turned down on a CD player or other component equipped with digital output level adjustment capability Set the digital volume level of the player to full or to the neutral position Analog input has been sele...

Page 102: ... farther away from the equipment causing the noise Noise is output when scanning a DTS CD The scan function performed by the player slightly alters the digital information making it unreadable This is not a malfunction but be sure to turn the volume down to prevent the output of loud noise from your speakers When playing a 96 kHz 24bit disc the sound is too loud Different discs have different reco...

Page 103: ...formation doesn t appear on your TV or monitor Overlay information doesn t appear when you are using different types of video cords for source and TV connections or when using component video connections Do not use component video cables if you would like to see overlay information and use the same type of video cable for example only composite or only S video for both source and TV connections Ca...

Page 104: ...ATTERY or is blank The remote control needs to be recharged Place the remote control on the recharger If the remote hasn t been charged for awhile the remote control display may remain blank for several minutes before the touch screen appears See Recharging the remote control on page 9 for more on this The remote control display is blank or very hard to see The remote control contrast needs to be ...

Page 105: ...r several different ways listen to sources without downsampling One of the DIGITAL NR MIDNIGHT or LOUDNESS features are switched on Turn it them off by pressing the corresponding button on the remote control or front panel When playing Dolby Digital or DTS sources the receiver s format indicators do not light No digital connection or the digital connection is incorrect Check the digital audio conn...

Page 106: ...down OPTION When you see DB CLEAR appear in the display press OPTION then OPTION again to confirm When you ve reset the i LINK database memory DB CLEAR SET shows in the display Message Explanation BUS FULL The i LINK bus has reached its capacity and cannot transmit any more data CANNOT LINK 1 The connection between the receiver and the selected i LINK equipped component is unstable If the i LINK c...

Page 107: ...em to respond when the buttons are pressed Static electricity caused by dry air Switch the power off then on again If this doesn t seem to work try disconnecting the power plug from the outlet and insert again One of the Home THX 7 1 channel modes is selected but there are certain options that can t be chosen There is only one surround back speaker connected or the current settings are for only on...

Page 108: ...y stereo source Dolby Pro Logic IIx 6 1 or 7 1 channel sound stereo surround and surround back from two channel or 5 1 channel sources With two channel sources the 1 subwoofer channel is generated by bass management in the receiver Dolby Surround is an encoding system which embeds surround sound information within a stereo soundtrack which a Dolby Pro Logic decoder can then use for enhanced surrou...

Page 109: ...accurately translate the sound from the movie theater environment into the home correcting the tonal and spatial errors that occur When the THX indicator shows in the display THX features are automatically added in Cinema modes see Using the Home THX modes on page 45 Re Equalization The tonal balance of a film soundtrack will be excessively bright and harsh when played back over audio equipment in...

Page 110: ...ng you the optimal mix of ambient and directional surround sounds THX MusicMode ASA technology optimizes playback of 5 1 encoded music sources such as DTS and Dolby Digital using all 8 speakers in your setup Boundary Gain Compensation Depending on the listener s and the subwoofer s position the listener may experience an excessive bass effect This feature compensates for excessive bass resulting f...

Page 111: ...Vp p 75 Ω Signal to Noise Ratio 70 dB Frequency Response 5 Hz to 10 MHz dB Component Video Section Input Sensitivity Impedance 1 Vp p 75 Ω Output Level Impedance 1 Vp p 75 Ω Signal to Noise Ratio 70 dB Frequency Response 5 Hz to 100 MHz dB FM Tuner Section Frequency Range 87 5 MHz to 108 MHz Usable Sensitivity Mono 13 2 dBf IHF 1 3 µV 75 Ω 50 dB Quieting Sensitivity Mono 20 2 dBf Stereo 38 6 dBf S...

Page 112: ...Published by Pioneer Corporation Copyright 2003 Pioneer Corporation All rights reserved 03J00001 Printed in Japan ARB7290 A ...

Reviews: