background image

26

It

2

 PRO LOGIC

 – Suono surround a 4.1 canali

Neo:6 CINEMA

 – Suono a 6.1 canali, 

particolarmente adatto per i film

Neo:6 MUSIC

1

 – Suono a 6.1 canali, 

particolarmente adatto per le fonti musicali

Solo per il modello VSX-516 – Con le fonti 
multicanale, se si sono collegati gli altoparlanti 
posteriori surround e se è stato selezionato 

SB 

ON

, è possibile selezionare (a seconda del 

formato):

2


Pro Logic IIx MUSIC

 – Vedi sopra

Dolby Digital EX

 – Crea un suono del 

canale surround posteriore per le fonti a 
5.1 canali e fornisce una decodificazione 
pura per le fonti a 6.1 canali (come Dolby 
Digital Surround EX)

DTS-ES

 – Vi consente di riprodurre fonti a 

6.1 canali con la codificazione DTS

Uso degli effetti surround Advanced

La funzione Advanced surround crea una vasta 
gamma di effetti surround. Provare le diverse 
modalità con varie colonne sonore per 

soddisfare le proprie preferenze.

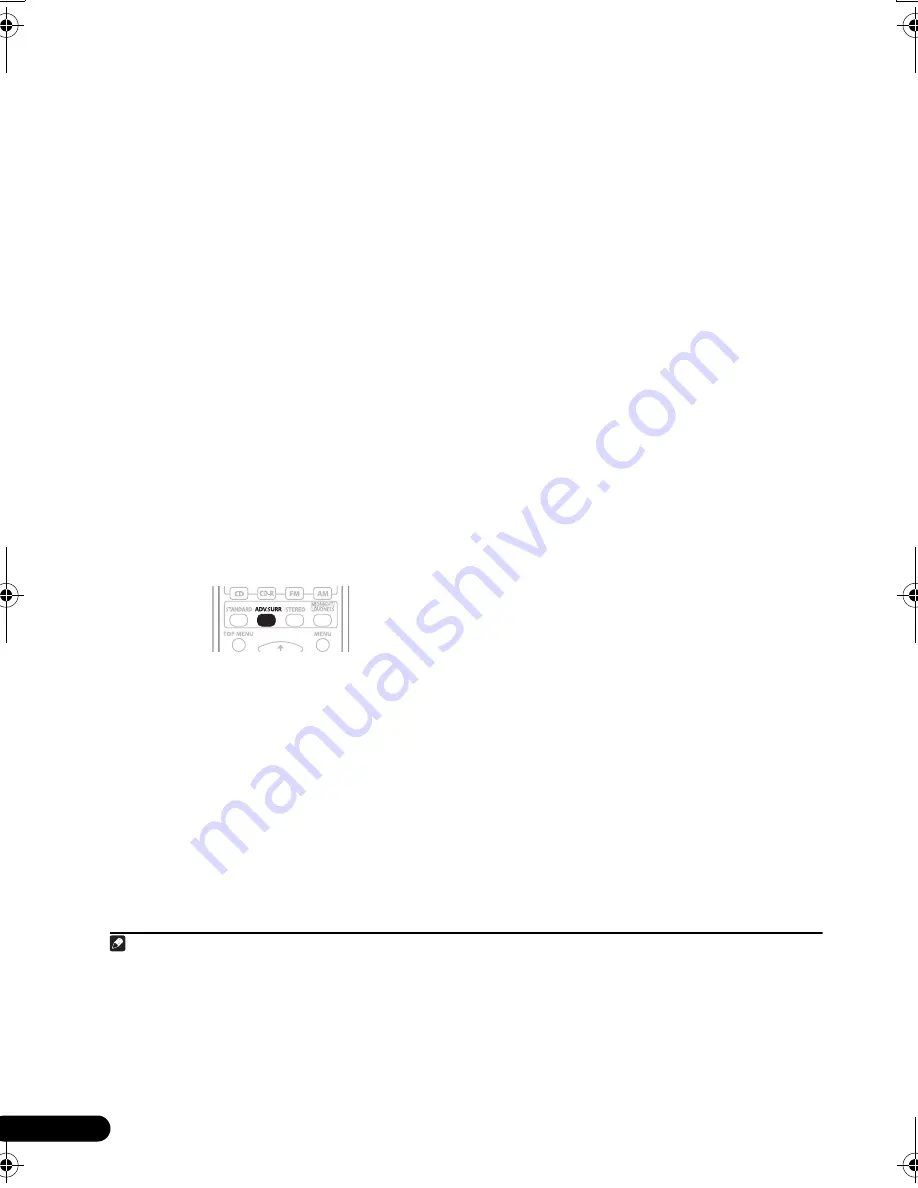
2

Premere ’ADV.SURR’ ripetutamente per 

selezionare una modalità d’ascolto.

ADV. MOVIE

 – Adatta per la visione di film.

ADV. MUSIC

 – Adatta per le sorgenti 

musicali.

TV SURR.

 – Produce un suono surround per 

le sorgenti televisive sia mono sia stereo.

SPORTS

 – Adatta per i programmi sportivi.

ADV. GAME

 – Adatta per i videogiochi.

EXPANDED

 – Simula un suono 

multicanale per le sorgenti a due canali.

3

6-STEREO


– (

Solo per il modello VSX-516)

 – 

Simula un suono multicanale per una 
sorgente stereo, usando tutti gli 
altoparlanti.

VIR. SURR

 – Crea un effetto surround 

virtuale usando soltanto il subwoofer e gli 
altoparlanti frontali.

EX POWER


– (

Solo per il modello VSX-416)


Selezionare questa modalità quando si 
utilizzano gli altoparlanti surround insieme 
agli altoparlanti frontali (vedere lo schema 
di pagina 18 per l’impostazione degli 
altoparlanti in modalità Extra Power).

PHONESUR.

 – Crea un effetto surround 

generale attraverso la cuffia.

Impostazione delle opzioni relative 
agli effetti

Quando si usano gli effetti surround, è 
possibile regolare numerosi parametri. 

1

Premere ripetutamente EFFECT/CH SEL 

per selezionare il parametro che si desidera 
regolare.

A seconda dello stato o della modalità corrente 
del ricevitore, alcune opzioni potrebbero non 
essere disponibili. Per maggiori informazioni 
fare riferimento alla tabella che segue.

Solo per il modello VSX-416

 – Tra le opzioni 

elencate, è disponibile solo il parametro 

EFFECT

.

2

Usare i tasti LEVEL +/– per impostare il 

parametro secondo le proprie esigenze.

Per conoscere le opzioni disponibili per 
ciascun parametro consultare la tabella che 
segue. I valori predefiniti, se non indicati come 
tali, sono elencati in grassetto.

Nota

1 Con sorgenti a 2 canali nella modalità Neo:6 Music, è possibile regolare l’effetto Center image (consultare 

Impostazione delle 

opzioni relative agli effetti

 sotto).

2 • Premendo 

’ADV.SURR’

 con la cuffia collegata, viene selezionata automaticamente l’opzione 

PHONES SURROUND

.

• 

A seconda della sorgente e della modalità audio selezionata, il diffusore posteriore surround presente nella configurazione 

potrebbe non emettere audio. Per maggiori dettagli, consultare la sezione 

Uso dell’elaborazione del canale posteriore surround

 a 

pagina 28.

• Quando si seleziona una modalhtà di ascolto Advanced Surround, è possibile regolare il livello degli effetti usando il 

parametro 

EFFECT

 in 

Impostazione delle opzioni relative agli effetti

 sotto.

3 Usare con Dolby Pro Logic per un effetto surround stereo (il campo stereo è più ampio rispetto alle modalità Standard con 
sorgenti Dolby Digital).

VSX_516_Italian.fm  Page 26  Friday, January 6, 2006  2:46 PM

Summary of Contents for VSX-416-K

Page 1: ... per l uso Discover the benefits of registering your product online at www pioneer co uk www pioneer eur com VSX 416 S K VSX 516 S K AUDIO VIDEO MULTI CHANNEL RECEIVER Registra il tuo prodotto su www pioneer it o www pioneer eur com e scopri subito quali vantaggi puoi ottenere ...

Page 2: ...hese operating instructions so you will know how to operate your model properly After you have finished reading the instructions put them away in a safe place for future reference The exclamation point within an equilateral triangle is intended to alert the user to the presence of important operating and maintenance servicing instructions in the literature accompanying the appliance The lightning ...

Page 3: ... D3 4 2 2 1a_A_En CAUTION The STANDBY ON switch on this unit will not completely shut off all power from the AC outlet Since the power cord serves as the main disconnect device for the unit you will need to unplug it from the AC outlet to shut down all power Therefore make sure the unit has been installed so that the power cord can be easily unplugged from the AC outlet in case of an accident To a...

Page 4: ... 26 Listening in stereo 27 Listening with Acoustic Calibration EQ 27 Choosing the input signal 28 Using surround back channel processing 28 Using Virtual Surround Back VSB 28 Using Midnight and Loudness 29 Enhancing dialog 29 Using the tone controls 30 Using the Sound Retriever 30 Playing other sources 30 Selecting the multichannel analog inputs 30 07 The System Setup menu Using the System Setup m...

Page 5: ... use or store batteries in direct sunlight or other excessively hot place such as inside a car or near a heater This can cause batteries to leak overheat explode or catch fire It can also reduce the life or performance of batteries Operating range of remote control unit The remote control has a range of about 7 meters It may not work properly if There are obstacles between the remote control and t...

Page 6: ...optimal surround sound See Connecting the speakers on page 16 Where you place the speakers will have a big effect on the sound Place your speakers as shown below for the best surround sound effect Also see Hints on speaker placement on page 17 for more on this VSX 516 model only 3 Plug in and switch on the receiver followed by your DVD player subwoofer and TV Make sure you ve set the video input o...

Page 7: ...ing in step 3 the following choices are available 2 1ch 3 1ch 4 1ch 5 1ch 6 1ch If you selected NO VSX 416 model or subwoofer wasn t detected VSX 516 model for the subwoofer setting in step 3 the following choices are available 2 0ch 3 0ch 4 0ch 5 0ch 6 0ch Check the table below to find the speaker setup that corresponds with your system VSX 516 model only 5 Press ENTER 6 Use the MULTI JOG dial to...

Page 8: ... using a table or a chair 2 If the receiver is off press RECEIVER to turn the power on 3 If you have a subwoofer turn it on 4 Press RECEIVER on the remote control then press the SETUP button Press SETUP again at any time to exit the System Setup menu 1 5 Select A MCACC from the System Setup menu then press ENTER Try to be as quiet as possible after pressing ENTER The system outputs a series of tes...

Page 9: ...e System Setup menu starting on page 31 1 Optionally when you see SKIP you can press cursor up down to select one of the following options then press ENTER and use cursor up down to check the settings CHK SP Check the size and number of speakers you ve connected see page 35 for more on this CHK DIST Check the distance of your speakers from the listening position see page 36 for more on this CHK LE...

Page 10: ...ght terminals and white plugs to L left terminals Digital audio cables Commercially available coaxial digital audio cables or optical cables should be used to connect digital components to this receiver 1 Video cables Standard RCA video cables These cables are the most common type of video connection and should be used to connect to the composite video terminals They have yellow plugs to distingui...

Page 11: ...udio output from your TV to the DIGITAL OPT 1 CD input on this receiver Use an optical cable for the connection 3 4 Connect the MONITOR OUT video jack on this receiver to a video input on your TV Use a standard RCA video cable to connect to the composite video jack Note 1 If your DVD player only has an optical digital output you can connect it to the optical input on this receiver using an optical...

Page 12: ...E DIGITAL IN 1 FRONT R L S P E A K E R S DVR VCR COAX DVD LD 1 2 ASSIGNABLE DIGITALIN R A AM LOOP FM UNBAL 75 Ω IN IN IN MONITOR OUT SUB WOOFER SURROUND CEN TER OUT VIDEO SUB WOOFER IN IN IN IN OUT OUT IN CD L R DVR VCR TV SAT DVD LD PLAY CD R TAPE MD FRONT PREOUT REC ANTENNA DVD 5 1CH INPUT D V D 5 1CH INPUT AUDIO R L CENTER OUTPUT SUB WOOFER OUTPUT VIDEO OUTPUT SURROUND OUTPUT FRONT OUTPUT R L R...

Page 13: ...mple shows an analog connection to the CD R TAPE MD analog output jack using a stereo RCA phono cable About the WMA9 Pro decoder This unit has an on board Windows Media Audio 9 Professional WMA9 Pro decoder so it is possible to playback WMA9 Pro encoded audio using a coaxial or optical digital connection when connected to a WMA9 Pro compatible player However the connected DVD player set top box et...

Page 14: ...ard RCA video cable for the video connection 3 If your video component has a digital audio output connect it to a digital input on this receiver The example shows a recorder connected to the DIGITAL COAX 2 DVR VCR input 1 Note 1 If your video component doesn t have a digital audio output omit this step If it only has an optical digital output you can con nect it to the optical input on this receiv...

Page 15: ...h screws fig c before clipping the loop to the stand Make sure the reception is clear 4 Place the AM antenna on a flat surface and in a direction giving the best reception 5 Connect the FM wire antenna in the same way as the AM loop antenna For best results extend the FM antenna fully and fix to a wall or door frame Don t drape loosely or leave coiled up Using external antennas To improve FM recep...

Page 16: ... the speakers You can use speakers with a nominal impedance between 6 Ω to 16 Ω please see Switching the speaker impedance on page 46 if you plan to use speakers with an impedance of less than 8 Ω Be sure to complete all connections before connecting this unit to the AC power source The illustration shows the VSX 516 but connections for the VSX 416 are the same COAX OPT CD ASSIGNABLE DIGITAL IN 1 ...

Page 17: ...ollow the guidelines on placement that the speaker manufacturer provided with your particular speakers to get the most out of them Place the front left and right speakers at equal distances from the TV When placing speakers near the TV we recommend using magnetically shielded speakers to prevent possible interference such as discoloration of the picture when the TV is switched on If you do not hav...

Page 18: ...VSX 416 model only See Using the Advanced surround effects on page 26 to switch on the Extra Power mode EX POWER Note 1 VSX 416 model only Follow the speaker placement diagrams disregarding the surround back speakers Surround left Surround right Listening position Front left Front right Center Subwoofer Surround back speaker Front left Surround left Surround right Listening position Center Subwoof...

Page 19: ... surround back channel option page 27 or when the surround back speaker is not available the Virtual Surround Back VSB mode page 28 UP DOWN MULTI JOG MASTER VOLUME ENTER AUDIO VIDEO MULTI CHANNEL RECEIVER VSX 516 STANDBY ON PHONES DVD LD DVD 5 1 TV SAT DVR VCR CD CD R TAPE MD USB FM STANDARD MIDNIGHT LOUDNESS ADVANCED SURR ST DIRECT AUTO SURR LISTENING MODE QUICK SETUP SETUP RETURN MUTE TONE PTY S...

Page 20: ...layback Direct playback bypasses the tone controls for the most accurate reproduction of a source page 27 Also selects the Auto Surround mode Auto playback on page 25 15 PHONES jack Use to connect headphones when connected there is no sound output from the speakers 16 STANDBY ON 17 EON MODE Use to search for programs that are broadcasting traffic or news information page 40 18 PTY SEARCH Use this ...

Page 21: ...STANDARD mode of the receiver is on this lights to indicate decoding of a Dolby Digital multichannel signal 4 2 PRO LOGIC IIx VSX 516 model 2 PRO LOGIC II VSX 416 model When the STANDARD Pro Logic II mode of the receiver is on 2 PRO LOGIC II lights to indicate Pro Logic II decoding 2 PRO LOGIC IIx lights to indicate Pro Logic IIx decoding see Listening in surround sound on page 25 for more on this...

Page 22: ... Surround Lights when one of the Advanced Surround modes has been selected 17 WMA9 Pro Lights to indicate decoding of a WMA9 Pro signal 18 MIDNIGHT Lights during Midnight listening page 29 19 D E Lights when Dialog Enhancement DIALOG E is switched on page 29 20 LOUDNESS Lights during Loudness listening page 29 21 EX VSX 516 model only Lights when a Dolby Digital Surround EX encoded signal is detec...

Page 23: ...el page 36 Also adjusts the level of the Advanced Surround effects as well as Dolby Pro Logic IIx Music and Neo 6 Music parameters page 26 You can then use the LEVEL buttons to make these adjustments LEVEL Use to adjust the effect and channel levels ACOUSTIC EQ SHIFT VSX 516 model only Press to select an Acoustic Calibration EQ setting page 27 MUTE Mutes unmutes the sound 6 SHIFT Press to access t...

Page 24: ...lasses of station presets page 38 MPX Use to switch between auto stereo and mono reception of FM broadcasts If the signal is weak then switching to mono will improve the sound quality page 38 Button What it does DVD DVR Turns DVD power on off CH Switches channels SUBTITLE Displays changes the subtitles on multilingual DVD Video discs AUDIO Changes audio language or channel Starts resumes normal pl...

Page 25: ...at will automatically be selected and shows in the display 2 With two channel sources press STANDARD repeatedly to select from3 2 Pro Logic II MOVIE Up to 5 1 channel sound especially suited to movie sources 2 Pro Logic II MUSIC Up to 5 1 channel sound especially suited to music sources 2 PRO LOGIC 4 1 channel surround sound VSX 516 model only 2 Pro Logic IIx MOVIE Up to 6 1 channel sound especial...

Page 26: ...odel only Select when using the surround speakers in addi tion to the front speakers see the diagram on page 18 for the Extra Power mode speaker setup PHONESUR Creates the effect of overall surround with headphones Setting the effect options When using surround effects there are a number of settings you can adjust 1 Press EFFECT CH SEL repeatedly to select the setting you want to adjust Depending ...

Page 27: ...o select between ALL CH No special weighting is given to any one channel Setting What it does Options Center Widtha Applicable only when using a cen ter speaker a Only available with 2ch sources in Dolby Pro Logic IIx Mu sic mode Spreads the center channel between the front right and left speakers making it sound wider higher settings or narrower lower settings 0 to 7 Default 3 Dimensiona Adjusts ...

Page 28: ...k processing off 3 The table below indicates when you will hear the surround back channel Sound plays through surround back speaker Press SB ch SB ch PROCESSING to select a surround back channel option Each press cycles through the following SB ON 6 1 decoding is always used for example a surround back channel will be generated for 5 1 encoded material SB AUTO Automatically switches to 6 1 decodin...

Page 29: ...idnight or music Loudness sources Press MIDNIGHT LOUDNESS to switch between MIDNIGHT LOUDNESS and OFF Enhancing dialog Default setting OFF The Dialog Enhancement feature localizes dialog in the center channel to make it stand out from other background sounds in a TV or movie soundtrack Press DIALOGUE ENHANCEMENT to switch dialog enhancement on or off Note 1 You can t use virtual surround back with...

Page 30: ...ver after compression 1 Press S RETRIEVER to switch the sound retriever on or off Playing other sources 1 Turn on the power of the playback component 2 Turn on the power of the receiver 3 Select the source you want to playback Use the input select buttons INPUT SELECTOR 4 Start playback of the component you selected in step 1 Selecting the multichannel analog inputs If you have connected a decoder...

Page 31: ... the Manual MCACC setup menu to make detailed adjustments when you re more familiar with the system Before making these settings you should have already completed Automatically setting up for surround sound MCACC on page 8 You only need to make these settings once unless you change the placement of your current speaker system or add new speakers Important For some of the settings below you ll have...

Page 32: ...d in the System Setup are output at high volume the volume increases to 18 dB automatically 2 Use to select each channel in turn and adjust the levels 10 dB as necessary Use to adjust the volume of the selected speaker to match the reference speaker When it sounds like both tones are the same volume press cursor down to continue to the next channel For comparison purposes the reference speaker wil...

Page 33: ...ou can skip to Setting the Acoustic Calibration EQ manually below 1 Select EQ A SET from the Manual MCACC setup menu Make sure the microphone is connected If you re using a subwoofer it is automatically detected every time you switch on the system Make sure it is on and the volume is at the middle position See Other problems during Auto MCACC on page 9 for notes regarding high background noise lev...

Page 34: ... the front speaker settings The sound of the test tone will alternate between the left front reference speaker and the target speaker 3 Use to select the channel you want and adjust to your liking Use the buttons to select the frequency and to boost or cut the EQ When you re finished use the buttons to select the channel display for example R EQ for the right channel or SB EQ for the surround back...

Page 35: ...ers Front F Select LARGE if your front speakers reproduce bass frequencies effectively or if you didn t connect a subwoofer Select SMALL to send the bass frequencies to the subwoofer 1 Center C Select LARGE if your center speaker reproduces bass frequencies effectively or select SMALL to send bass frequencies to the other speakers or subwoofer If you didn t connect a center speaker choose NO the c...

Page 36: ...istance of your speakers from the listening position 5 The receiver can then add the proper delay needed for effective surround sound 1 Select SP DISTN from the SP SETUP menu 2 Use to choose the speaker that you want then set the distance Use to adjust the distance of each speaker in 0 1 meter increments The Input Assign menu You only need to make settings in the Input Assign menu if you didn t ho...

Page 37: ... settings in order DRC Specify the amount of dynamic range adjustment to Dolby Digital soundtracks see Dynamic Range Control Setup below DUAL MONO Isolate one channel when listening to discs with dual mono encoding see Dual Mono Setup below LFE ATT Set the attenuator level for the LFE channel LFE Attenuator Setup below 3 Use to make the adjustments necessary for each setting pressing RETURN to con...

Page 38: ... Use the MULTI JOG dial after pressing STATION front panel to select station presets 4 Press ENTER to store the station Naming station presets You can name your station presets for easy recall 1 Choose the preset you want to name See Listening to station presets below 2 Press SHIFT TUNER EDIT A cursor appears at the first character position 3 Input the name you want then press ENTER Names can be u...

Page 39: ...Affairs Current Affairs Info General Information Sport Sport Educate Educational Drama Radio plays etc Culture National or regional culture theater etc Science Science and technology Varied Usually talk based material such as quiz shows or interviews Pop M Pop music Rock M Rock music Easy M Easy listening Light M Light classical music Classics Serious classical music Other M Music not fitting abov...

Page 40: ... Press repeatedly to switch between EON TA Traffic Announcement Sets the tuner to pick up traffic information when it is broadcast EON NEWS Sets the tuner to pick up news when it is broadcast OFF Switches off the EON feature When set to TA or NEWS the EON indicator in the display lights it flashes when receiving an EON broadcast 3 The indicator in the display lights when the current station carrie...

Page 41: ...necessary Press SIGNAL SELECT front panel to select the input signal corresponding to the source component see page 27 for more on this 3 Prepare the source you want to record Tune to the radio station load the CD video DVD etc 4 Prepare the recorder Insert a blank tape MD video etc into the recording device and set the recording levels 1 Refer to the instructions that came with the recorder if yo...

Page 42: ...ept files with copy protection or restricted playback 2 Compatible USB devices include external magnetic hard drives portable flash memory particularly keydrives and digital audio players MP3 players of format FAT16 32 It is not possible to connect this unit to a personal computer for USB playback Pioneer cannot guarantee compatibility operation and or bus power with all USB mass storage devices a...

Page 43: ...al Rights Management protection compatible Yes DRM protected audio files will not play in this receiver About MPEG 4 AAC Advanced Audio Coding AAC is at the core of the MPEG 4 AAC standard which incorporates MPEG 2 AAC forming the basis of the MPEG 4 audio compression technology The file format and extension used depend on the application used to encode the AAC file This unit plays back AAC files ...

Page 44: ...oneer authorized service center or your dealer for servicing No sound is output when a function is selected Make sure the component is connected correctly refer to Connecting up on page 10 Press MUTE on the remote control to turn muting off No image is output when a function is selected Make sure the component is connected correctly refer to Connecting up on page 10 Select the correct component us...

Page 45: ... CD player This is not a malfunction but be sure to turn the volume down to prevent the output of loud noise from your speakers Can t operate the remote control Replace the batteries refer to page 5 Operate within 7 m 30 of the remote sensor on the front panel refer to page 5 Remove the obstacle or operate from another position Avoid exposing the remote sensor on the front panel to direct light Th...

Page 46: ...he power cord when your hands are wet as this could cause a short circuit or an electric shock Do not place the unit a piece of furniture etc on the power cord or pinch the cord Never make a knot in the cord or tie it with other cords The power cords should be routed such that they are not likely to be stepped on A damaged power cord can cause a fire or give you an electrical shock Check the power...

Page 47: ...al to Noise Ratio 50 dB Antenna Loop antenna Miscellaneous Power requirements AC 220 V to 230 V 50 Hz 60 Hz Power consumption VSX 416 280 W VSX 516 320 W In standby 0 5 W Dimensions VSX 416 420 W mm x 158 H mm x 348 D mm VSX 516 420 W mm x 158 H mm x 352 5 D mm Weight without package VSX 416 8 5 kg VSX 516 8 9 kg Furnished Parts AM loop antenna 1 FM wire antenna 1 Dry cell batteries AA size IEC R6...

Page 48: ...regione a regione Verificare che la tensione di rete della zona in cui si intende utilizzare l apparecchio sia quella corretta come indicato sul pannello posteriore dell apparecchio stesso ad es 230 V o 120 V D3 4 2 1 4_A_It Prima di collegare per la prima volta l apparecchio alla sezione che segue sorgente di alimentazione leggere attentamente la ATTENZIONE Per evitare il pericolo di incendi non ...

Page 49: ...l apparecchio per un relativamente lungo periodo di tempo ad esempio durante una vacanza staccare la spina del cavo di alimentazione dalla presa di corrente alternata di rete D3 4 2 2 1a_A_It Questo prodotto è destinato esclusivamente all uso domestico Eventuali disfunzioni dovute ad usi diversi quali uso prolungato a scopi commerciali in ristoranti o uso in auto o su navi e che richiedano partico...

Page 50: ...l segnale d ingresso 28 Uso dell elaborazione del canale posteriore surround 28 Uso della modalità Virtual Surround Back VSB 28 Uso delle modalità Midnight e Loudness 29 Enfatizzazione dei dialoghi 29 Uso dei controlli del tono 30 Uso della funzione Sound Retriever 30 Riproduzione di altre fonti 30 Selezione degli ingressi analogici multicanale 30 07 Menù System Setup Uso del menu System Setup 31 ...

Page 51: ...ente caldi come all interno di un automobile o in prossimità di un calorifero Le batterie potrebbero perdere liquido surriscaldarsi esplodere o prendere fuoco In tali condizioni anche la durata e le prestazioni delle batterie potrebbero risultare ridotte Gamma operativa del telecomando Il telecomando ha un raggio d azione di circa 7 metri Potrebbe non funzionare correttamente nei seguenti casi Ci ...

Page 52: ...tenere un suono surround ottimale Vedi a Collegamento degli altoparlanti a pagina 16 La collocazione degli altoparlanti influenza notevolmente il suono Per ottenere un effetto sonoro ottimale posizionare gli altoparlanti come indicato di seguito Per maggiori dettagli consultare inoltre Suggerimenti per l ubicazione degli altoparlanti a pagina 17 Solo per il modello VSX 516 3 Collegare e accendere ...

Page 53: ...degli altoparlanti 4 Usare il comando MULTI JOG per scegliere la configurazione degli altoparlanti Se si è selezionato YES modello VSX 416 o se è stato rilevato un subwoofer modello VSX 516 per l impostazione del subwoofer al punto 3 sono disponibili le seguenti opzioni 2 1ch 3 1ch 4 1ch 5 1ch 6 1ch Se si è selezionato NO modello VSX 416 o se è stato rilevato un subwoofer modello VSX 516 per l imp...

Page 54: ...no in modo tale che sia all altezza delle orecchio nella vostra normale posizione d ascolto Altrimenti posizionare il microfono al livello dell orecchio usando un tavolo o una sedia 2 Se il ricevitore è spento premere RECEIVER per accenderlo 3 Se c è un ricevitore accenderlo 4 Premere RECEIVER sul telecomando poi premere il tasto SETUP Premere SETUP in un qualsiasi momento per uscire dal menù Syst...

Page 55: ... System Setup vedi a pagina 31 1 Facoltativamente quando viene visualizzato SKIP è possibile premere cursore sù giù per selezionare una delle seguenti opzioni e premere ENTER quindi usare cursore sù giù per controllare le impostazioni CHK SP Controllare dimensione e numero degli altoparlanti collegati vedere a pagina 35 per altri dettagli CHK DIST Controllare la distanza degli altoparlanti dalla p...

Page 56: ... gli spinotti rossi ai terminali di destra R e gli spinotti bianchi ai terminali di sinistra L Cavi audio digitali Usare un cavo audio digitale coassiale venduto separatamente oppure cavi ottici per collegare i componenti digitali a questo ricevitore 1 Cavi video Cavi video RCA standard Questi cavi sono i cavi di connessione video del tipo più comune e vanno usati per collegare i terminali video c...

Page 57: ...rmetterà di riprodurre il suono dal sintonizzatore incorporato nel televisore Usare un cavo fono RCA a tale scopo Se il televisore ha un decoder digitale incorporato è possibile anche collegare un uscita audio digitale ottica dal televisore all ingresso DIGITAL OPT 1 CD al ricevitore Usare un cavo ottico per il collegamento 3 4 Collegare il jack video MONITOR OUT sul ricevitore all ingresso video ...

Page 58: ...ul ricevitore 2 Usare un cavo fono RCA stereo per il collegamento audio e un cavo video RCA standard per il collegamento video 2 Se la set top box dispone di un uscita digitale collegarla a un ingresso digitale del ricevitore L esempio illustra un collegamento ottico all ingresso DIGITAL OPT 1 CD 3 Nota 1 L ingresso multicanale può essere usato solo quando è selezionato DVD 5 1 ch vedere a pagina ...

Page 59: ...ponente digitale Usare un cavo fono RCA stereo come da illustrazione 3 Se si collega un registratore collegare le uscite audio analogiche REC agli ingressi audio analogici sul registratore L esempio mostra un collegamento analogico alla presa di uscita analogica CD R TAPE MD usando un cavo fono RCA stereo Informazioni sul decoder WMA9 Pro Quest unità ha un decoder Windows Media Audio 9 Professiona...

Page 60: ...collegamento video 2 Collegare una serie di ingressi audio video sul registratore alle uscite DVR VCR AUDIO e VIDEO su questo ricevitore Usare un cavo fono RCA stereo per il collegamento audio e un cavo video RCA standard per il collegamento video 3 Se il video componente ha un uscita audio digitale collegarlo ad un ingresso digitale su questo ricevitore L esempio mostra un registratore collegato ...

Page 61: ...tra superficie fissare il supporto con delle viti fig c prima di agganciare il telaio al supporto Assicurarsi che la ricezione sia chiara 4 Collocare l antenna AM su una superficie piana e in una direzione che consenta di ottenere la ricezione migliore 5 Collegare l antenna FM a filo nello stesso modo dell antenna AM a telaio Per i migliori risultati srotolare completamente il filo dell antenna FM...

Page 62: ...gli altoparlanti frontali su LARGE consultare Impostazione degli altoparlanti a pagina 35 Assicurarsi di collegare gli altoparlanti di destra al terminale di destra e l altoparlante di sinistra al terminale di sinistra Inoltre assicurarsi che i terminali positivo e negativo del ricevitore corrispondano a quelli degli altoparlanti E possibile usare altoparlanti con un impedenza nominale compresa tr...

Page 63: ...und dagli altoparlanti qui sotto ma dovete anche seguire le linee guida sull ubicazione fornite dal fabbricante degli altoparlanti per ottenere il massimo dei vostri altoparlanti particolari Posizionare gli altoparlanti anteriori sinistro e destro alla stessa distanza dal televisore Quando posizionate gli altoparlanti vicini al televisore vi raccomandiamo di usare altoparlanti con una schermatura ...

Page 64: ...ante 6 1 canali Vista generale dell impostazione dell altoparlante Configurazione altoparlanti in modalità Extra Power Solo per il modello VSX 416 Vedere Uso degli effetti surround Advanced a pagina 26 per attivare la modalità Extra Power EX POWER Nota 1 Solo per il modello VSX 416 Attenersi allo schema di posizionamento dei diffusori tralasciando i diffusori surround posteriori ...

Page 65: ...tion EQ è impostata automaticamente su ALL CH ADJUST dopo aver eseguito la funzione Auto MCACC Setup pagina 8 o EQ Auto Setup pagina 33 4 ENTER 5 Controllo MULTI JOG Il controllo MULTI JOG svolge diverse funzioni Utilizzarlo per selezionare diverse opzioni dopo aver premuto i tasti MULTI JOG designati 6 SIGNAL SELECT Consente di selezionare un segnale di ingresso pagina 27 7 SB ch PROCESSING Solo ...

Page 66: ...i del tono per la riproduzione ottimale della sorgente pagina 27 Consente inoltre di selezionare la modalità Auto Surround Riproduzione automatica a pagina 25 15 Presa PHONES Consente di collegare la cuffia se questa è collegata gli altoparlanti non emettono alcun suono 16 STANDBY ON 17 EON MODE Usare questo per localizzare programmi che trasmettono informazioni sul traffico o notizie pagina 40 18...

Page 67: ...l ricevitore s illumina per indicare la codifica di un segnale multicanale Dolby Digital 4 2 PRO LOGIC IIx modello VSX 516 2 PRO LOGIC II x modello VSX 416 Quando sul ricevitore è attiva la modalità STANDARD Pro Logic II 2 PRO LOGIC II si illumina per indicare la decodifica Pro Logic II 2 PRO LOGIC IIx si illumina per indicare la decodifica Pro Logic IIx per maggiori dettagli consultare Ascolto co...

Page 68: ...14 Display dei caratteri 15 Neo 6 Solo per il modello VSX 516 Quando la modalità STANDARD Neo 6 del ricevitore è attiva s illumina per indicare l elaborazione Neo 6 16 ADV SURR Surround avanzato S illumina quando è stata selezionata una delle modalità Advanced Surround 17 WMA9 Pro S illumina per indicare la decodifica di un segnale WMA9 Pro 18 MIDNIGHT S illumina durante la modalità di ascolto Mid...

Page 69: ...fetti Advanced Surround nonché i parametri Dolby Pro Logic IIx Music e Neo 6 Music pagina 26 Si possono quindi utilizzare i tasti LEVEL per effettuare queste regolazioni LEVEL Consente di regolare i livelli di effetti e canali ACOUSTIC EQ SHIFT Solo per il modello VSX 516 Premere questo per selezionare un impostazione EQ della calibratura acustica pagina 27 MUTE Silenzia ripristina l audio 6 SHIFT...

Page 70: ...ina 38 MPX Usare per passare dalla ricezione auto stereo a quella mono e viceversa delle trasmissioni FM Se il segnale è debole la commutazione a mono migliorerà la qualità sonora pagina 38 Taste Funzione DVD DVR Accende spegne l alimentazione del DVD CH Consente di cambiare canale SUBTITLE Visualizza cambia i sottotitoli sui dischi DVD Video multilingue AUDIO Cambia la lingua audio o il canale Av...

Page 71: ...l DTS o Dolby Surround il formato di decodificazione corretto verrà selezionato automaticamente e visualizzato sul display 2 Con fonti a due canali premere STANDARD ripetutamente per selezionare da3 2 Pro Logic II MOVIE Suono fino a 5 1 canali particolarmente adatto per i film 2 Pro Logic II MUSIC Suono fino a 5 1 canali specialmente adatto per le fonti musicali 2 PRO LOGIC Suono surround a 4 1 ca...

Page 72: ...agli altoparlanti frontali vedere lo schema di pagina 18 per l impostazione degli altoparlanti in modalità Extra Power PHONESUR Crea un effetto surround generale attraverso la cuffia Impostazione delle opzioni relative agli effetti Quando si usano gli effetti surround è possibile regolare numerosi parametri 1 Premere ripetutamente EFFECT CH SEL per selezionare il parametro che si desidera regolare...

Page 73: ...OUSTIC EQ Premere ripetutamente per selezionare tra ALL CH Nessun peso speciale viene dato ad un canale particolare Imposta zione Funzione Opzioni Center Widtha Valido solo se si utilizza un altoparlante centrale a Disponibile solo con sorgenti a 2 canali in modalità Dolby Pro Logic IIx Music Distribuisce il canale centrale tra gli altoparlanti frontali sinistro e destro ampliando impostazioni più...

Page 74: ... surround posteriore Il suono viene riprodotto attraverso gli altoparlanti surround posteriori Premere SB ch SB ch PROCESSING per selezionare un opzione per il canale posteriore surround virtuale Ad ogni pressione la selezione cambia come segue SB ON Ladecodifica6 1vienesempreusata ad esempio per il materiale a codifica 5 1 sarà generato un canale posteriore surround SB AUTO Passa automaticamente ...

Page 75: ... film Midnight o l ascolto di musica Loudness Premere MIDNIGHT LOUDNESS per cambiare tra MIDNIGHT LOUDNESS e OFF Enfatizzazione dei dialoghi Impostazione standard OFF La funzione Dialog Enhancement localizza il dialogo nel canale centrale per farlo uscire fuori dai suoni di fondo in una colonna sonora televisiva o cinematografica Premere DIALOGUE ENHANCEMENT per attivare disattivare dialog enhance...

Page 76: ... S RETRIEVER per attivare o disattivare la funzione Sound retriever Riproduzione di altre fonti 1 Accendere la corrente del componente di riproduzione 2 Accendere la corrente del ricevitore 3 Selezionare la fonte da riprodurre Usare i tasti di selezione dell ingresso INPUT SELECTOR 4 Avviare la riproduzione del componente selezionato al punto 1 Selezione degli ingressi analogici multicanale Se al ...

Page 77: ...i sta usando il ricevitore vedere il Menu di impostazione Other a pagina 37 Impostazione manuale dei diffusori mediante il menu Manual MCACC Solo per il modello VSX 516 E possibile usare le impostazioni nel menù d impostazione manuale MCACC per fare delle regolazioni dettagliate quando avete familiarizzato con il sistema Prima di fare queste impostazioni bisogna aver completato la procedura Impost...

Page 78: ...i prova usati in System Setup sono emessi ad alto volume il volume aumenta automaticamente a 18 dB 2 Usare per selezionare ogni canale a turno e regolare i livelli 10 dB come necessario Usare per regolare il volume dell altoparlante selezionato e farlo coincidere con l altoparlante di riferimento Quando sembra che i test abbiano lo stesso volume premere cursor giù per continuare con il canale segu...

Page 79: ...one Manuale MCACC Assicurarsi che sia collegato il microfono Se state usando un subwoofer questo viene rivelato automaticamente ogniqualvolta si accende il sistema Assicurarsi che sia acceso e che il volume sia nella posizione centrale Vedere anche Altri problemi che possono sorgere durante l uso della funzione Auto MCACC a pagina 9 per le note sugli alti livelli di rumore di fondo e altre possibi...

Page 80: ...eriore sinistro riferimento e l altoparlante bersaglio 3 Usare per selezionare il canale desiderato e regolarlo a proprio piacimento Usare i tasti per selezionare la frequenza e per rafforzare o ridurre l EQ Una volta terminato usare i tasti per selezionare la visualizzazione del canale ad esempio R EQ per il canale destro o SB EQ per il canale posteriore surround quindi usare per passare al canal...

Page 81: ...nuno dei seguenti altoparlanti Front F Selezionare LARGE se gli altoparlanti anteriori riproducono le frequenze dei bassi efficientemente oppure se non è stato collegato un subwoofer Selezionare SMALL per inviare le basse frequenze al subwoofer 1 Center C Selezionare LARGE se l altoparlante centrale riproduce le basse frequenze efficientemente oppure selezionare SMALL per inviare le basse frequenz...

Page 82: ... dalla posizione d ascolto 5 Il ricevitore sarà poi in grado di aggiungere il ritardo necessario per un suono surround efficiente 1 Selezionare SP DISTN dal menù SP SETUP 2 Usare per scegliere l altoparlante desiderato quindi impostare la distanza Usare per regolare la distanza di ogni altoparlante in incrementi di 0 1 metri Menù Input Assign I parametri del menu Input Assign devono essere configu...

Page 83: ...ore Dolby Digital vedi a Impostazione di controllo della gamma dinamica sotto DUAL MONO Isolare un canale quando si ascoltano i dischi con codifica dual mono vedere Impostazione Dual Mono sotto LFE ATT Impostare il livello attenuatore per il canale LFE Impostazione LFE Attenuator sotto 3 Usare i tasti per regolare ciascun parametro confermando con il tasto RETURN al termine di ciascuna schermata I...

Page 84: ...le per scegliere le stazioni di preselezione 4 Premere ENTER per memorizzare la stazione Come denominare le stazioni preselezionate È possibile assegnare un nome alle stazioni di preselezione in modo da poterle richiamare facilmente 1 Selezionare la stazione di preselezione a cui assegnare il nome Vedi a Ascolto delle stazioni preselezionate sotto 2 Premere SHIF TUNER EDIT Nella posizione del prim...

Page 85: ...ene riprodotta per cinque secondi News Notizie Affairs Attualità Info Informazioni generali Sport Sport Educate Programmi educativi Drama Drammi radiofonici ecc Culture Cultura nazionale o regionale teatro ecc Science Scienze e tecnologia Varied Talk show quali quiz o interviste Pop M Musica pop Rock M Musica rock Easy M Musica leggera Light M Musica classica leggera Classics Musica classica seria...

Page 86: ...raffic Announcement Imposta il sintonizzatore per ricevere le trasmissioni sul traffico quando queste sono trasmesse EON NEWS Imposta il sintonizzatore per ricevere le notizie quando queste sono trasmesse OFF Cambia alla funzione EON Quando è impostata la funzione TA o NEWS l indicatore EON s illumina sul display lampeggia alla ricezione di una trasmissione EON 3 L indicatore s illumina sul displa...

Page 87: ...elezionare il segnale d ingresso se necessario Premere SIGNAL SELECT pannello frontale per selezionare il segnale di ingresso corrispondente al componente sorgente consultare pagina 27 per maggiori dettagli 3 Preparare la fonte da registrare Sintonizzare la stazione radio inserire il CD la videocassetta il DVD ecc 4 Preparare il registratore Inserire una cassetta un MD o una videocassetta vergine ...

Page 88: ...eccezione dei file con protezione dalla copia o a riproduzione limitata 2 I dispositivi USB compatibili comprendono unità disco magnetiche esterne memorie flash portatili in particolare le chiavette USB e i lettori audio digitali lettori MP3 in formato FAT16 32 Non è possibile collegare questa unità a un personal computer per la riproduzione USB Pioneer non è in grado di garantire la compatibilità...

Page 89: ...EG 4 AAC Sì1 Compatibile con la tecnologia di protezione DRM Digital Rights Management Sì i file audio protetti con tecnologia DRM non vengono riprodotti con questo ricevitore Informazioni sul formato MPEG 4 AAC La codifica audio avanzata AAC Advanced Audio Coding è il nucleo dello standard MPEG 4 AAC che incorpora il formato MPEG 2 AAC ed è alla base della tecnologia di compressione audio MPEG 4 ...

Page 90: ...rarsi che il componente sia collegato correttamente fare riferimento a Collegamento a pagina 10 Premere MUTE sul telecomando per disattivare la funzione corrispondente Non viene emessa alcuna immagine quando si seleziona una funzione Assicurarsi che il componente sia collegato correttamente fare riferimento a Collegamento a pagina 10 Selezionare il componente corretto usare i tasti di selezione di...

Page 91: ... in riproduzione il lettore CD DTS compatibile emette rumore Questo non è segno di malfunzionamento ma assicurarsi di abbassare il volume per prevenire la riproduzione di un rumore forte dagli altoparlanti Il telecomando non funziona Sostituire le pile fare riferimento a pagina 5 Utilizzarlo entro 7 m ad un angolo di 30 dal sensore remoto del pannello anteriore fare riferimento a pagina 5 Spostare...

Page 92: ... mai il cavo d alimentazione con le mani bagnate altrimenti si può verificare un corto circuito o scosse elettriche Non posizionare l unità un mobile ecc sul cavo d alimentazione o premere il cavo stesso Non annodare mai il cavo e non bisogna mai legare il cavo d alimentazione insieme ad altri cavi Far passare i cavi d alimentazione in modo tale che non sia possibile calpestare gli stessi Un cavo ...

Page 93: ...siti di alimentazione AC 220 V a 230 V 50 Hz 60 Hz Consumo corrente VSX 416 280 W VSX 516 320 W Nella modalità d attesa 0 5 W Dimensioni VSX 416 420 W mm x 158 H mm x 348 D mm VSX 516 420 W mm x 158 H mm x 352 5 D mm Peso senza imballaggio VSX 416 8 5 kg VSX 516 8 9 kg Componenti in dotazione Antenna AM a telaio 1 Antenna FM a filo 1 Pile a secco IEC R6 dimensione AA 2 Telecomando 1 Impostazione m...

Page 94: ...A INC 300 Allstate Parkway Markham Ontario L3R OP2 Canada TEL 1 877 283 5901 PIONEER EUROPE NV Haven 1087 Keetberglaan 1 B 9120 Melsele Belgium TEL 03 570 05 11 PIONEER ELECTRONICS ASIACENTRE PTE LTD 253 Alexandra Road 04 01 Singapore 159936 TEL 65 6472 7555 PIONEER ELECTRONICS AUSTRALIA PTY LTD 178 184 Boundary Road Braeside Victoria 3195 Australia TEL 03 9586 6300 PIONEER ELECTRONICS DE MEXICO S...

Reviews: