Firmware
5
4
3
2
1
6
D
C
A
B
D
C
A
B
5
4
3
2
1
6
VSX-330
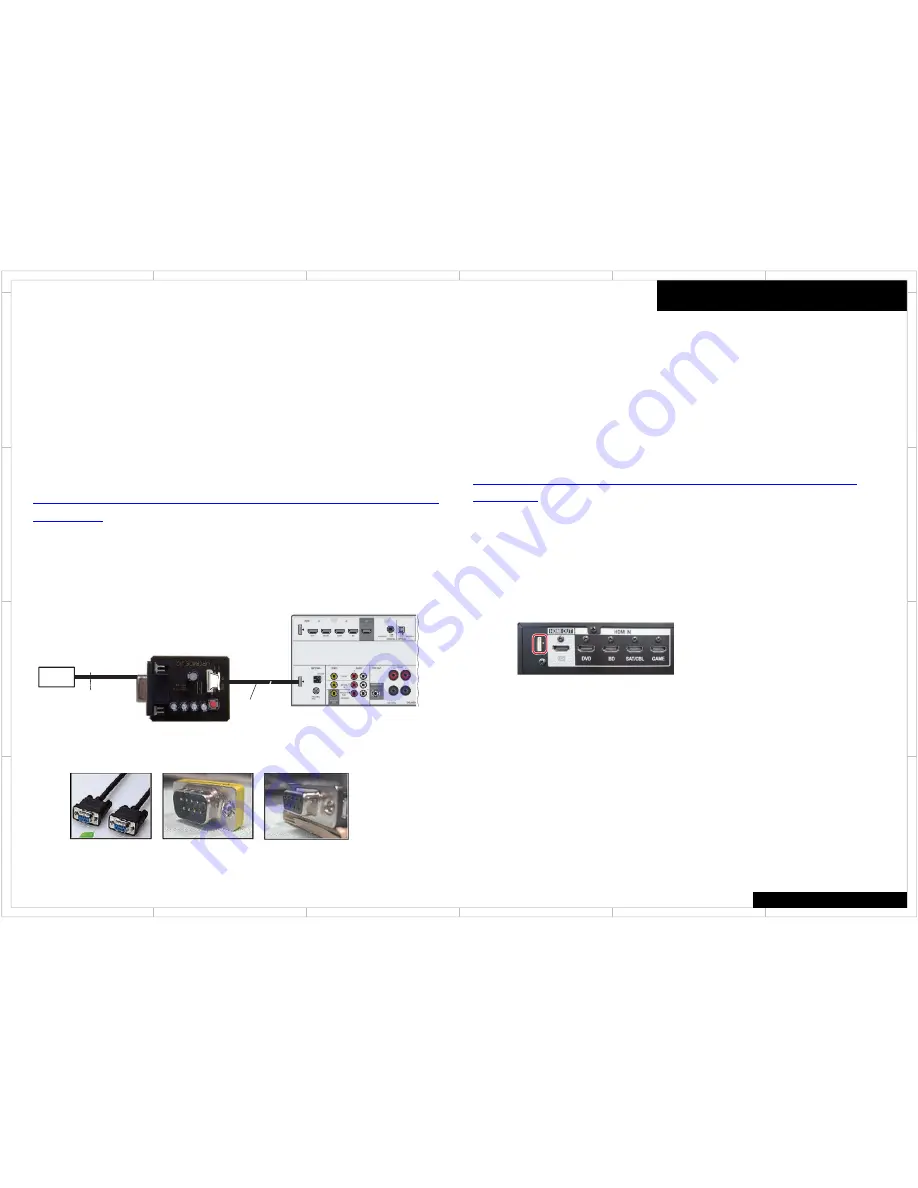
[Necessary Tools and Connections]
1
MAIN microcomputer
•
PC
with
a
serial
port
•
RS-232C
cable
(9-pin
to
9-pin,
straight
cable)
(Marketing
product)
•
UPDATE
jig:
GGF16
89
(with
10P
to
10P
FFC)
•
Firmware
•
Firmware
Writer
Application
for
PC
(Flash Programmer M16C Flash Starter M3A-0806 Software)
http://am.renesas.com/products/tools/flash_prom_programming/flash_programmers/m3a_080
6/downloads.jsp
Connect as shown in the below figure and follow the procedure as below
1.
Install the software for updating on the PC
2.
Unplug the AC Cord of the main unit
3.
Insert the FFC with its contact surface facing the " mark.
2
HDMI & CEC (SUB) microcomputer
•
PC
with
a
USB
port
•
USB
cable
(Marketing
product)
•
UPDATE
jig:
GGF16
89
(with
10P
to
10P
FFC)
•
Firmware
•
Firmware
Writer
Application
for
PC
(Cypress/Spansion FLASH MCU Programmer for FM0+/FM3/FM4)
http://www.spansion.com/support/microcontrollers/developmentenvironment/Pages/mcu-
download.aspx
Connect as shown in the below figure and follow the procedure as below
1.
Install the software for updating on the PC.
2.
Unplug the power cord of the main unit.
Connect the FFC of the updating jig for updating to the main unit.
(Orient the FFC so that the conductive surface of
the connector faces the triangular a symbol.)
Preparation of Update
3.
Start
the
software
for
updating
on
the
PC.
No
Necessary
connect
Main
and
HDMI&CEC
at
the
same
time
When
you
update
Main,
you
connect
Main
only.
When
you
update
HDMI&CEC,
you
connect
HDMI&CEC
only.
Straight Cable
Adapter
JIG's side
10P
RS-232C
Straight cable
PC
(MAIN
microcomputer)
Rear side
10P to 10P FFC
UPDATE jig
GGF16
89


