background image

Important

!

Do not store the remote control in high tem-
peratures or direct sunlight.

!

The remote control may not function properly
in direct sunlight.

!

Do not let the remote control fall onto the
floor, where it may become jammed under the
brake or accelerator pedal.

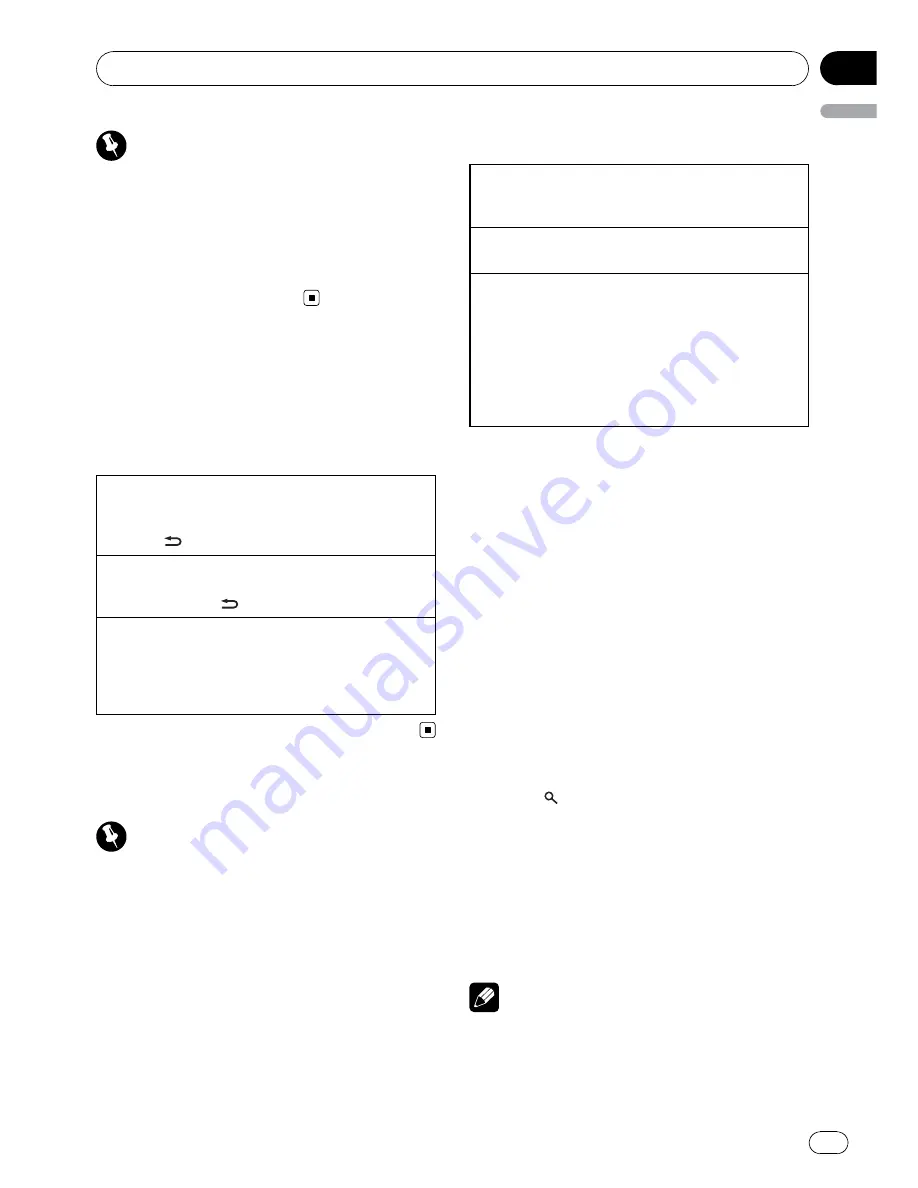
Menu operations identical
for function settings/audio
adjustments/initial
settings/lists

Returning to the previous display
Returning to the previous list/category (the folder/ca-
tegory one level higher)

1

Press

/

DISP

/

SCRL

.

Returning to the main menu
Returning to the top tier of list/category

1

Press and hold

/

DISP

/

SCRL

.

Returning to the ordinary display
Canceling the initial setting menu
Returning to the ordinary display from the list/cate-
gory

1

Press

BAND

/

ESC

.

Tuner

Important

If you are using this unit in North, Central or
South America, reset the AM tuning step (refer to

AM step

(AM tuning step)

on page 14).

Basic Operations

Selecting a band

1

Press

BAND

/

ESC

until the desired band (

FM1

,

FM2

,

FM3

for FM or

AM

) is displayed.

Manual tuning (step by step)

1

Push

M.C.

left or right.

Seeking

1

Push and hold

M.C.

left or right, and then re-

lease.
You can cancel seek tuning by pushing

M.C.

left

or right.
While pushing and holding

M.C.

left or right, you

can skip stations. Seek tuning starts as soon as
you release

M.C.

Storing and recalling stations

You can easily store up to six stations for each
band as presets.

Using preset tuning buttons

1

When you find a station that you want

to store in memory, press one of the preset
tuning buttons (1 to 6) and hold until the
preset number stops flashing.

2

Press one of the preset tuning buttons

(1 to 6) to select the desired station.

Using preset screen

1

Press

to switch to the preset screen.

2

Use M.C. to store the selected fre-

quency in memory.

Turn to change the preset number. Press and
hold to store.

3

Use M.C. to select the desired station.

Turn to change the station. Press to select.

Note

You can also recall stored radio stations by push-
ing

M.C.

up or down during the frequency dis-

play.

Operating this unit

En

7

English

Section

02

Summary of Contents for Super Tuner IIID DEH-4250SD

Page 1: ...Operation Manual Manual de instrucciones www rusmanual ru CD RECEIVER RADIO CD CD PLAYER DEH 4250SD English ...

Page 2: ...and recalling stations 7 Function settings 8 CD CD R CD RW and external storage devices USB SD 8 Basic Operations 8 Displaying text information 9 Selecting and playing files tracks from the name list 9 Advanced operations using special buttons 9 Function settings 10 iPod 10 Basic Operations 10 Displaying text information 10 Browsing for a song 10 Advanced operations using special buttons 11 Functi...

Page 3: ...uthorized PIONEER Service Station Demo mode Important Failure to connect the red lead ACC of this unit to a terminal coupled with ignition switch on off operations may lead to battery drain The demo automatically starts when the igni tion switch is set to ACC or ON while the unit is turned off Turning off the unit does not can cel demo mode To cancel the demo mode press DISP SCRL Press DISP SCRL a...

Page 4: ...unit it is dangerous to connect directly Do not use the unauthorized product Remote control Part Operation j VOLUME Press to increase or decrease vo lume k MUTE Press to mute Press again to un mute l a b c d Press to perform manual seek tuning fast forward reverse and track search controls Also used for controlling functions m AUDIO Press to select an audio function n DISP SCRL Press to select dif...

Page 5: ...g album re lated to the song currently playing is selected from iPod 8 LOC The local seek tuning is on 9 5 stereo The selected frequency is being broadcasted in stereo a folder re peat Folder repeat is on When repeat function is on only is displayed b folder ran dom Folder random is on When random function is on only is displayed c shuf fle Shuffle or shuffle all function is on while the iPod sour...

Page 6: ...le s antenna extends when this unit s source is turned on To retract the antenna turn the source off Use and care of the remote control Using the remote control 1 Point the remote control in the direction of the front panel to operate When using for the first time pull out the film protruding from the tray Replacing the battery 1 Slide the tray out on the back of the remote con trol 2 Insert the b...

Page 7: ...ss BAND ESC until the desired band FM1 FM2 FM3 for FM or AM is displayed Manual tuning step by step 1 Push M C left or right Seeking 1 Push and hold M C left or right and then re lease You can cancel seek tuning by pushing M C left or right While pushing and holding M C left or right you can skip stations Seek tuning starts as soon as you release M C Storing and recalling stations You can easily s...

Page 8: ...n inserted press SRC OFF to select the built in CD player Ejecting a CD CD R CD RW 1 Press h eject Playing songs on a USB storage device 1 Open the USB connector cover 2 Plug in the USB storage device using a USB cable Stop playing a USB storage device 1 You may disconnect the USB storage device at anytime Playing songs on an SD memory card 1 Remove the front panel 2 Insert an SD memory card into ...

Page 9: ...instead of bit rate value When playing back VBR variable bit rate re corded AAC files the average bit rate value is displayed However depending on the soft ware used to decode AAC files VBR may be displayed Selecting and playing files tracks from the name list 1 Press to switch to the file track name list mode 2 Use M C to select the desired file name or folder name Changing file or folder name 1 ...

Page 10: ...mplete even if the menu is can celled before being confirmed iPod Basic Operations Playing songs on iPod 1 Open the USB connector cover 2 Plug in an iPod using an iPod Dock Connector to USB Cable Selecting a track chapter 1 Push M C left or right Fast forwarding or reversing 1 Push and hold M C left or right Notes The iPod s battery will be charged if the igni tion switch is set to ACC or ON while...

Page 11: ...h to the link play mode 2 Turn M C to change the mode press to select Artist Plays an album of currently playing artist Album Plays a song of currently playing album Genre Plays an album of currently playing genre The selected song album will be played after the currently playing song The selected song album may be cancelled if you op erate functions other than link search e g fast for ward and re...

Page 12: ...k in normal speed Slower Playback slower than normal speed 3 Press M C to confirm the selection S Rtrv sound retriever Refer to S Rtrv sound retriever on page 10 Notes Operation is complete even if the menu is can celled before being confirmed Switching the control mode to iPod pauses song playback Operate the iPod to resume playback The following functions are still accessible from the unit even ...

Page 13: ...ou can adjust the cut off frequency and the output level of the subwoo fer Only frequencies lower than those in the selected range are outputted from the subwoofer 1 Press M C to display the setting mode 2 Press M C to cycle between cut off frequency and output level of subwoofer 3 Press M C to switch to cut off frequency and then turn M C to select cut off frequency 50Hz 63Hz 80Hz 100Hz 125Hz 4 P...

Page 14: ... setting allows you to switch your source to USB USB iPod automatically 1 Press M C to turn the plug and play on or off ON When USB storage device iPod is con nected the source is automatically switched to USB USB iPod If you disconnect your USB sto rage device iPod this unit s source is turned off OFF When USB storage device iPod is con nected the source is not switched to USB USB iPod automatica...

Page 15: ...AUX auxiliary input on the previous page Turning the clock display on or off Press CLK DISP OFF to turn the clock display on or off Note The clock display disappears temporarily when you perform other operations but the clock dis play appears again after 25 seconds Switching the display indication and button illumination Press and hold CLK DISP OFF to switch the display indication and button illum...

Page 16: ...contact your dealer or your nearest Pioneer Service Center be sure to note the error message Built in CD Player Message Cause Action ERROR 11 12 17 30 Dirty disc Clean disc Scratched disc Replace disc ERROR 10 11 12 15 17 30 A0 Electrical or me chanical Turn the ignition switch OFF and back ON or switch to a different source then back to the CD player ERROR 15 The inserted disc is blank Replace di...

Page 17: ... to ACC or ON and then connect only com pliant USB storage devices N A SD Not compatible SD storage de vice Remove your de vice and replace it with a compatible SD storage device ERROR 19 Communication failure Perform one of the following opera tions Turn the ignition switch OFF and back ON Disconnect or eject the external storage device Change to a dif ferent source Then return to the USB or SD s...

Page 18: ...an a CD wipe the disc with a soft cloth outward from the center Condensation may temporarily impair the player s performance Leave it to adjust to the warmer tem perature for about one hour Also wipe any damp discs with a soft cloth Playback of discs may not be possible because of disc characteristics disc format recorded applica tion playback environment storage conditions and so on Road shocks m...

Page 19: ...y to this unit Firmly secure the iPod when driving Do not let the iPod fall onto the floor where it may become jammed under the brake or accelerator pedal For details refer to the iPod s manuals About iPod settings When an iPod is connected this unit changes the EQ equalizer setting of the iPod to off in order to optimize the acoustics When you disconnect the iPod the EQ returns to the original se...

Page 20: ...up to eight tiers A practical hierarchy is less than two tiers Playable folders up to 1 500 Playable files up to 15 000 Playback of copyright protected files No Partitioned external storage device USB SD Only the first playable partition can be played There may be a slight delay when starting playback of audio files on an external storage device USB SD with numerous folder hierarchies SD memory ca...

Page 21: ...bers that specify the playback sequence e g 001xxx mp3 and 099yyy mp3 2 Put those files into a folder 3 Save the folder containing files on the external storage device USB SD However depending on the system environ ment you cannot specify the playback se quence For USB portable audio players the sequence is different and depends on the player Copyright and trademark iTunes Apple and iTunes are tra...

Page 22: ...liance with safety and regulatory standards iPhone iPhone is a trademark of Apple Inc Works with iPhone means that an electronic accessory has been designed to connect spe cifically to iPhone and has been certified by the developer to meet Apple performance standards Apple is not responsible for the operation of this device or its compliance with safety and regulatory standards Specifications Gene...

Page 23: ...system FAT12 FAT16 FAT32 MP3 decoding format MPEG 1 2 Audio Layer 3 WMA decoding format Ver 7 7 1 8 9 10 11 2ch audio Windows Media Player AAC decoding format MPEG 4 AAC iTunes en coded only m4a Ver 8 2 and earlier WAV signal format Linear PCM MS ADPCM Non compressed SD Compatible physical format Version 2 00 Maximum memory capacity 32 GB for SD and SDHC File system FAT12 FAT16 FAT32 MP3 decoding ...

Reviews: