background image

19

En

02 Getting Started

English

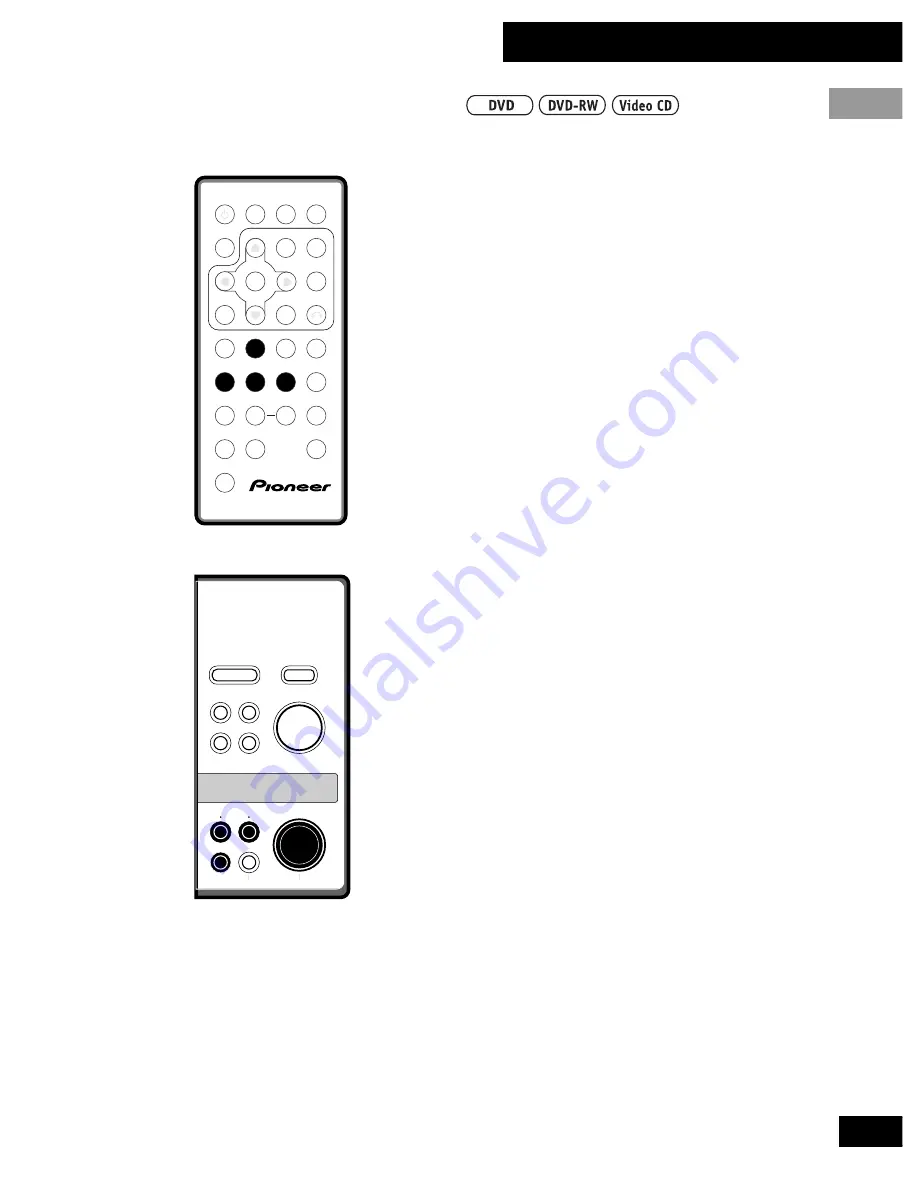
Slow forward play

1

During playback or while
paused, press and hold 

E

 for

about 2 seconds.

On the top panel, press 

8

, then press and

hold 

¡

·

¢

 for about 2 seconds.

Slow-motion playback starts at 1/2 speed.

• There's no sound during slow-motion

play.

2

Use 

e

 and 

E

 to change the

play speed.

On the top panel, use the 

4

·

1

 and

¡

·

¢

 buttons.

• There are four slow play speeds: 1/2,

1/4, 1/8 and 1/16.

3

To restart normal playback,
press 

3

.

Slow reverse play

You can only use slow reverse play with DVD and
DVD-RW discs.

1

During playback or while
paused, press and hold 

e

 for

about 2 seconds.

On the top panel, press 

8

, then press and

hold 

4

·

1

 for about 2 seconds.

Reverse slow-motion playback starts.

• There's no sound during slow-motion

play.

2

To restart normal playback,
press 

3

.

Playing slow-motion video 

MENU

OFF 

¡    ¢

4    1

8

7

3

3

2

5

SETUP

RETURN TOP MENU

DVD/AV-IN

ENTER

ON

Î

DISPLAY

MENU

TOP MENU

SUBTITLE

AUDIO

ANGLE

ENTER

SETUP

RETURN

PLAY

CLEAR

REV

FWD

PAUSE

STOP

STEP/SLOW

STEP/SLOW

REPEAT

PROGRAM

RANDOM

COND.MEM.

SEARCH MODE

LAST MEM.

SHIFT

PREV

NEXT

C

4

1

3

¡

¢

e

8

E

7

A-B

1

2

3

4

5

6

+10

7

8

9

0

Summary of Contents for PDV-20

Page 1: ...PORTABLE DVD PLAYER PDV LC20 PDV 20 Operating Instructions built in screen This mark applies only to US and Canadian models ...

Page 2: ...ded to alert the user to the presence of important operating and maintenance servicing instructions in the literature accompanying the appliance RISK OF ELECTRIC SHOCK DO NOT OPEN CAUTION VENTILATION Slots and openings in the cabinet are provided for ventilation and to ensure reliable operation of the product and to protect it from overheating and these openings must not be blocked or covered The ...

Page 3: ...objects of any kind into this product through openings as they may touch dangerous voltage points or short out parts that could result in a fire or electric shock Never spill liquid of any kind on the product SERVICING Do not attempt to service this product yourself as opening or removing covers may expose you to dangerous voltage or other hazards Refer all servicing to qualified service personnel...

Page 4: ...n experienced radio TV technician for help Please read through these operating instructions so you will know how to operate your model properly After you have finished reading the instructions put them away in a safe place for future reference This player is not suitable for commercial use CAUTION This product satisfies FCC regulations when shielded cables and connectors are used to connect the un...

Page 5: ...ÄR ÖPPNAD BETRAKTA EJ STRÅLEN AVATTAESSA ALTISTUT NÄKYVÄ JA NÄKYMÄTTÖMÄLLE LASERSATEIL YLLE ÄLÄ KATSO SÄTEESEN VRW1860 On the bottom of the player For Canadian model CAUTION TO PREVENT ELECTRIC SHOCK DO NOT USE THIS POLARIZED PLUG WITH AN EXTENSION CORD RECEPTACLE OR OTHER OUTLET UNLESS THE BLADES CAN BE FULLY INSERTED TO PREVENT BLADE EXPOSURE ATTENTION POUR PREVENIR LES CHOCS ELECTRIQUES NE PAS ...

Page 6: ...43 53 Connect to an external AV amplifier for full surround sound Compatible with 24 bit 96kHz software Connect to an external 24 bit 96kHz compatible amplifier for rich detailed and dynamic audio playback Setup Navigator page 21 Setup your DVD player quickly and easily using on screen displays Low standby power consumption This unit is designed to use less than 0 7 W of energy when this player is...

Page 7: ...4 Bookmarking a place on a disc 35 Memorizing disc settings1 36 Displaying disc information 37 Using the Setup menu 40 OSD settings 40 04 The Setup Menu Using the Setup Menu 40 OSD language 40 Video settings 41 Audio settings 43 Language settings 45 Miscellaneous settings 48 Other settings 50 Resetting all the player settings 52 05 Connections Listening through an external AV amplifier 53 Connecti...

Page 8: ...u have received the following supplied accessories AC adapter Power cable Remote control unit with lithium battery AV cable 2 mini plugs to 3 RCA S Video cable mini plug to S Video plug Optical fiber cable PDV LC20 European model only PDV BT20 battery pack PDV LC20 only These operating instructions Optional accessories PDV BT20 battery pack PDV BT25 high capacity battery pack ...

Page 9: ...ed with the permission of one generation and recorded on DVD discs cannot be played on this player When playing a DVD RW disc that was edited on a DVD recorder the screen may go momentarily black at the edited point Play List edit A B erase etc When playing a DVD RW disc that was edited on a DVD recorder you may see scenes from just before the edited point This is not a malfunction Up to 20 charac...

Page 10: ...tures Look on the box of a DVD disc to find out what features are available Some discs feature multiple audio and subtitle languages multiple camera angles and widescreen video You may come across the following marks on disc boxes 2 Number of audio languages 2 Number of subtitle languages 3 Number of camera angles 16 9 LB Aspect ratios available 2 ALL Compatible regions Different regions of the wo...

Page 11: ...ation for use Before using for the first time remove the battery protector from the remote control Pull out the film from the back of the remote control unit Use the remote control within the operating range shown below 30 30 4m 13 2 ft Film ...

Page 12: ...d via a VCR or when recorded on a VCR See pages 53 to 55 for how to connect this player up to an AV amplifier and other components Setting the TV system Except US and Canadian models This player is compatible with both PAL and NTSC TV systems If your TV is compatible with both systems then set the TV SYSTEM switch to AUTO otherwise set it to the system your country or region uses PAL LCD AUTO NTSC...

Page 13: ...ntrol to switch the player into standby When in standby the power indicator lights red Plugging in and switching on Power cord caution Handle the power cord by the plug Do not pull out the plug by tugging the cord and never touch the power cord when your hands are wet as this could cause a short circuit or electric shock Do not place the unit a piece of furniture etc on the power cord or pinch the...

Page 14: ...ould be face down Make sure that the disc clicks into place properly 4 Push the disc cover shut 5 Press 3 to start playback If a menu screen appears see the following page for how to navigate it Adjust the volume using the rotary volume control on the right side of the player MENU OFF 4 1 8 7 3 3 2 5 SETUP RETURN TOP MENU DVD AV IN ENTER ON Î DISPLAY MENU TOP MENU SUBTITLE AUDIO ANGLE ENTER SETUP ...

Page 15: ... play below To switch the player off press and hold OFF 7 for about two seconds Resuming play When you stop playback the player remembers where on the disc you got to As long as you leave the disc in the player even if you switch the player off the next time you press 3 playback resumes from that point To start playback from the beginning of the disc again press 7 while the disc is stopped For res...

Page 16: ...ou re using the remote control you can also use the number buttons to select items from numbered menus press and hold SHIFT while using the number buttons To display this disc menu during playback press MENU or TOP MENU Navigating disc menus MENU OFF 4 1 8 7 3 3 2 5 SETUP RETURN TOP MENU DVD AV IN ENTER ON Î DISPLAY MENU TOP MENU SUBTITLE AUDIO ANGLE ENTER SETUP RETURN PLAY CLEAR REV FWD PAUSE STO...

Page 17: ...buttons to highlight a menu item in the list then press ENTER to select it Use the 4 1 and buttons to see the previous next page 4 and on the remote To preview the first frame of the highlighted menu item press the cursor right 3 button To display this disc menu during playback press MENU 1 2 3 4 5 It s a Bust Caravan Lowdown Rue de Salle The Surgeon s Daughter Pigeon Post 1 Use the number buttons...

Page 18: ...h Video CDs Due to the way in which DVD video is encoded frame review steps are larger than frame advance steps 3 To restart normal playback press 3 Still frame and frame review advance MENU OFF 4 1 8 7 3 3 2 5 SETUP RETURN TOP MENU DVD AV IN ENTER ON Î DISPLAY MENU TOP MENU SUBTITLE AUDIO ANGLE ENTER SETUP RETURN PLAY CLEAR REV FWD PAUSE STOP STEP SLOW STEP SLOW REPEAT PROGRAM RANDOM COND MEM SEA...

Page 19: ...reverse play You can only use slow reverse play with DVD and DVD RW discs 1 During playback or while paused press and hold e for about 2 seconds On the top panel press 8 then press and hold 4 1 for about 2 seconds Reverse slow motion playback starts There s no sound during slow motion play 2 To restart normal playback press 3 Playing slow motion video MENU OFF 4 1 8 7 3 3 2 5 SETUP RETURN TOP MENU...

Page 20: ...es off Press on the remote to put the player into standby The power indicator turns from green to red Press again to switch back on 6 Unplug from the wall outlet 7 Unplug the power cord from the DC IN jack MENU OFF 4 1 8 7 3 3 2 5 SETUP RETURN TOP MENU DVD AV IN ENTER ON Î DISPLAY MENU TOP MENU SUBTITLE AUDIO ANGLE ENTER SETUP RETURN PLAY CLEAR REV FWD PAUSE STOP STEP SLOW STEP SLOW REPEAT PROGRAM...

Page 21: ...r on screen display OSD appears i Setup Navigator Setup Navigator Audio1 General Language Other Video 2 Move Exit SETUP Select ENTER Auto Start Off Start Setup using the Setup Navigator Navigate all of the following OSDs using these controls 5 Cursor up down ENTER Select the highlighted menu option 2 Go back to the previous question The control possibilities for the current OSD are shown at the bo...

Page 22: ...widescreen and standard TVs 6 Select the digital audio formats the connected AV amplifier is compatible with i Setup Navigator Audio1 General Language Other Video 2 Move Exit SETUP Select ENTER Amp Connection Digital Jack Not Connected Dolby D DTS MPEG Dolby Digital MPEG Dolby Digital DTS PCM Dolby Digital Compatible with Dolby Digital All options except Not Con nected assume PCM compatibility The...

Page 23: ...TER Changes are saved Exit Setup Navigator Start Again Delete Changes Save Changes 9 Press SETUP to exit Congratulations set up is complete If you want to use the Setup Navigator again at any time it is available from the General menu Also each individual setting can be changed using the appropriate menu option chapter 04 explains all menu options in detail ...

Page 24: ...s not in PBC mode 2 Enter the title chapter track number or time minutes seconds For example for title 4 press 4 For chapter track 12 press 1 2 For 45 minutes into the disc press 4 5 0 0 Remember to hold down the SHIFT button when entering numbers 3 Press 3 to start restart play back Note For many discs you can also perform title track and chapter searches from the Other screen of the Setup menu S...

Page 25: ...u want to start playback from While a disc is playing enter a chapter number to jump to Enter a title number to start playback from jump to The disc can be stopped or playing Enter a track number to start playback from jump to The disc can be stopped or playing A Video CD with Playback Control PBC will start playback in non PBC mode Î DISPLAY MENU TOP MENU SUBTITLE AUDIO ANGLE ENTER SETUP RETURN P...

Page 26: ... angle If the disc was paused playback starts again with the new angle To hide the TV angle indicator choose Angle Indicator Off from the Video screen of the Setup menu see page 42 Note You can also change camera angles from the Other screen of the Setup menu See page 50 for more Î DISPLAY MENU TOP MENU SUBTITLE AUDIO ANGLE ENTER SETUP RETURN PLAY CLEAR REV FWD PAUSE STOP STEP SLOW STEP SLOW REPEA...

Page 27: ... more languages you can switch audio language anytime during playback 1 Press AUDIO repeatedly to display switch the audio language To set audio language preferences see page 45 Note You can also switch subtitles and audio language from the Other screen of the Setup menu See page 50 for more It may also be possible to select subtitle and audio languages from the disc menu Press MENU or TOP MENU to...

Page 28: ...udio channel you can switch between the main sub or a mix of both During playback press AUDIO to change the audio channel The current playback channel s are indicated on screen Î DISPLAY MENU TOP MENU SUBTITLE AUDIO ANGLE ENTER SETUP RETURN PLAY CLEAR REV FWD PAUSE STOP STEP SLOW STEP SLOW REPEAT PROGRAM RANDOM COND MEM SEARCH MODE LAST MEM SHIFT PREV NEXT C 4 1 3 e 8 E 7 A B 1 2 3 4 5 6 10 7 8 9 ...

Page 29: ...BC mode Using repeat play 1 Press REPEAT during playback to select a repeat mode Each press switches the repeat mode For DVD and DVD RW Repeat Chapter Repeat Title Repeat Off For CD Video CD Repeat Track Repeat All Repeat Off In program play mode Program Repeat Repeat Off 2 To resume normal playback press CLEAR Any repeat play mode is cancelled if you switch camera angles on a DVD disc Using repea...

Page 30: ...nts of the loop must be in the same title 2 To resume normal playback press CLEAR You can also repeat a section of a disc just once by pressing 3 to mark the end point instead of A B Looped play is cancelled if you switch camera angles on a DVD disc Î DISPLAY MENU TOP MENU SUBTITLE AUDIO ANGLE ENTER SETUP RETURN PLAY CLEAR REV FWD PAUSE STOP STEP SLOW STEP SLOW REPEAT PROGRAM RANDOM COND MEM SEARC...

Page 31: ...nd enter a title number all the programmed chapters will come from this title 4 Enter the title chapter numbers for your program list For titles chapters 1 9 use the correspond ing number buttons For 10 and over use the 10 button 10 0 for 10 10 10 4 for 24 etc You can program a pause instead of a title chapter press 8 instead of entering a number in the program list A pause can t be the first or l...

Page 32: ...mber changes This is not a malfunction For Video CDs that feature PBC make sure that the disc is stopped before you start 1 Press PROGRAM 2 Enter the track numbers for your program list For tracks 1 9 use the corresponding number buttons For 10 and over use the 10 button 10 0 for 10 10 10 4 for 24 etc You can program a pause instead of a track press 8 instead of entering a number in the program li...

Page 33: ...add the currently playing title chapter track to the program list press and hold PROGRAM for about a second If there is no current program list a new one is created for DVD if the last list created was a title list then the a title program list is created otherwise a chapter program list is created To delete the program list stop playback press 7 then press CLEAR The program list is also erased wh...

Page 34: ...ress 7 To cancel random playback without stopping playback press CLEAR The rest of the disc plays out Note During random play the 4 and buttons function a little differently to normal 4 returns to the beginning of the current track chapter You can t go back further than this selects another track chapter at random from those remaining You can t use random play together with program or repeat play ...

Page 35: ...op playback here press 7 2 To resume playback load the disc and press LAST MEM If the disc starts auto playback stop it first 3 To clear the bookmark for the disc loaded press LAST MEM then CLEAR while Last Memory is displayed on screen Note Bookmarking also works with Video CD but for one disc only and you must leave the disc in the player removing the disc erases the memory Last Memory may not w...

Page 36: ...age 42 Multi angle page 42 Audio language page 45 Subtitle language page 45 Parental lock level page 48 1 Press COND MEM during playback to memorize settings Condition Memory is displayed on screen 2 To recall memorized settings just load the disc 3 To clear memorized settings load the disc and press CLEAR while Condition Memory is displayed on screen Memorizing disc settings Î DISPLAY MENU TOP ME...

Page 37: ...To show switch the information displayed press DISPLAY When a disc is playing the information appears at the top of the screen Keep pressing DISPLAY to change the displayed information When a disc is stopped all title chapter or track information for the disc loaded appears on screen Press DISPLAY again to exit the screen Note You can choose to display disc information permanently on screen from t...

Page 38: ...ransmission rate level meter transmission rate level Display off Play All 3 12 10 53 70 19 59 26 Play Track 3 10 53 5 23 3 56 Play Track 3 10 53 5 23 1 27 current track number total number of tracks Video CD s total elapsed time current track number Video CD s total elapsed time Video CD s remaining time Video CD s total time elapsed time of current track total time of current tracks current track...

Page 39: ...ed Exit DISPLAY Title Chapter Title Chapter 01 06 07 08 09 10 02 03 04 05 1 30 1 21 1 46 1 12 1 8 1 10 1 13 1 5 1 4 1 8 1 2 Information DVD Titles and number of chapters in each title Total time 72 04 Track Time Track Time 01 06 07 08 09 10 02 03 04 05 5 23 4 55 6 13 5 45 5 10 6 51 3 18 6 50 4 16 3 22 1 2 Information Compact Disc Exit DISPLAY Total playing time of disc tracks and track times Disc ...

Page 40: ...up menu gives you access to all the system s DVD settings Press SETUP to display leave the menu and the cursor 2 5 3 and ENTER buttons to navigate and select options In some screens you can press RETURN to leave the screen without making any changes The controls for each menu are shown at the bottom of the screen If an option is grayed out it means that it cannot be changed at the current time Thi...

Page 41: ... Default 16 9 Wide Audio1 General Language Other Video 2 Move Exit SETUP TV Screen Picture Quality 4 3 Letter Box 4 3 Pan Scan 16 9 Wide i Select your display preference If you have a widescreen TV select the 16 9 Wide setting widescreen DVD software is then shown using the full screen area When playing software recorded in conventional 4 3 format the settings on your TV will determine how the mat...

Page 42: ...or distorted on the default S2 setting try changing it to S1 Still Picture Default setting Auto Picture Quality Still Picture TV Screen Audio1 General S Video Out Language On Screen Diplay Other Video 2 Move Exit SETUP Standard Field Frame Auto Angle Indicator S2 Off The player uses one of two processes when displaying a still frame from a DVD disc The default Auto setting lets the system decide w...

Page 43: ... PCM Out MPEG Out i Audio1 General Language Other Video 2 Dolby Digital Out Dolby Digital Off DTS MPEG 3 PCM Changes DTS output mode You only need to make this setting if you connected this system to another component AV amplifier etc using the digital out If your AV amplifier or other connected component is DTS compatible set to DTS otherwise set to Off 96kHz PCM Out Set in Setup Navigator Defaul...

Page 44: ...ideo 2 Dolby Digital Out Dolby Digital Off 96kHz 3 48kHz On Off MPEG 3 PCM You can disable all digital audio output by setting this to Off Audio DRC Default setting On Move Exit SETUP i Audio1 Audio2 General Language Other Video Audio DRC High Medium Low Off Dynamic playback at low volume The dynamic range of a source is the difference between the quietest and the loudest sounds The dynamic range ...

Page 45: ... languages recorded on a DVD disc any time during playback using the AUDIO button This does not affect this setting Subtitle Language Default Setting English Audio1 General Language Other Video 2 Move Exit SETUP OSD Language Audio Language Subtitle Language Auto Language i Setup disc s subtitle language English French Spanish German Italian Other This setting is your preferred subtitle language fo...

Page 46: ...Language to work the Audio Language and Subtitle Language settings must be the same see page 45 Remember You can still switch audio and subtitle languages on playback using the AUDIO and SUBTITLE buttons DVD Language Default Setting w Subtitle Language Subtitle Display Subtitle Off Audio1 General Language Other Video 2 Move Exit SETUP OSD Language Audio Language Subtitle Language Auto Language Eng...

Page 47: ...play the extra assistive subtitles recorded on to some DVD discs Subtitle Off Default Setting Selected Subtitle DVD Language Subtitle Display Subtitle Off Audio1 General Language Other Video 2 Move Exit SETUP OSD Language Audio Language Subtitle Language Auto Language With Audio English Selected Subtitle English English On w Subtitle Language Some discs display subtitles even if the Subtitle Displ...

Page 48: ...er it is not possible to give a definitive guide to each level check the disc box for parental lock details Be careful Not all discs that you may consider inappropriate for your children are rated Unrated discs will always play without requiring the password first Miscellaneous settings Changing the parental lock level 1 Select Level Change Setup Navigator Parental Lock Setup Menu Mode Audio1 Gene...

Page 49: ...ur password resetting the player will clear the password See page 52 for more on this Screen Saver Default setting differs by country Audio1 General Language Other Video 2 Move Exit SETUP Setup Navigator Setup Menu Mode Parental Lock Expert Basic Level8 Screen Saver Background Color On Off If a constant image is displayed on a conventional CRT type TV it can burn in leaving a ghost image on the sc...

Page 50: ...R 1 English 1 Dolby Digital 5 1CH 2 3 3 23 Move This setting lets you change the audio track if more than one is available The options available depend on the disc Other settings Change Subtitle Default setting not applicable Change Audio Change Subtitle Change Angle Title Search Chapter Search Change OSD Audio1 General Language Other Video 2 Expert Exit SETUP Select ENTER Off 1 English 2 3 3 23 M...

Page 51: ...English 1 English 2 3 Move This setting lets you jump to another chapter on a DVD disc directly without using the remote Use the cursor 5 and buttons to select a chapter number Track Search Default setting not applicable Change Audio Track Search Change OSD Audio1 General Language Other Video 2 Exit SETUP Select ENTER Off 1 12 Move This setting lets you jump to another track on a CD or Video CD di...

Page 52: ...ttings All saved settings such as Last Memory Program Memory Condition Memory Parental Lock password and so on are erased when you do this 1 Switch the power off 2 Hold down 8 on the front panel and press ON 3 until the power comes on MENU OFF 4 1 8 7 3 3 2 5 SETUP RETURN TOP MENU DVD AV IN ENTER ON ...

Page 53: ...ck system does not work Take care not to jolt the player to prevent it from skipping Before making or changing the connections switch off the power and disconnect the power cord from the AC outlet Tips for using the digital output You can also use the digital output to hook up this player to a digital recorder MD CD R DAT etc or two channel amplifier with an optical digital input In this case make...

Page 54: ...t you can use the supplied S Video cable to connect it to this player This may give a better picture than using the supplied AV cable AUDIO IN OUT VIDEO IN OUT DC IN 9 8V S VIDEO IN AUDIO IN R L Supplied S Video cable Supplied AV cable S Video input Audio inputs Red white plugs Black ringed plug ...

Page 55: ...l Loud noise is output through the headphones when playing DTS encoded CDs Watching an external video source PDV LC20 only You can set the AV IN OUT jack to function as either an output to watch discs to an external TV monitor or an input to watch other video sources on this player s built in screen After connecting up press the DVD AV IN button to switch the player to AV input mode When you do th...

Page 56: ... 17 19 This mark indicating compatibility with DVD RW discs recorded on a DVD recorder only appears on the US and Canadian models MENU OFF 4 1 8 7 3 3 2 5 SETUP RETURN TOP MENU DVD AV IN ENTER ON Fwd track skip scan p 15 17 19 DVD AV IN p 55 SETUP p 21 RETURN p 17 MENU p 16 17 TOP MENU p 16 3 Play hold for ON p 13 14 Cursor control p 21 40 ENTER p 21 40 7 Stop hold for OFF p 15 20 8 Pause p 15 18 ...

Page 57: ... shows the PDV LC20 The PDV 20 has audio and video outputs only AUDIO IN OUT VIDEO IN OUT DC IN 9 8V Analog audio input output and optical digital output DC IN jack Composite video input output and S Video output Î DISC COVER 2 OPEN 5 OPEN Slide to open the disc cover Remote control sensor Power indicator ...

Page 58: ...58 En 06 Controls Displays Player right side Illustration shows the PDV LC20 PHONES 1 VOLUME 2 Rotary volume control Headphone jacks ...

Page 59: ...m play page 34 7 RESUME Indicates that playback can be resumed page 15 8 ANGLE Indicates that there are multiple camera angles in the current scene page 26 9 Counter display Displays the elapsed playback time of the current title DVDs or track CDs and Video CDs 10 Title chapter track number display Shows the current title or chapter number DVDs or track number CDs and Video CDs 1 1 96kHz Lights wh...

Page 60: ...de Leaves the center of the screen in the correct ratio while stretching the edges Off Turns off the built in display LCD screen PDV LC20 only Flipping the screen Press and hold MONITOR for about a second to flip the picture upside down Press and hold again to flip it back again Note that because the stereo sound channels are not reversed when the picture is flipped if you re listening through the...

Page 61: ... 12 Camera ANGLE page 26 13 MENU and TOP MENU page 16 17 14 SETUP menu page 21 40 15 RETURN page 17 16 C CLEAR pages 29 36 17 3 PLAY page 14 18 7 STOP page 15 20 19 PROGRAM page 31 20 SEARCH MODE page 24 25 21 REPEAT and A B repeat page 29 30 1 2 3 4 5 6 1 0 7 8 9 0 Î 4 1 e 8 E 7 3 C A B DISPLAY MENU TOP MENU SUBTITLE AUDIO ANGLE ENTER SETUP RETURN PLAY CLEAR REV FWD PAUSE STOP STEP SLOW STEP SLOW...

Page 62: ...e it from the battery case then insert a new lithium battery Warning lithium battery Keep out of the reach of children Contact a physician immediately if a battery should be swallowed Do not take apart dispose of in flames charge heat solder or short circuit Remove the battery if the equipment isn t going to be used for a month or more Caution Danger of explosion if battery is incorrectly replaced...

Page 63: ...allowed to remain on the display for a long period the display may stain or discolor If the screen becomes the very dirty use a commercially available LCD screen cleaner Cleaning the lens Performace will be affected if there is dirt or dust on the lens To clean the lens use a commercially available camera lens blower to clean the lens When doing so be careful not to touch the lens Do not use comme...

Page 64: ...ystem that becomes hot in use Use near a television or monitor as you may experience interference especially if the television uses an indoor antenna Use in a kitchen or other room where the player may be exposed to smoke or steam Use on a thick rug or carpet or cover with cloth this may prevent proper cooling of the unit Place on an unstable surface or one that is not large enough to support all ...

Page 65: ...iscs is not recommended Pioneer disclaims all liability arising in connection with the use of shaped discs Taking care of your discs When holding discs take care not to leave fingerprints dirt or scratches on the disc surface Hold the disc by its edge or by the center hole and edge Damaged or dirty discs can affect playback performance Take care also not to scratch the label side of the disc Altho...

Page 66: ...erating a stream of numbers On playback a digital to analog converter generates an analog signal based on these numbers See also Sampling frequency and Analog audio Dolby Digital DVD only A surround sound system developed by Dolby Laboratories containing up to six channels of digital audio front left and right surround left and right center and low frequency channels See also DTS DTS A surround so...

Page 67: ...igating a Video CD through on screen menus recorded onto the disc Especially good for discs that you would normally not watch from beginning to end all at once karaoke discs for example Regions DVD only These associate discs and players with particular areas of the world This system will only play discs that have compatible region codes You can find the region code of your system by looking on the...

Page 68: ...ou next load a DVD disc Settings made when a disc was playing do not take effect Some settings do not take effect until the disc is stopped then started again note that the resume feature may not work depending on the setting s changed Settings have been erased If power is cut or the player is unplugged while a disc is playing any settings made while the current disc was playing will be lost Alway...

Page 69: ...S audio digital output is connected to a non compatible AV amplifier etc No picture from the LCD screen PDV LC20 only Monitor is set to OFF page 60 The player is set to AV input page 55 Power automatically turns off When using the battery if a disc is paused for more than 5 minutes the player automatically stops If the disc is stopped for more than 5 minutes the player automatically goes into stan...

Page 70: ...s at the top and bottom of the screen The sides of the program are cropped so that the picture fills the whole screen set to either 4 3 Letter Box The program appears squashed set to either 4 3 Letter Box or 4 3 Pan Scan The program is presented correctly regardless of the setting 16 9 16 9 Wide The program is presented correctly regardless of the setting The program is shown in widescreen with bl...

Page 71: ...the player with the back of the battery pack 1 2 Catches 2 Gently push the player down on to the battery pack until you hear it click into place Check that the battery is securely attached Recharging the battery pack You can recharge the battery cpack whether it is attached to the player or not The PDV BT20 takes about 2 5 hours to fully charge from empty the PDV BT25 takes about 5 hours 1 Plug th...

Page 72: ...charge indicator on screen If the AC adapter is connected this is indicated instead From fully charged the PDV BT20 gives about 3 hours continuous playback with the PDV LC20 and about 5 hours with the PDV 20 The PDV BT25 gives about 6 5 hours continuous playback with the PDV LC20 and about 12 hours with the PDV 20 The actual battery life depends on how the player is used When battery power is almo...

Page 73: ... Kannada kn Kashmiri ks Kurdish ku Kirghiz ky Latin la Lingala ln Laothian lo Lithuanian lt Latvian lv Malagasy mg Maori mi Macedonian mk Malayalam ml Mongolian mn Moldavian mo Marathi mr Malay ms Maltese mt Burmese my Nauru na Nepali ne Norwegian no Occitan oc Oromo om Oriya or Panjabi pa Polish pl Pashto Pushto ps Quechua qu 0721 0801 0809 0818 0821 0825 0901 0905 091 1 0914 0919 0923 1009 1023 ...

Page 74: ...Operating temperature 5 C to 35 C 36 F to 96 F Operating humidity 5 to 85 no condensation Video input output Video output level 1 Vp p 75 Ω Output jack 4 pole minijack S video output Y output level 1 Vp p 75 Ω C output level 286 mVp p 75 Ω Output jack 4 pole minijack video input output switching type Audio input output Audio input output level 150 mVrms 1 kHz 20 dB Input output jack 4 pole minijac...

Page 75: ...75 En 07 Additional Information English ...

Page 76: ...ICS OF CANADA INC 300 Allstate Parkway Markham Ontario L3R OP2 Canada PIONEER EUROPE NV Haven 1087 Keetberglaan 1 B 9120 Melsele Belgium TEL 03 570 05 11 PIONEER ELECTRONICS AUSTRALIA PTY LTD 178 184 Boundary Road Braeside Victoria 3195 Australia TEL 03 9586 6300 PIONEER ELECTRONICS DE MEXICO S A DE C V San Lorenzo 1009 3er Piso Desp 302 Col Del Valle Mexico D F C P 03100 TEL 5 688 52 90 TPTZF 00I...

Reviews: