background image

4

Thank you for buying this Pioneer product.
Please read through this operating instructions before using
your speaker system so you will know how to make the
most of its performance. After you have finished reading
the operating instructions, store it in a safe place. You will
then know where it is, should you wish to refer to it if
something is unclear while the speaker system is being used.

BEFORE USE

INSTALLATION WORK

÷

The installation of this speaker system must be
carried out by professionals with the adequate skill
and experience. Therefore, when installation or
attaching is to be carried out, be sure to commission
construction specialists or your dealer.

÷

PIONEER will not take any responsibility for
accidents or damage caused by improper assembly
or installation, insufficient strength, incorrect usage,
or natural disasters.

English

÷

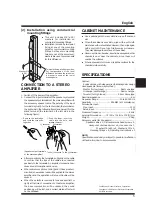
The nominal impedance of this speaker system is 8 ohms.

Connect the speaker system to a stereo amplifier with a
load impedance ranging from 4 to 16 ohms (a model with

“4-16

” displayed on the speaker output terminals).

÷

In order to prevent damage to the speaker system
resulting from input overload, please observe the
following precautions:

÷

Do not supply power to the speaker system in
excess of the maximum permissible input.

÷

When connecting or disconnecting pin-plugs, be
sure that amplifier power is OFF.

÷

When using a graphic equalizer to emphasize loud
sounds of a high frequency range, do not use
excessive amplifier volume.

÷

Do not force a low-powered amplifier to produce
a loud volume of sound (the amplifier’s harmonic
distortion will be increased, and you may damage
the speaker).

÷

Please handle the speakers with sufficient care, as
the grille net and th cabinet can become damaged
or broken when they are subjected to strong external
impacts.

÷

To protect the speaker from excessive input power and
abnormal signals, an automatic-reset type protective
device is installed.
When excessive input is sent to the speaker, the
protective device is activated, and the sounds cease to
be produced. When this occurs, reduce the amplifier
volume; the protective device will reset itself in about
5–10 seconds.

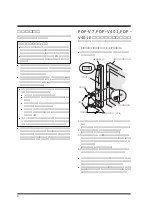
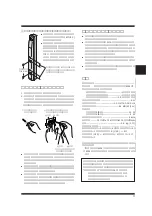
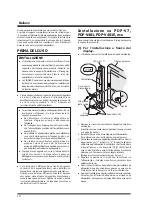
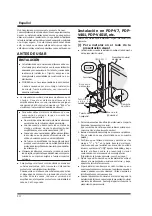
1. Remove the (lower two) hole rivets at the rear of the

display.

(The hole rivets can be removed by turning with a coin or

similar.)

2. Install the accessory mounting fitting on the speaker.

(Take care that the cushion is not peeled off.)

3. Confirm the left and the right speaker by the markings

“L” and “R” on the rear of the speaker, make sure that

the cushion is on the inner side and that the marking
“UP

»

” points up, and then install the speaker on the

display, starting with the lower mounting fitting.

(Fasten only provisionally, as there is play.)

4. Adjust the position so that the gap between the speaker

and the display is uniform, and then tighten the screws
firmly.

÷

When screws other than those enclosed as accessories

are used to install the speakers, the speakers may drop

off or accidents may be caused. Always use the screws
enclosed as accessories.

÷

When the display is to be moved after speaker
installation, do not hold the display by the speakers. Hold

the bottom of the display to move it.

UP

÷

The illustration shows installation on the right side of the

display.

[1] For installation at the side of the

display

Installation on PDP-V7, PDP-
V401, PDP-V401E, etc.

There are two installation methods.Please follow the
following procedure.

Mounting fitting

Cushion

「PDP-S01」

Plasma display

Hole rivet

Washer (ø 15)

Hexagon screw

Flat countersunk head
screw

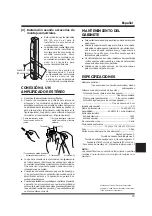
Summary of Contents for PDP-S01-LR

Page 1: ...truzioni per l uso Gebruiksaanwijzing Manual de in strucciones PDP S01 LR スピーカーシステム Speaker System Système d enceintes acoustiques Lautsprechersystem Sistema Altoparlante Luidsprekersysteem Sistema de altavoces Françias English 日本語 Español Deutsch Italiano Nederlands ...

Page 2: ...入れない ピンプラグの抜き差し時はアンプの電源をOFFに する グラフィックイコライザーで高音を大幅に増強す る場合 音量を上げすぎない 小出力アンプで無理に大きな音を出さない アン プの高調波歪が増え トゥイーターを破損するこ とがある グリルネットおよびキャビネットは 外力により強 い衝撃を与えますと傷ついたり破損することがあり ますので 取り扱いには十分注意してください UP プラズマディスプレイ PDP S01 クッション 取付金具 六角ネジ 皿ネジ ワッシャー 15 ホールリベット PDP V7 PDP V401 PDP V401Eなどへの取り付けかた 設置の方法は 2 種類あります 次の手順で行ってください イラストはディスプレイの右側に取り付ける場合で説 明しています 1 ディスプレイ側面に取り付ける場合 1 ディスプレイ背面のホールリベット 下2つ をはず す ホールリベッ...

Page 3: ...円コーン型 高音用 トゥイーター 2 5 cmドーム型 公称インピーダンス 8 Ω 再生周波数帯域 50 Hz 60 000 Hz 出力音圧レベル 82 dB W 1m 許容入力 最大入力 EIAJ 12 W 定格入力 EIAJ 4 W クロスオーバー周波数 4 kHz 外形寸法 74 幅 x714 高さ x103 奥行 mm 質量 2 9 kg 1 個 付属品 2 台分 スピーカーコード 2 皿ネジ 4 六角穴付きネジ 4 六角レンチ 1 ワッシャーM 8 25 4 ワッシャー 15 4 取付金具 4 保証書 1 取扱説明書 1 上記の仕様および外観は改良のため予告なく変更すること があります 防磁設計 EIAJ とは 社 日本電子機械工業会 EIAJ の技術基準に適合したスピーカーシステムで す 仕様 キャビネット スタガ接続方式密閉型 防磁設計 EIAJ 端子に接続したあとコードを軽...

Page 4: ...dle the speakers with sufficient care as the grille net and th cabinet can become damaged or broken when they are subjected to strong external impacts To protect the speaker from excessive input power and abnormal signals an automatic reset type protective device is installed When excessive input is sent to the speaker the protective device is activated and the sounds cease to be produced When thi...

Page 5: ...t fixing at either position For compensation of the level difference between the two holes a washer is used at the lower monting hole SPECIFICATIONS Cabinet Enclosed type with stagger circuit antimagnetic design Used speakers three way method Woofer for low tones Oval cone type Mid range middle range Oval cone type Tweeter for high tones 2 5 cm dome type Nominal impedance 8 Ω Frequency Range 50 to...

Page 6: ...à fonctionner à un volume sonore poussé la distorsion harmonique de l amplificateur sera accrue ce qui risquerait d endommager le haut parleur Manipuler les haut parleurs avec suffisamment de soin car autrement l enjoliveur frontal et le coffret risqueraient d être endommagés ou hors d usage en les soumettant à des chocs externes exagérés Un système de réinitialisation automatique est installé pou...

Page 7: ... sur le levier introduire le câble dans le trou et relâcher le levier 1 D é n u d e r l a g a i n e d isolement et torsader ensemble les brins d extrémité Borne ª Borne Après connexion aux bornes tirer légèrement sur le câble pour vérifier que les extrémités du câble sont connectées effectivement aux bornes Une connexion défectueuse risque de causer des parasites ou des coupures de son Si des brin...

Page 8: ...Die Lautsprecher sind vorsichtig zu behandeln da Ziergitter und Gehäuse durch starke Stöße und Erschütterungen verkratzt bzw beschädigt werden können Um den Lautsprecher vor übermäßig hohem Eingang und unnormalen Signalen zu schützen wurde er mit einer Schutzschaltung mit automatischer Rückstellung versehen Wird der Lautsprecher mit zu hoher Leistung angesteuert wird die Schutzschaltung aktiviert ...

Page 9: ...ein korrekter Stereo Effekt nicht erhalten werden kann 1 Die Isolierung entfernen dann die Enden des Innenkabels verdrillen 2 Den Hebel nach unten drücken das Kabel in die Öffnung einführen dann den Hebel wieder loslassen Zur Minusklemme Lautsprecher Ausgangsanschlüsse des Stereo Verstärkers Minusklemme Plusklemme ª D e r E i n b a u s a t z e n t h ä l t Unterlegscheiben der Größe M8 ø 25 mm die ...

Page 10: ...i assicurarsi che l alimentazione elettrica dell amplificatore sia spenta OFF Se si utilizza un equalizzatore grafico per enfatizzare i suoni alti della gamma di frequenze alte non aumentare troppo il volume dell amplificatore Non forzare un amplificatore dotato di bassi a produrre volumi di suono alti la distorsione armonica dell amplificatore potrebbe aumentare e gli altoparlanti potrebbero dann...

Page 11: ...ostegni di montaggio disponibili in commercio Siccome questi due fori non sono allo stesso livello le rondelle vengono utilizzate per compensare questo dislivello Fissaggio in due punti per posizione Per compensare la differenza di livello tra i due fori nel foro di montaggio inferiore viene utilizzata una rondella COLLEGAMENTO A UN AMPLIFICATORE STEREO 1 Spegnere l alimentazione dell amplificator...

Page 12: ...en kunnen worden beschadigd wanneer het luidsprekersysteem aan schokken of stoten onderhevig wordt gesteld Ter bescherming van het luidsprekersysteem tegen een overmatig ingangsvermogen en abnormale signalen is een beschermingscircuit met automatische terugstelling ingebouwd Indien er een overmatig vermogen naar een luidspreker wordt gestuurd zal dit circuit in werking treden en de geluidsweergave...

Page 13: ... valt af en toe weg indien de kabel geen goed contact met de aansluiting maakt Indien de kerndraden van de kabel uit de aansluiting steken endeªen dradenkortsluitingmaken zalereenovermatig vermogen naar de stereo versterker worden gestuurd waardoor de werking van het systeem stopt of andere problemen worden veroorzaakt Indien de polariteit van een luidspreker is verwisseld links of rechts bij het ...

Page 14: ...mplificador aumentará y podría dañar los altavoces Manipule los altavoces con mucho cuidado ya que la red de rejilla y el gabinete pueden dañarse o romperse cuando se encuentran sujetos a fuertes impactos externos Para proteger el altavoz contra entradas excesivas y señales anormales éste incorpora un dispositivo protector de reinicialización automática Cuando entra en el altavoz una señal excesiv...

Page 15: ...n el orificio de montaje inferior Esta unidad incluye las arandelas M8 25 mm de ø para la instalación de accesorios de montaje comerciales La instalación se realiza fijando dos puntos en uno de los orificios de montaje para los accesorios de montaje comerciales Como estos orificios de montaje no se encuentran en el mismo nivel se u s a n l a s a r a n d e l a s p a r a compensar esta diferencia 1 ...

Page 16: ... OFFICE CUSTOMER SUPPORT CENTER 4 1 MEGURO 1 CHOME MEGURO KU TOKYO 153 8654 JAPAN C1998 パイオニア株式会社禁無断転載 株式会社 153 8654 東京都目黒区目黒 1 丁目 4 番 1 号 PIONEER ELECTRONIC CORPORATION 4 1 Meguro1Chome Meguroku Tokyo 153 8654 Japan PIONEER NEW MEDIA TECHNOLOGIES INC 2265 East 220th St Long Beach CA90810 U S A TEL 310 952 2111 PIONEER ELECTRONICS OF CANADA INC 300 Allstate Parkway Markham Ontario L3R 0P2 Canada T...

Reviews: