21
English
En
SELECT
ENTER
EXIT
SET
MENU
PICTURE
SCREEN
SET UP
OPTION
:
NT
: A U T O
S E T T I N
C L AMP
POWE R
:
G
OF F
P
S I T I O N
O
M N A GEME
A
I N P UT
I N P UT 1
L
E
B
L A
: X G A
MAIN MENU
INPUT1
7
Next, adjust the screen display to set the image
position and clock.
7
Set the mask control and orbiter mode to OFF.
This setting should be made only by a factory trained
technicion or your dealer. If this function is set to ON,
the plasma display's display position will change,
causing a deviation between the pen tip and its
onscreen display position, and which cannot be rectified
by later calibration.
Installing the Driver Software
Consult the driver installation guide.
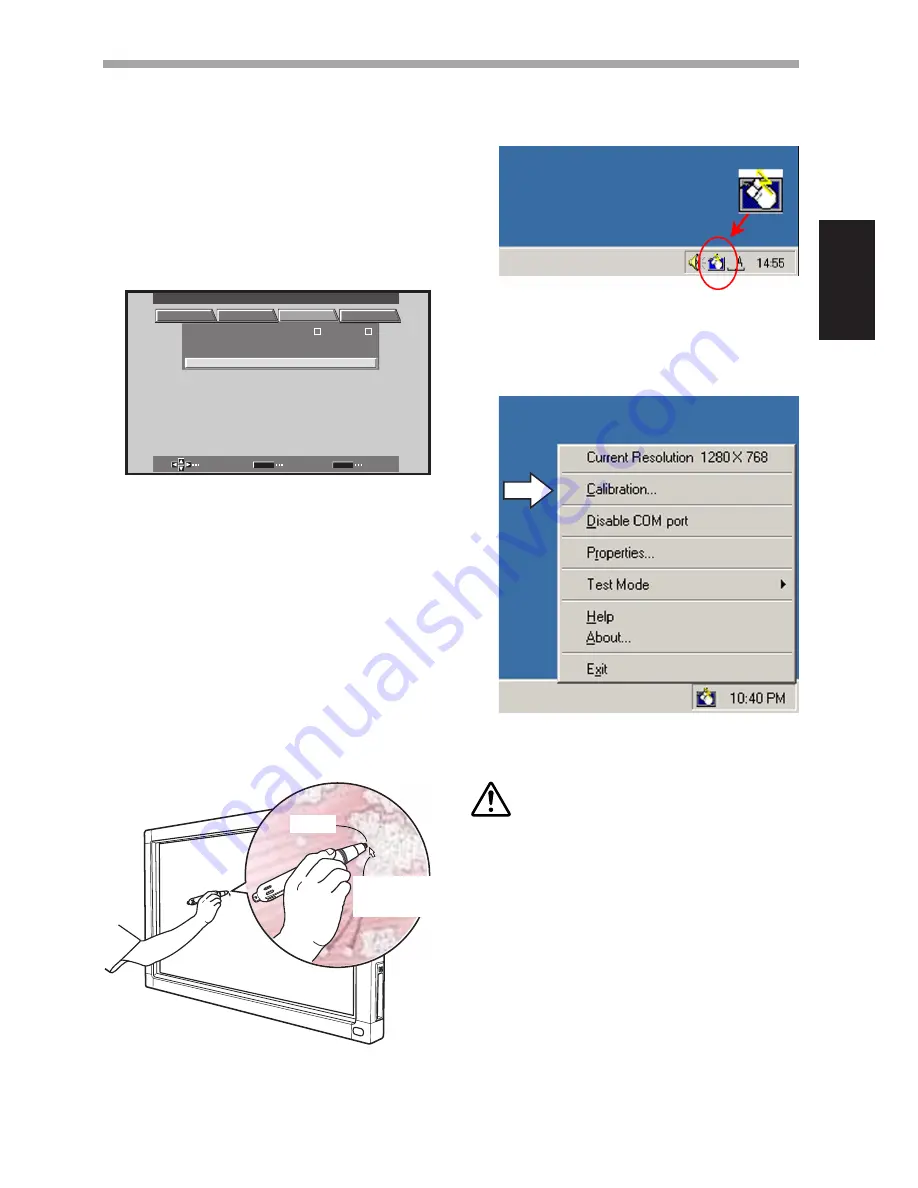
Alignment of Pen Tip and Cursor Position
Confirm that the onscreen cursor aligns properly with the
position of the pen tip.
Pen tip
Mouse cursor
(screen display
position)
If the cursor position differs from that of the physical pen
tip, adjust as follows:
1. Using your mouse, left-click on the CBdrv icon
in the task tray.
NOTE:
The actual appearance of your task tray may differ
depending on your computer configuration.
2. When the pop-up menu appears, left-click on
"Calibration."
INSTALLATION
3. Follow the calibration instructions that appear
onscreen.
NOTE:
Input to the unit can be performed with a finger or other
object in addition to the special dedicated pen; mechanical
pencils or other sharp objects should not be used,
however, since the screen may be scratched as a result.
When performing onscreen operations, the dedicated pen
or a fingertip should always be used.
Adjusting the Plasma Display
To properly adjust the plasma display, consult the section
"Setting Up the System" and "Display Panel Adjustments" in
the plasma display's operating instructions.
7
First, set the System Settings.
Set screen display mode.
To use 1280 x 768 (60 Hz/70 Hz) screen resolution and
refresh rate, set the screen display mode to "
WIDE
XGA
."
With the screen image turned on, select
MENU
=
SET
UP
=
SETTING
=
SET
, and change the
XGA
setting to
WIDE XGA
.


