Pioneer P8MP - Premier DEH Radio Installation Manual Download Page 4

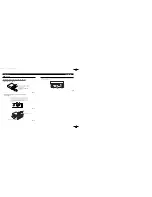
DIN Rear-mount

Installation using the screw holes on the side of the unit

1. Remove the frame. (Fig. 11)

Fig. 11

2. Fastening the unit to the factory radio mounting bracket. 

(Fig. 12) (Fig. 13)

Select a position where the screw holes of the bracket and
the screw holes of the head unit become aligned (are fitted),
and tighten the screws at 2 places on each side. Use either
truss screws (5 

×

8 mm) or flush surface screws 

(5 

×

9 mm), depending on the shape of the screw holes in

the bracket

.

Fig. 12

Fig. 13

11

13

12

10

Frame

Insert the release pin into the hole in
the bottom of the frame and pull out
to remove the frame.
(When reattaching the frame, point
the side with a groove downwards
and attach it.)

Screw

Dashboard or Console

Factory radio mounting bracket

About the fixing screws for the front panel

If you do not operate the Detaching and Replacing the Front Panel Function, use the supplied fixing screws and
fix the front panel to this unit.

Fig. 14

Fixing screw

Installation

<ENGLISH>

CRD3845A_inst  1/23/04 18:54  Page 13

Summary of Contents for P8MP - Premier DEH Radio

Page 1: ...the igni tion switch the red lead of the unit should be connected to a terminal coupled with ignition switch ON OFF operations If this is not done the vehicle battery may be drained when you are away from the vehicle for several hours Fig 1 Fig 1 The black lead is ground Please ground this lead separately from the ground of high current prod ucts such as power amps If you ground the products toget...

Page 2: ... Antenna jack Refer to Fig 5 This product 15 cm 5 7 8 in Left Right Yellow black If you use a cellular telephone connect it via the Audio Mute lead on the cellular telephone If not keep the Audio Mute lead free of any connections Yellow To separately sold power supply wiring kit RD 221 Red To separately sold power supply wiring kit RD 221 Orange white To lighting switch terminal Black ground To ve...

Page 3: ...illing of holes or other modifications of the vehicle Install the unit where it does not get in the driver s way and cannot injure the passenger if there is a sudden stop like an emergency stop The semiconductor laser will be damaged if it overheats so don t install the unit anywhere hot for instance near a heater outlet If installation angle exceeds 60 from horizontal the unit might not give its ...

Page 4: ...ews 5 9 mm depending on the shape of the screw holes in the bracket Fig 12 Fig 13 11 13 12 10 Frame Insert the release pin into the hole in the bottom of the frame and pull out to remove the frame When reattaching the frame point the side with a groove downwards and attach it Screw Dashboard or Console Factory radio mounting bracket About the fixing screws for the front panel If you do not operate...

Page 5: ...rouge de l unité doit être connecté à une borne couplée aux opérations de marche arrêt du contacteur d allumage Sinon la batterie du véhicule peut se décharger lorsque le véhicule n est pas utilisé pendant plusieurs heures Fig 1 Fig 1 Le conducteur noir est le câble de masse Veillez à relier ce conducteur à une masse qui ne soit pas la masse d un appareil gros consommateur d énergie tel qu un ampl...

Page 6: ...lulaire connectez le via le fil de mise en sourdine audio sur le téléphone cellulaire Sinon laisser le fil de mise en sourdine audio sans aucune connexion Orange blanc Vers la borne du contacteur d éclairage 15 cm Prise pour la télécommande câblée Veuillez vous reporter au mode d emploi de la télécommande câblée vendue séparément Rouge Vers une borne dont l alimentation est commandée par la clé de...

Page 7: ... Fig 7 182 53 Tableau de bord Bague en caoutchouc Vis Support Après avoir introduit le support dans le tableau de bord sélectíonnez les languettes appropriées en fonction de l épaisseur du matériau du tableau de bord et courbez les Assurez le maintien aussi solidement que possible en utilisant les languettes inférieures et supérieures Cela fait courbez les languettes de 90 degrés Remarque Avant de...

Page 8: ...é Utiliser l une des vis de serrage 5 8 mm ou les ves à tête plate 5 9 mm selon le forme des trous de vis sur le support Fig 12 Fig 13 11 13 12 10 Cadre Introduisez la tige de déblocage dans l orifice du fond du cadre et tirez pour enlever le cadre Pour remettre le cadre en place diriger le côté avec la rainure vers le bas Vis Tableau de bord ou console Support pour le montage de la radio Fixation...

Reviews: