36
System Setup
SPEAKER
SETTING
CROSSOVER
NETWORK
BASS PEAK LEVEL
MANAGER
DYNAMIC RANGE
CONTROL
DIGITAL INPUT
SELECT
MULTI ROOM
CHANNEL DELAY
CHANNEL LEVEL
BACK
1
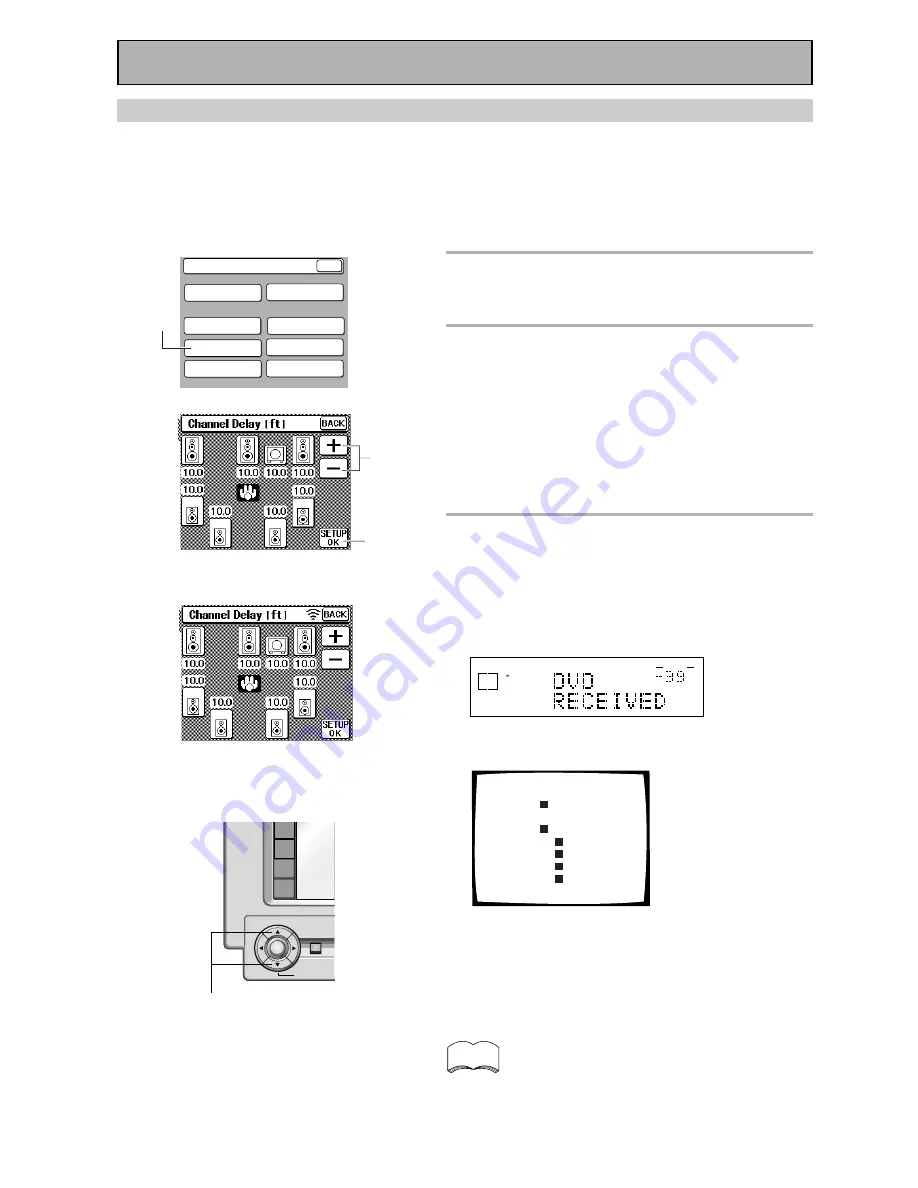
Press the CHANNEL DELAY button.
The CHANNEL DELAY speaker settings will appear on
your remote control screen.
2
Select each speaker by pressing its
button and use the +/– (or
5˜∞
)
buttons to add or subtract the
distance in feet that the speaker is
from your normal listening position.
Adjust the speaker distance in half foot increments
from 0.5 to 45 feet (1 foot equals approximately 0.3
meters).
The default setting is 10 ft.
3
Press the SETUP OK button to
return to the SYSTEM SETUP
MENU.
Hold the remote control pointed towards the receiver
until you see the “RECEIVED” display on the receiver.
If "ERROR" flashes in the display, perform the setup
operations from the first step again.
dB
SIGNAL
SELECT
ANALOG SP
A
VOLUME
These settings will be displayed on your TV.
Channel Delay
[10.0ft]
[10.0ft]
[10.0ft]
[10.0ft]
[10.0ft]
[10.0ft]
Front
L
Center
Front
Surround
SurrBack
SurrBack
Surround
Subwoofer
L
R
R
R
L
L
[10.0ft]
[10.0ft]
Next, proceed to CHANNEL LEVEL below.
If you want to change a setting before proceeding
Start over from step one.
You can use the
5˜∞
buttons at the bottom of
the remote control instead of the +/– buttons.
CHANNEL DELAY
Adding a slight delay to some speakers is necessary to achieve a surround sound effect. You need to figure out
the distance from your listening position to your speakers to add the proper delay. The following steps show you
how to set the delay time for each channel by specifying the distances from your listening position to each
speaker. Once you specify the speaker distances, the receiver calculates the correct delay times automatically.
If continuing from SPEAKER SETTING go to step 1. If starting fresh, complete steps 1-3 in “Setting Up for
Surround Sound“ (p.32) first.
Initial Set Up
1
«
5˜∞
buttons
ENTER
DVD/LD
TV/SAT
VCR1
VCR2
STANDBY/ON
BACK LIGHT
on/off
memo
3
2


